MODIFYING
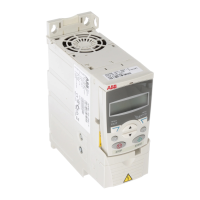
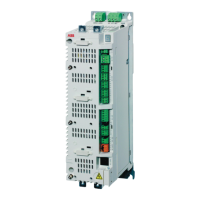
THE ACS355 UL TYPE
4X FOR MXXX OPTIONS
Description:
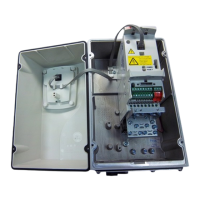
The following instructions are designed to provide a step by step procedure; how to modify the
ACS355 UL Type 4X drive for Mxxx-01 (MPOW-01, MREL-01 or MTAC-01) option. If these
procedures are followed and executed properly all standard product warranties apply.
1.1 Table of Contents
1.1 Table of Contents ...................................................................................................................... 1
2 General Information ....................................................................................................................... 2
2.1 Description ................................................................................................................................. 2
2.2 Safety in Installation and Maintenance ...................................................................................... 2
2.3 Reference Documentation ......................................................................................................... 2
3 Remove & Modify the UL Type 4X Drive Cover ............................................................................ 3
3.2 Using a dremel tool cut the power and fault indicator extension tab approximately a 3/16”
from the cover surface. ....................................................................................................................... 4
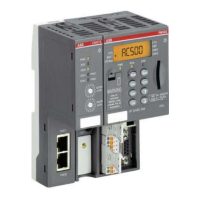
4 Modify Mxxx-01 (MPOW-01, MREL-01, MTAC-01) for UL Type 4X drive mounting. .................... 4
4.1 Using a screw driver release the four securing tabs and then remove the top cover. .............. 4
5 Install Mxxx-01 to ACS355 U.L Type 4X Drive .............................................................................. 6
5.1 Remove the standoff and screw from the Mxxx-01 Kit. ............................................................. 6
5.2 Remove the circuit board fastening screw from the drive and insert and tighten the Mxxx-01
standoff. ............................................................................................................................................ 6
5.3 Install the Mxxx-01 option onto the drive and secure using the screw provided with the Mxxx-
01 kit. ................................................................................................................................................... 6
6 Control Panel Access Option & Reassemble ................................................................................ 7
6.1 Option 1 – Built-In Control Panel – Disconnected Note: Option 1 will require removing the
ACS355’s UL Type 4x front cover to connect the drives control panel. ............................................. 7
6.2 Option 2 – Blank Control Panel - Note: Option 2 will require removing the control panel
access cover to connect the drives control panel. The control panel will have to be stored external
to the drive. ......................................................................................................................................... 7
Author: Jeff Fell – Application Eng., Greg Semrow – Product
Marketing Date: 8, 2014
External
http://www.abb.us/drives.
Industry – Industrial
Document #: LVD-EOTN72U-EN
Revision: A
Product Categories: ACS355, MPOW, MREL, MTAC