4 Repair
4.3.1. Replacement of cable unit, axes 1-3
913HAC026048-001 Revision: A
© Copyright 2006-2008 ABB. All rights reserved.
Removal, cable unit, axes 1-3
The procedure below details how to remove the cabling of axes 1-3.
Gasket, cover 3HAC3200-1
Cable straps, outdoor 2166 2055-3
Flange sealing 1234 0011-116 Loctite 574
Circuit diagram See chapter Circuit diagram
in the Product manual,
reference information.
Standard toolkit The contents are defined in
section Standard toolkit on
page 190, in part 2 of the
Product manual.
Other tools and
procedures may be
required. See references
to these procedures in the
step-by-step instructions
below.
These procedures include
references to the tools
required.
Equipment, etc. Spare part no. Art. no. Note
Action Note/Illustration
1. In order to facilitate refitting of the cable
harness, move the robot to the specified
position:
• Axis 1: 0°
• Axis 2: 0°
• Axis 3: 0°
• Axis 6: no significance
Axes 2 and 3 may be tilted slightly to
improve access.
2.
-
Danger!
Turn off all electric power, hydraulic and
pneumatic pressure supplies to the robot!
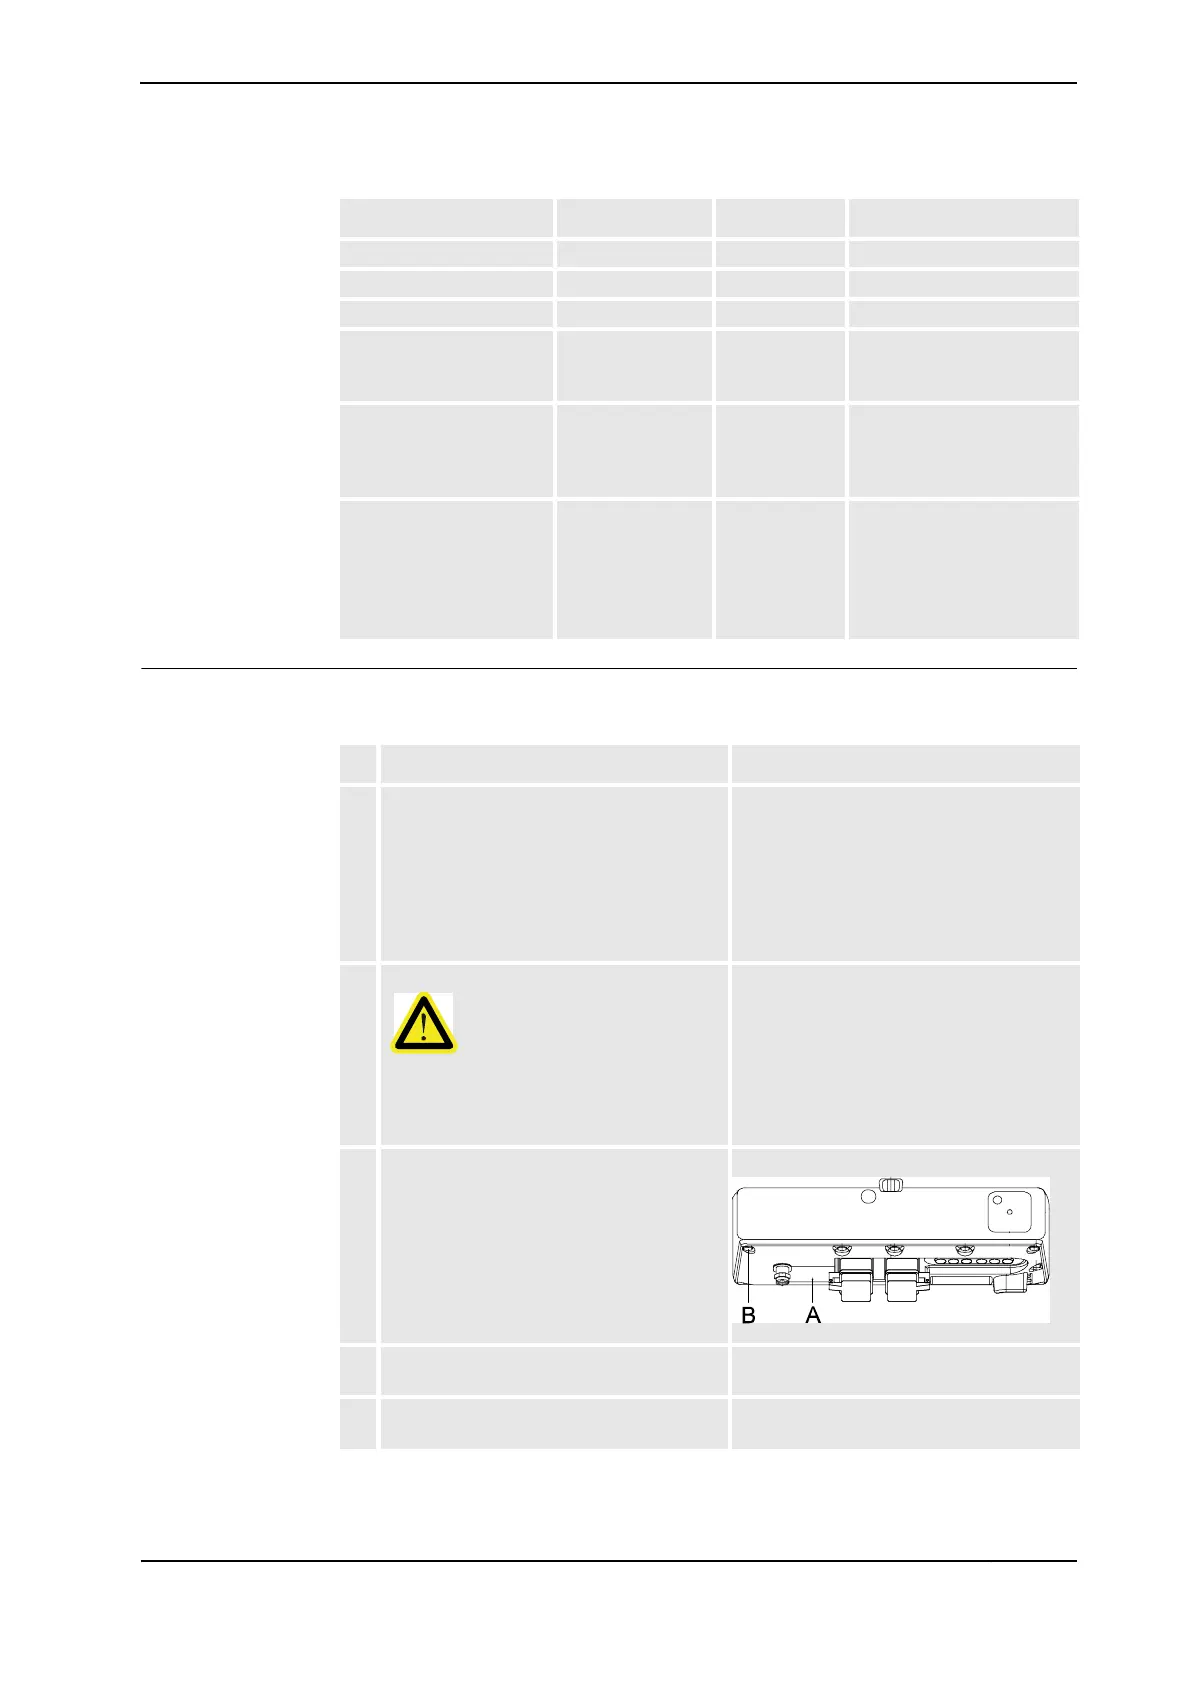
3. Remove the rear cover plate (A) on the
robot by unscrewing its attachment screws
(B).
xx0200000399
4. Disconnect the connectors R1.MP1-3 and
R2.BU1-3 inside the base.
5. Disconnect all the earth cables on the
R1.M1-3 cable from the back of the cover.
Continued
Continues on next page

 Loading...


