L2SM2
ALLEN & HEATH
3
CONTENTS
GL2 INTERNAL LAYOUT ......................................................41
GL2 PANEL WIRING D246/1...............................................42
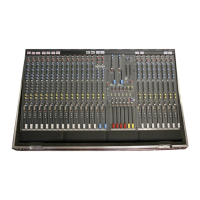
GL2-S FRONT PANEL ..........................................................43
GL2-S REAR PANEL .............................................................44
GL2-S INTERNAL LAYOUT...................................................45
GL2-S PANEL WIRING D327/2 ...........................................46
INPUT PCB LAYOUT FW045D/3 ........................................47
INPUT PCB CIRCUIT D222/1 ..............................................48
STEREO PCB LAYOUT FW046D/2 ....................................49
STEREO PCB CIRCUIT D223/1 ..........................................50
GL2 BLOCK DIAGRAM .........................................................51
GL2 GROUP PCB LAYOUT FW047D/2 ..............................52
GL2 GROUP PCB CIRCUIT D224/1 ....................................53
GL2 MODE SWITCH BLOCK DIAGRAMS............................54
GL2 MASTER PCB LAYOUT FW048D/3 ............................55
GL2 MASTER PCB CIRCUIT D225/1 sheet 1 .....................56
GL2 MASTER PCB CIRCUIT D225/1 sheet 2 .....................57
GL2-S BLOCK DIAGRAM ......................................................58
GL2-S RETURN PCB LAYOUT .............................................59
GL2-S RETURN PCB CIRCUIT C2322/1 sheet 1 ..................60
GL2-S RETURN PCB CIRCUIT C2322/1 sheet 2 ..................61
GL2-S LR PCB LAYOUT ....................................................... 62
GL2-S LR PCB CIRCUIT C2323/1 sheet 1 ............................63
GL2-S LR PCB CIRCUIT C2323/1 sheet 2 ............................64
POWER UNIT PCB LAYOUT FW049/3 ..............................65
POWER UNIT CIRCUIT D226/3 ..........................................66
POWER UNIT WIRING D247A/1 ........................................67
POWER UNIT WIRING D247/1........................................... 68
SYS-LINK PCB LAYOUT FW050/1 .....................................69
SYS-LINK PCB CIRCUIT D242/1 ........................................ 70
RIAA PCB LAYOUT & CIRCUIT MBD111/1 ........................71
WARRANTY STATEMENT ...................................................2
INTRODUCTION ...................................................................3
TECHNICAL DESCRIPTION ................................................. 4
SPECIFICATION & CONNECTIONS ....................................5
REAR PANEL CONNECTIONS ............................................6
INSTALLING THE CONSOLE ...............................................7
EARTHING THE AUDIO SYSTEM ........................................7
INTERCONNECTIONS .........................................................8
ADJUSTING THE LEVELS.................................................... 8
OPTIONS ...............................................................................8
IDENTIFYING THE FAULT....................................................9
SERVICE PROCEDURES ..................................................... 9
PRECAUTIONS .....................................................................9
TROUBLESHOOTING CHART .............................................10
REMOVING THE BASE.........................................................11
REPLACING A CHANNEL ASSEMBLY ................................11
REMOVING THE POWER UNIT ...........................................12
INPUT CIRCUIT BOARD OPTIONS .....................................13
STEREO CIRCUIT BOARD OPTIONS .................................14
GL2 GROUP CIRCUIT BOARD OPTIONS ...........................15
GL2 MASTER CIRCUIT BOARD OPTIONS ......................... 16
GL2-S RETURN CIRCUIT BOARD OPTIONS ......................17
GL2-S LR CIRCUIT BOARD OPTIONS ................................18
SYS-LINK EXPANDER OPTION FITTING ............................19-26
SYS-LINK OPTION APPLICATION .......................................27-28
RIAA INPUT OPTION FITTING .............................................29-32
FITTING NON-STANDARD FADERS ...................................33-34
DESK STAND FITTING .........................................................35
ORDERING SPARE PARTS ................................................. 36-38
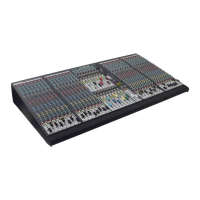
GL2 FRONT PANEL ..............................................................39
GL2 REAR PANEL.................................................................40
INTRODUCTION
The information presented in this manual is intended for competent technical personnel to carry out service and product
support for the GL2 and GL2-S consoles. We assume that the reader is familiar with the related electronic theory and audio
terminology, and is able to carry out basic servicing, fault-finding and repair of audio equipment of this type. Service personnel
should also be familiar with audio system and mains earthing and power requirements, and the associated handling
precautions.
For further information on the operation and application of the GL2 or GL2-S please refer to the GL2 USER GUIDE
publication AP0177 or the GL2-S USER GUIDE publication AP2326 supplied with each console.
Whilst we believe the information in this manual to be reliable we do not assume responsibility for inaccuracies. We also reserve
the right to make changes in the interest of further product development.
SERVICE AND TECHNICAL SUPPORT
Under normal operating conditions the GL2 and GL2-S do not require user maintenance or internal calibration. Any service
work required should be carried out by qualified technical personnel only.
We are able to offer further product support through our worldwide distribution network. To help us provide the most efficient
service please would you quote the console serial number in any communication regarding this product.
SAFETY WARNING !
Mains electricity is dangerous and can kill. Mains voltage is present within the console power unit.
Do not remove the rear cover or internal power unit with mains connected. Check your mains
wiring and earthing before switching on. Refer service work to qualified service personnel only.
Publication: AP0179
Issue 2
copyright © 1995 ALLEN & HEATH. All rights reserved