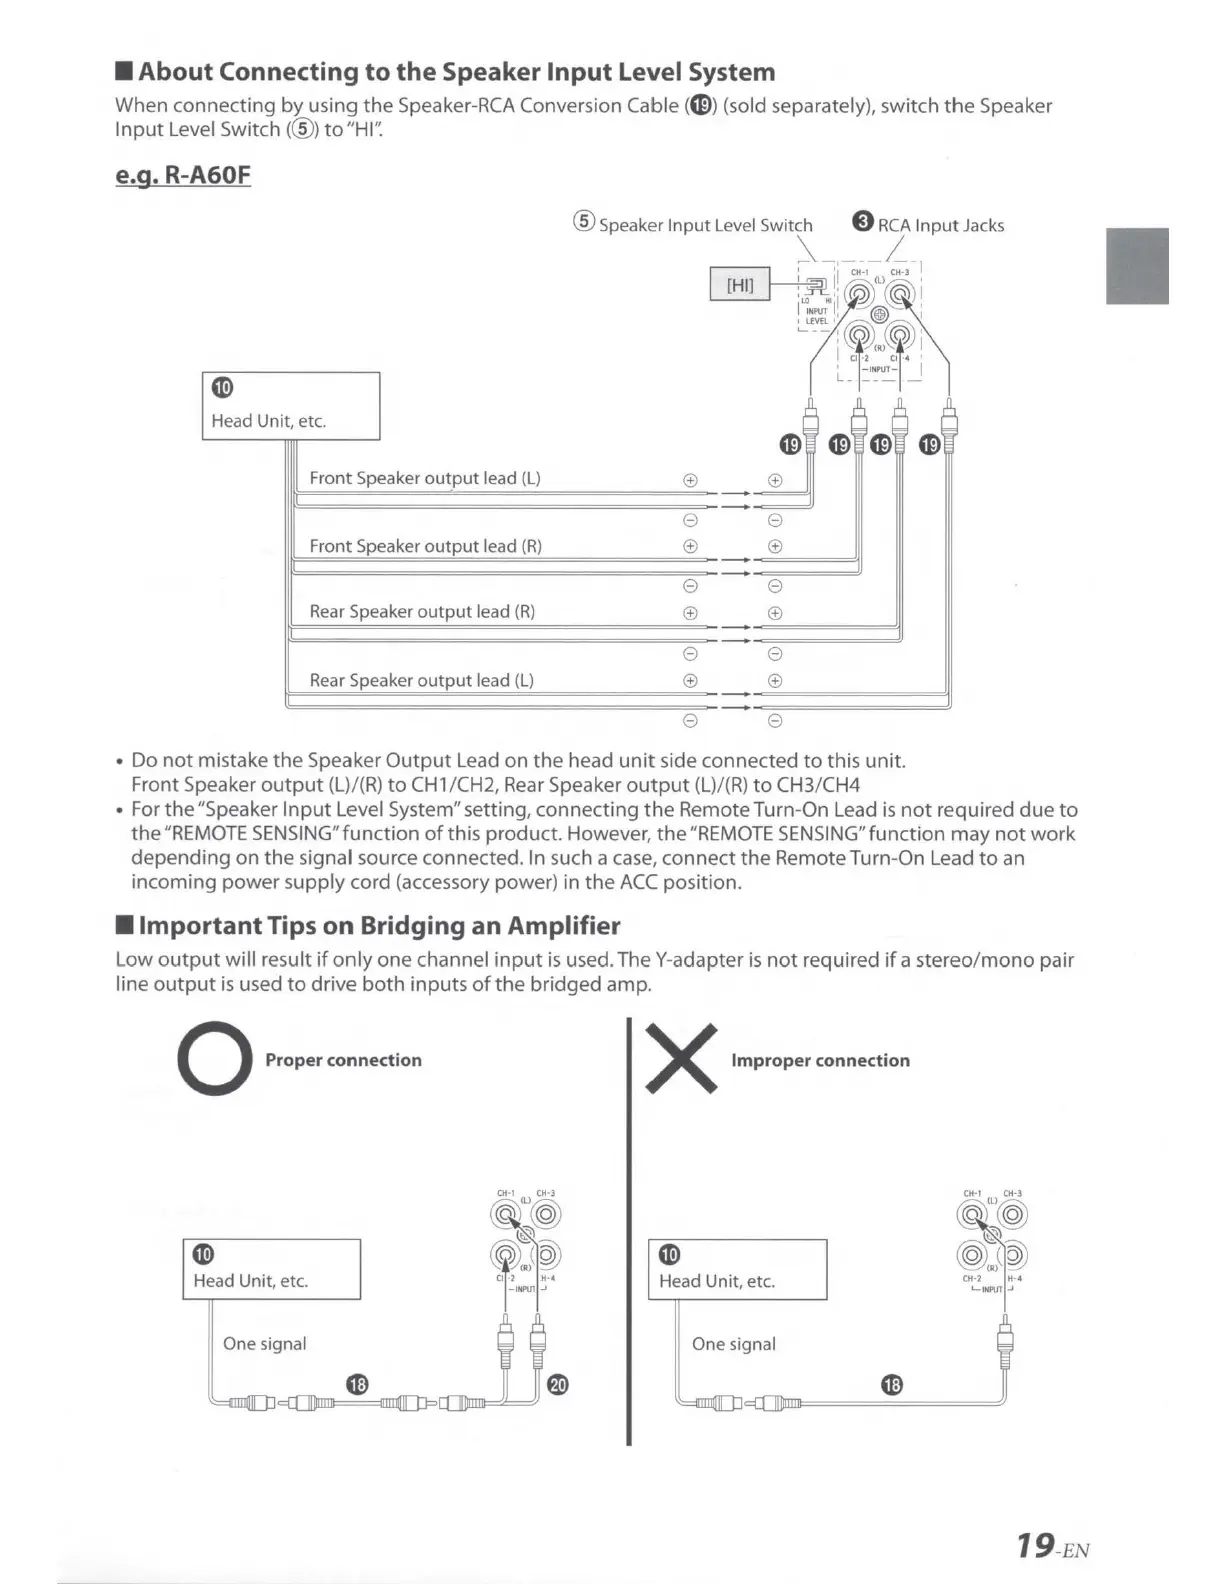
■
About
Connecting
to
the
Speaker
Input
Level System
When connecting
by
using
the
Speaker-RCA Conversion Cable
(CD)
(sold separately), switch
the
Speaker
Input
Level Switch(@) to"HI''.
e.g. R-A60F
® Speaker
Input
Level Switch 8
RCA
Input
Jacks
i_,
___
L__l
~
Head
Unit
, etc.
Front
Speaker
output
lead
(L
)
<±)
0
Front
Speaker
output
lead
(R
)
<±)
0
- - r
_,
_r
output
lead (
R)
<±)
0
Rear Speaker
output
lead (L)
<±)
0
~
i!
i
tii
!~!,
@~
~--:@)@,)·
I a
+.
,
CR>
c~• !
t__
l
::'~~
1 J
=j
G>
G>
G>
0
<±)
0
<±)
0
<±)
-
0
• Do
not
mistake
the
Speaker
Output
Lead
on
the
head
unit
side connected
to
this unit.
Front Speaker
output
(L)/(R)
to
CH1
/CH2,
Rear
Speaker
output
(L)/(R)
to
CH3/CH4
• For
the
"Speaker
Input
Level System" setting, connecting
the
Remote Turn-On Lead
is
not
required
due
to
the"REMOTE SENSING"function
of
this product. However, the"REMOTE SENSING"function may
not
work
depending
on
the
signal source connected. In such a case, connect
the
Remote Turn-On Lead
to
an
incoming
power
supply cord (accessory power)
in
the
ACC
position.
■
Important
Tips
on
Bridging
an
Amplifier
Low
output
will result
if
only
one channel
input
is
used. The Y-adapter
is
not
required
if
a stereo/mono pair
line
output
is
used
to
drive
both
inputs
of
the
bridged amp.
0 P,ope, ,onnect;on
X
lmp,ope"onne«;on
CH·l CH·3 CH·l CH·3
~
Q)~
~
Q)~
@
@I
~
,:,
~
<@).f@)
Head Unit, etc. Head
Unit
, etc.
CH·l
•·•
L-
JN
PU'T
.J
One signal One signal
J
e
@)
e
~
c[(]Dmm
19
-EN
 Loading...