Photo Sensitivity Warning
This game contains flashing lights or patterns which may trigger
epileptic seizures among a small percentage of people, even those with
no prior history of epilepsy or seizures. Player discretion is advised. If
you, or anyone in your family, has an epileptic condition, please consult
your physician prior to playing. If you experience any unusual symptoms
while playing, including dizziness, altered vision, eye or muscle twitches,
loss of awareness, disorientation, involuntary movements or
convulsions, then IMMEDIATELY stop playing the game, and consult
your physician before resuming play.
First time use
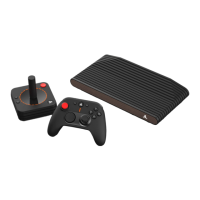
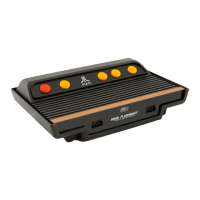
How to set up the console
1. Gently insert one end of the included HDMI® cable into the
HDMI OUT port located on the back of the console.
2. Insert the other end of the cable into your television.
3. Confirm your television is set to the proper video input. For example,
if you plug the console into your television’s HDMI® 1 port, switch
your television source to the same HDMI® 1.
4. Gently insert the USB-C® end of the included power cable into the
power port (5V IN) located on the back of the console.
5. Insert the USB-A end of the cable into a powered source.
6. Press the power button located on the top of the console.
NOTE: The RGB lights around the power and home buttons will
illuminate when the console is powered on. This may take up to 3
seconds after the power button is pressed.
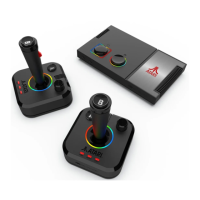
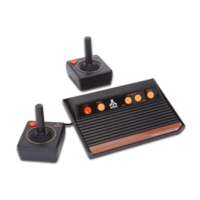
How to set up the joysticks
1. Remove the battery cover located on the bottom of each joystick.
2. Insert 4 AA batteries in each joystick and replace the battery cover.
3. Move the on/o switch on each joystick from ( ) to ( ).
4. The LED sync indicator on the back of the joystick will flash when
turned on. Once the joystick syncs with the console, the LED sync
indicator will become solid.
NOTE: If you do not want to use batteries, gently insert one end of a
USB-C® cable (not included) into the power port (5V IN) located on the
back of each joystick. Gently insert the other end of the cable into the
front of the console. When using this option, you do not need to
add batteries.
How to insert and remove batteries
IMPORTANT: Use high quality alkaline batteries for longer
playing times.
MENU / RGB button
• A quick press of the MENU / RGB button brings up the
GAME CONTROLS or SAVE MENU options (while in-game).
• A press and hold of the MENU / RGB button allows you to change the
RGB lights on the console and joysticks.
Game controls
Quick press the MENU / RGB button located on the back of the joystick
to access GAME CONTROLS.
NOTE: TV TYPE and GAME DIFFICULTY are only supported on
Atari® 2600 games.
NOTE: PADDLE SENSITIVITY is not supported on all paddle games.
Save options
The Atari® Gamestation Pro allows for game saves onto a microSD™
card. The microSD™ card slot allows up to 128 GB capacity.
1. Format the microSD™ card to a FAT32 file system.
2. Create a folder on the microSD™ card and label it States.
3. Insert the microSD™ card into the microSD™ card slot located on the
side of the console.
NOTE: The microSD™ card should be inserted into the console with the
pins facing upwards.
4. Quick press the MENU / RGB button located on the back of the
joystick to access the SAVE MENU. You can save, load or delete a
save state from this menu.
NOTE: The SAVE MENU can only be accessed within each game.
NOTE: Each game allows up to 2 internal save states and 2 save states
onto the microSD™ card.
NOTE: Internal storage is limited, so space may run out before all
internal save states are used.
NOTE: Not all games support save options.
Factory reset
FACTORY RESET can be found within the ABOUT section under
SETTINGS. FACTORY RESET will delete all game saves both internally
and on the microSD™ card.
Battery information
Leakage of battery acid can cause personal injury as well as damage to
this product. If battery leakage occurs, thoroughly wash the aected
skin and clothes. Keep battery acid away from your eyes and mouth.
Leaking batteries may make popping sounds.
• Batteries should be installed and replaced only by an adult.
• Do not mix alkaline, standard (carbon-zinc) or rechargeable batteries.
• Do not mix used and new batteries (replace all batteries at the
same time).
• Do not mix dierent brands of batteries.
• We do not recommend using batteries labeled “Heavy Duty”, “General
Use”, “Zinc Chloride” or “Zinc Carbon”.
• Do not leave batteries in the controller for long periods of non-use.
• Remove batteries and store them in a cool, dry place when not in use.
• Remove depleted batteries from the unit.
• Do not put the batteries in backwards. Make sure that the positive (+)
and negative (-) ends are facing in the correct direction. Insert the
negative end first.
• Do not use damaged, deformed or leaking batteries.
• Do not recharge non-rechargeable batteries.
• Remove rechargeable batteries from the device before charging.
• Dispose batteries only at the government approved recycling facilities
in your area.
• Do not short circuit battery terminals.
• Tampering with the product can result in damage to your product, void
of the warranty and could cause injuries.
• Warning: CHOKING HAZARD small parts. Not suitable for children
under 36 months.
• The restriction accompanies the age warning.
• A 5V DC, 2A adapter is recommended for use with this device.
• Only use an adapter that meets the device's requirements.
• The adapter is not a toy.
• Adapters used with the device are to be regularly examined for
damage to the cord, plug, enclosure and other parts.
• Please keep this user guide for important information.
• The toy shall only be used with a transformer for toys or a power
supply for toys.
• Rechargeable batteries should be charged under adult supervision.
• The product should only be connected to equipment bearing either of
the following symbols:
FCC information
NOTE: This equipment has been tested and found to comply with the
limits for a Class B Digital Device, pursuant to Part 15 of the FCC Rules.
These limits are designed to provide reasonable protection against
harmful interference in a residential installation. This equipment
generates, uses, and can radiate radio frequency energy and, if not
installed and used in accordance with the instructions, may cause
harmful interference to radio communications. However, there is no
guarantee that interference will not occur in a particular installation.
If this equipment does cause harmful interference to radio or television
reception, which can be determined by turning the equipment o and
on, the user is encouraged to try to correct the interference by one or
more of the following measures:
• Reorient or relocate the receiving antenna.
• Increase the distance between the equipment and receiver.
• Connect the equipment to an outlet on a circuit dierent from that to
which the receiver is connected.
• Consult the dealer or an experienced radio/TV technician for help.
This equipment complies with Part 15 of the FCC Rules. Operation is
subject to the following two conditions:
1. This equipment may not cause harmful interference.
2. This equipment must accept any interference received, including
interference that may cause undesired operation.
Modifications not authorized by the manufacturer may void the user's
authority to operate this device. This equipment complies with FCC RF
radiation exposure limits set forth for an uncontrolled environment. This
transmitter must not be co-located or operating in conjunction with any
other antenna or transmitter.
Warranty information
All MY ARCADE® products come with a limited warranty and have been
subjected to a thorough series of tests to ensure the highest level of
dependability and compatibility. It is unlikely that you will experience
any problem, but if a defect should become apparent during the use of
this product, MY ARCADE® warrants to the original consumer purchaser
that this product will be free from defects in material and workmanship
for a period of 120 days from the date of your original purchase.
If a defect covered by this warranty occurs to a product purchased in
the U.S., MY ARCADE®, at its option, will repair or replace the product
purchased at no charge or refund the original purchase price. If a
replacement is necessary and your product is no longer available, a
comparable product may be substituted at the sole discretion of
MY ARCADE®. For MY ARCADE® products purchased outside of the
U.S., please ask the store where it was purchased for further information.
This warranty does not cover normal wear and tear, abusive use or
misuse, modification, tampering or any other cause not related to either
materials or workmanship. This warranty does not apply to products
used for any industrial, professional or commercial purposes.
Service information
For service on any defective product under the 120-day warranty policy,
please contact Consumer Support to obtain a Return Authorization
Number. MY ARCADE® reserves the right to require the return of the
defective product and proof of purchase.
NOTE: MY ARCADE® will not process any defective claims without a
Return Authorization Number.
Consumer Support hotline
877-999-3732 (U.S. and Canada only)
or +1-310-222-1045 (International)
Consumer Support email
support@MyArcadeGaming.com
Website
www.MyArcadeGaming.com
For emulator information, please visit:
www.MyArcadeGaming.com
Save a tree, register online
MY ARCADE® is making the eco-friendly choice to have all products
registered online. This saves the printing of physical paper registration
cards. All the information you need to register your recent
MY ARCADE® purchase is available at:
www.MyArcadeGaming.com/product-registration
Declaration of Conformity
A copy of the EU Declaration of Conformity for this product can be
found at this link: www.MyArcadeGaming.com/pages/doc
21 3
4
5 6 7 8
9
10 11 12
13
14
15
16
17
18
19
20
21
22
23
24
25 26 27
28
29
30
31 32 33
34 35 36
37 38
39
40 41 42 43
44
45 46 47 48
49 50 51 52 53
54 55 56 57 58
59 60 61 62
63
64 65 66 67 68
69 70 71 72
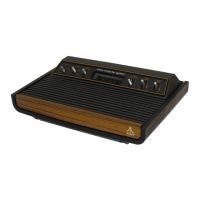
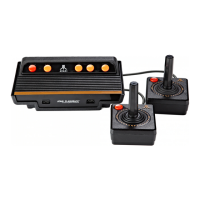
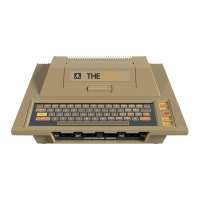
WWW.MYARCADEGAMING.COM
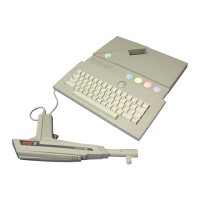
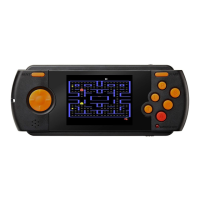
COLLECT THEM ALL!
User guide
Manuel de l’utilisateur
Guía del usuario
Manuale dell’Utente
Guia do usuário
Bedienungsanleitung
Gebruikershandleiding
ユーザー ガ イド