13 1 n
Ind
e
x D
a
t
a
T
ec
hno
l
ogy R
e
p
a
i
rs C
a
r
c
a
r
e
Con
t
ro
l
s Ov
e
rv
i
e
w
Hardtop*
4 O p e n b oth of th e fro nt lo c kin g le v ers.
Pr e ss th e b utto n to d o this. T h e
le v ers will rele a s e slig htly. R ais e th e
le v ers a s far a s p o ssibl e .
46 c d e 0 8 9
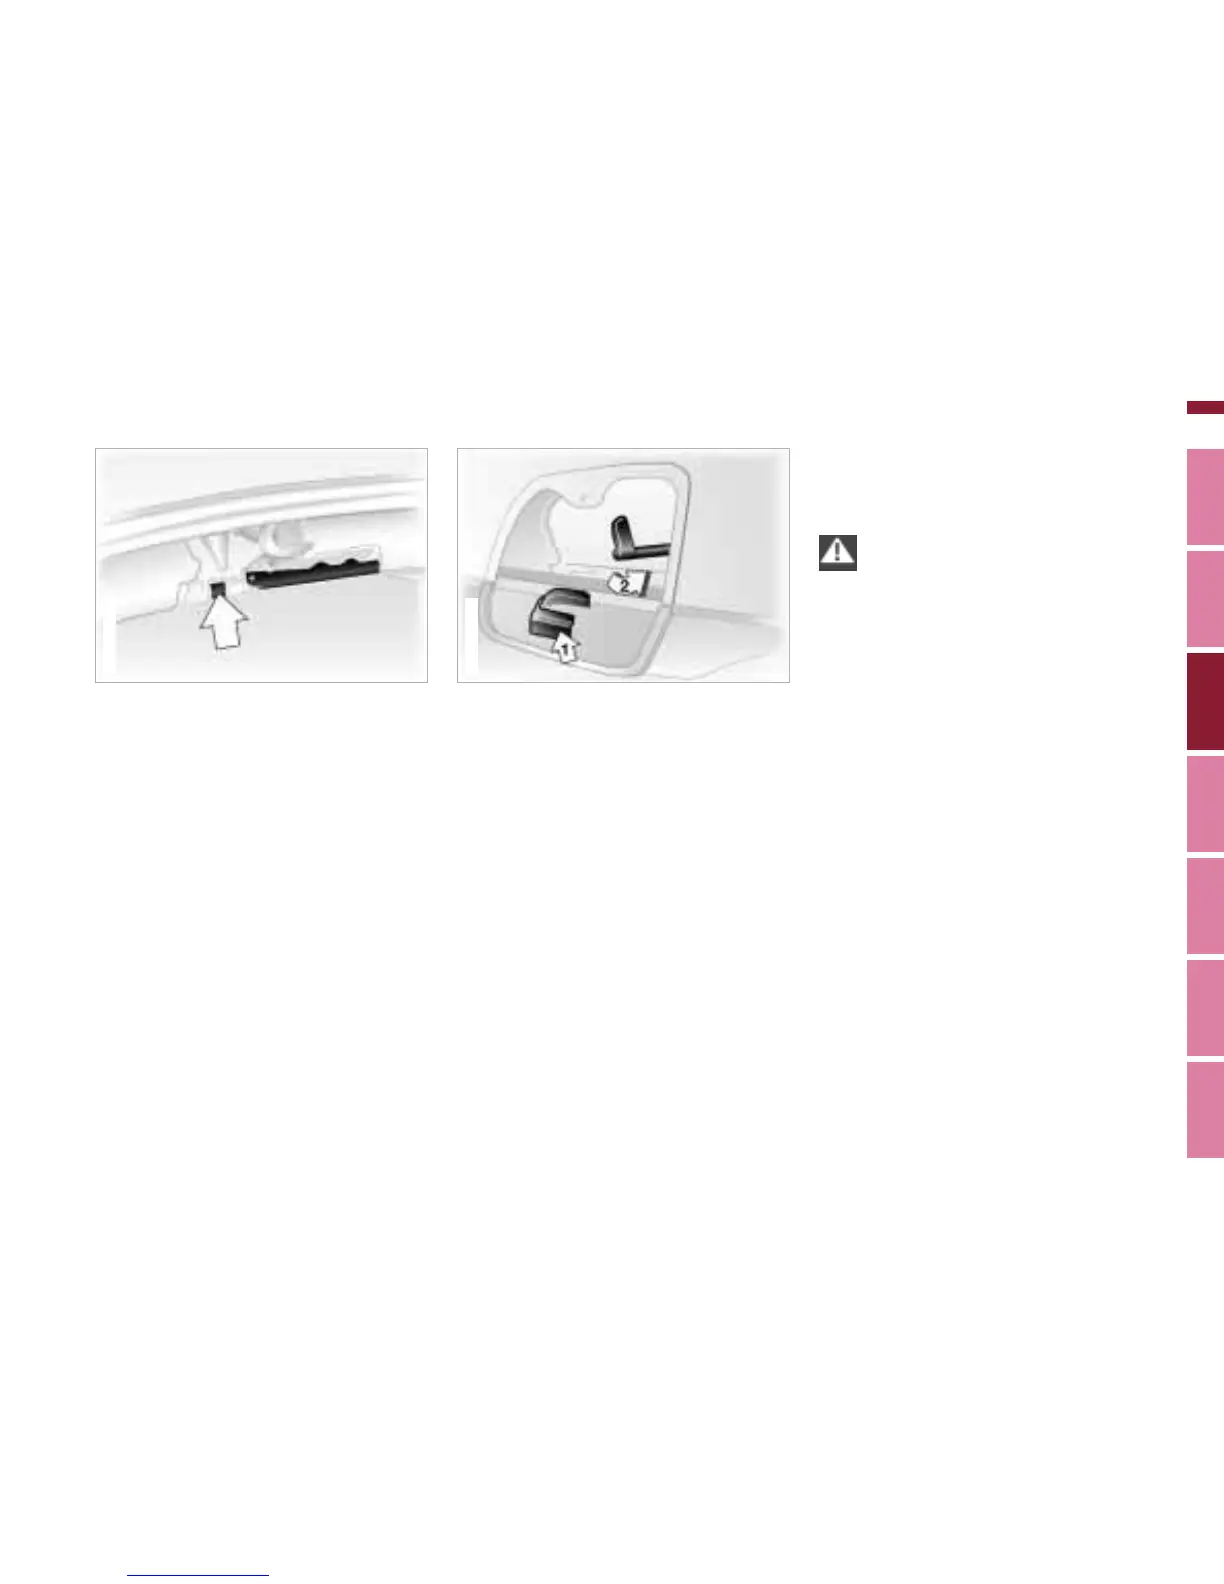
5 B efore installin g, first flip d o w n th e
c ov er p a n els th a t ar e lo c ate d un d e r-
n e ath th e l e ft a n d right int e rior la m p s.
T o d o this, pre s s o n th e slig htly
rais e d s p oto n th e c o v er p a n el. T h ere
is a h ol d er in th e c o v er p a n e l to
s e c ure ly store th e vis ors th at h av e
b e e n re m ov e d (1).
6 O p e n th e re d rele a s e l e v er a s far a s
p ossible (2).
7 P o sitio n th e h ardto p o n th e s u p p orts
with th e h elp of a s e c o n d p ers on. B e
sure to p ut th e m o untin gs e x a ctly into
th e pro p er bra c k ets.
8 In th e b a c k, clo s e th e re d lo c king
le v er b y turnin g to th e in sid e a s f ar a s
p ossible b e hin d th e trim . Fli p th e
c ov er p a n els b a c k into pla c e.
46 c d e 0 7 7
9 To lo c k th e h ardto p in th e front, c o n -
tin u e pre s sing o n th e fro nt lo c kin g le -
v er u ntil y o u h e ar it e n g a g e .
Lift th e h ardto p c arefully. B e
e xtre m ely c areful n ot to s hift th e
s e als. S e als th at h av e b e e n shifte d o ut
of pl a c e or p ulle d o ut c a us e l e ak s. c
Removing
R e m o v e th e h ardto p in th e o p p o site
ord e r of in stall atio n.
 Loading...