WW
WW
W
ARNINARNIN
ARNINARNIN
ARNIN
GG
GG
G
LP & NLP & N
LP & NLP & N
LP & N
G ARE EXTREMELG ARE EXTREMEL
G ARE EXTREMELG ARE EXTREMEL
G ARE EXTREMEL
Y FLY FL
Y FLY FL
Y FL
AMMABLE SOAMMABLE SO
AMMABLE SOAMMABLE SO
AMMABLE SO
TT
TT
T
AKE EXTRA PRECAAKE EXTRA PRECA
AKE EXTRA PRECAAKE EXTRA PRECA
AKE EXTRA PRECA
UTIONS WHENUTIONS WHEN
UTIONS WHENUTIONS WHEN
UTIONS WHEN
PERFPERF
PERFPERF
PERF
ORMINORMIN
ORMINORMIN
ORMIN
G ANY WG ANY W
G ANY WG ANY W
G ANY W
ORK TORK T
ORK TORK T
ORK T
O THE HEAO THE HEA
O THE HEAO THE HEA
O THE HEA
TERTER
TERTER
TER
CT-13
page 1 of 2
rev 10/06
Bosch Water Heating
340 Mad River Park, Waitsfield, VT 05673
©BBT NORTH AMERICA CORPORATION
Bosch Group
REMOVING AND CLEANING
BURNERS
MODELS: 1000P, 1600P, 1600H,
260PN, 425PN, 425HN
A. Removing pilot assembly
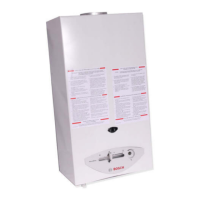
Model 1000P, 1600P, 260PN, 425PN (Fig 1):
1. Shut off gas and water to heater, then remove front
cover.
2. Remove wire clip holding top of pilot tube into
bracket.
3. Move lower end of pilot tube to left to release from
black clip on gas valve. Be sure to catch air screen
attached to base of pilot tube.
4. Pull upwards on upper end of pilot tube to rele ase
from bracket.
5. Remove black clip from bracket to release spark elec-
trode.
6. Gently press down on top of thermocouple to release
it from bracket.
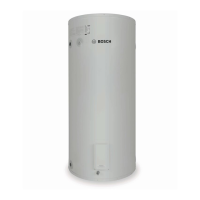
FIGURE 3
FIGURE 4
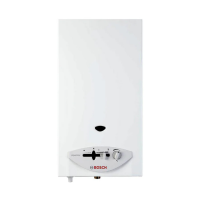
Model 1600H, 425HN (Fig. 2):
1. Shut off gas and water to heater, then remove front
cover.
2. Remove both pilot bracket screws and pilot shield from
front of burners.
3. Remove pilot assembly from burner bracket. Be sure
to catch air screen secured to base of pilot assembly.
B. Removing burners
1. Remove 2 burner set screws on the right side of the
gas valve. (Fig. 2)
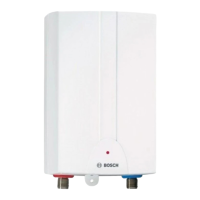
2. Remove four screws from both right and left burner
brackets and set aside. (Fig. 3)
3. Push entire burner assembly up to seperate from the
gas valve.
4. Tilt right side of burners up and slide them out at an
angle to the left. (Fig. 3)
Burner bracket location
(425PN model shown)
FIGURE 2
Pilot shield
Pilot bracket
screws
Burners
Pilot air
screen
1600H, 425HN pilot assembly
1000P, 1600P, 260PN, 425PN pilot assembly
FIGURE 1
Pilot air screen
Pilot wire clip
Burners
Pilot tube
Thermocouple
lead
Pilot air
screen
Burner set
screws