MY23P0a -52_1.0_11.10.2022
225
Cleaning, maintenance and inspection
7.5.5.2 Check
There is a different wear gauge for each chain,
depending on the manufacturer:
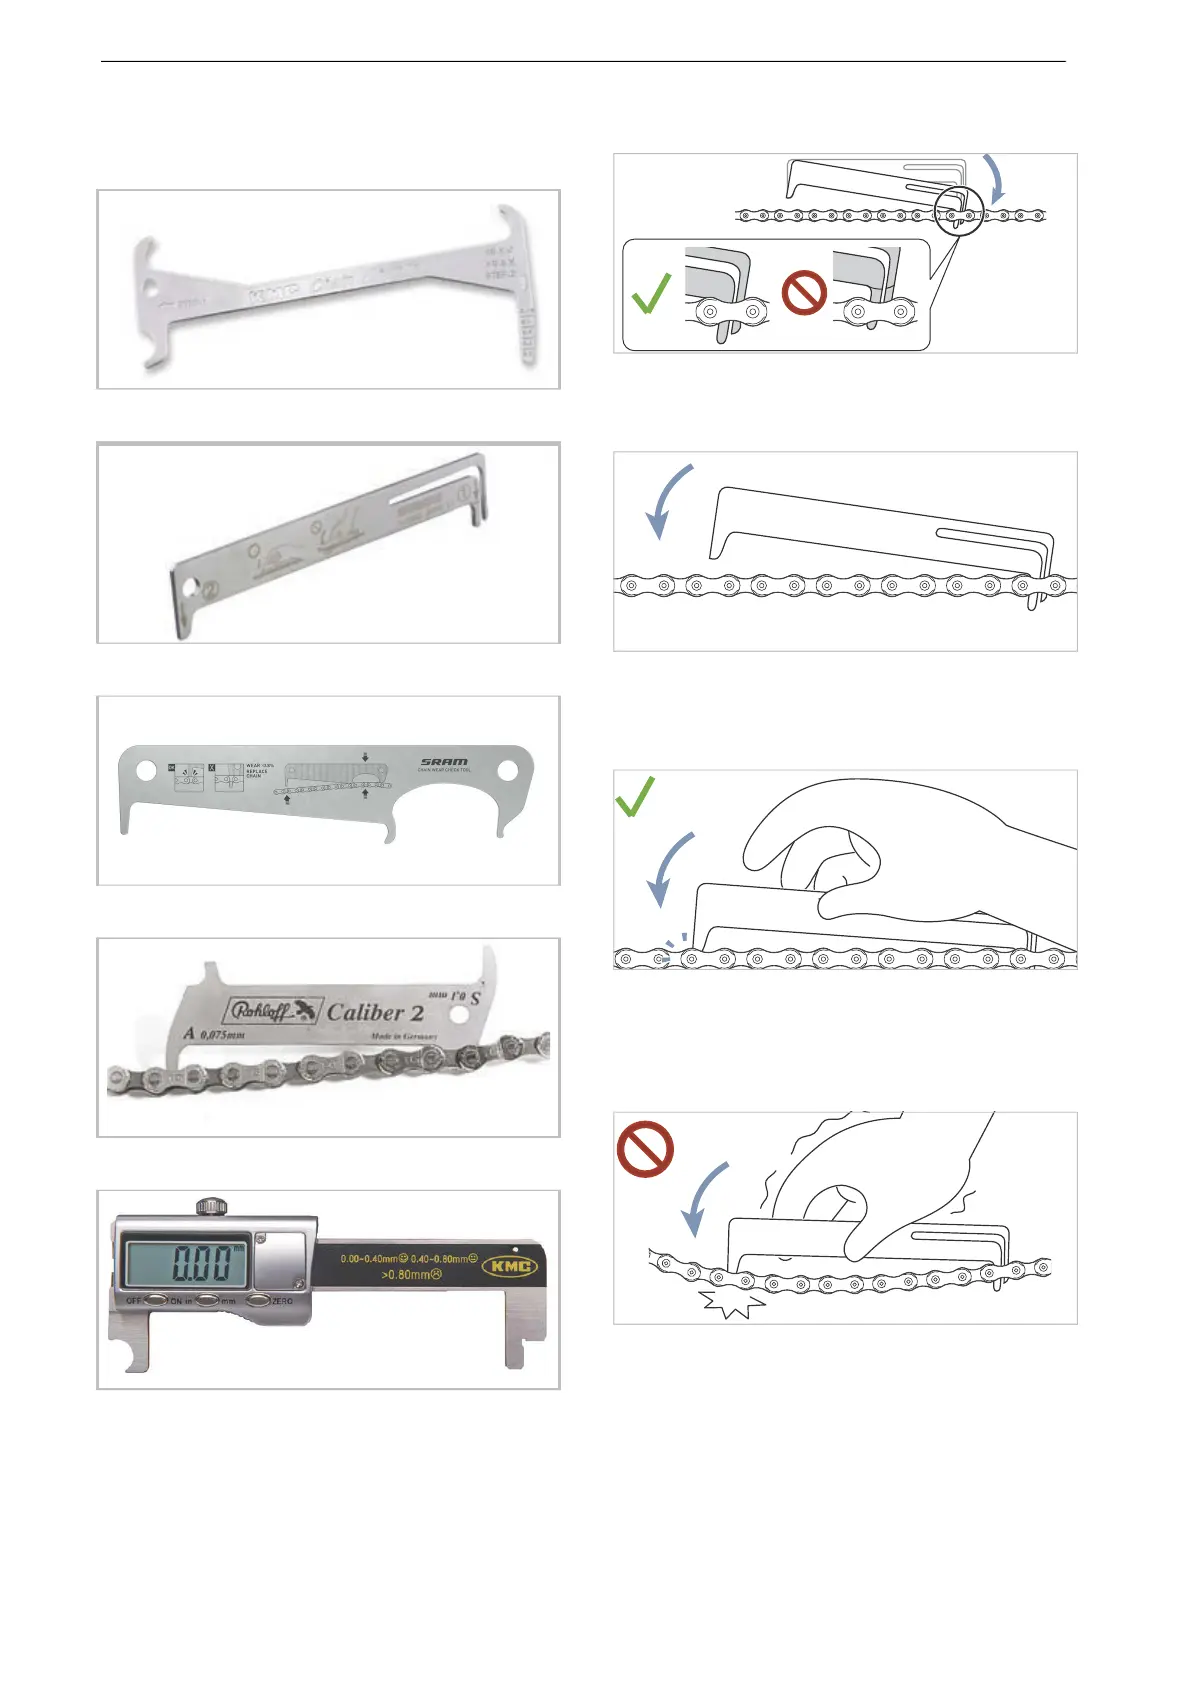
Figure 198: Example of a KMC gauge
Figure 199: Example of a SHIMANO gauge
Figure 200: Example of a SRAM gauge
Figure 201: Example of a ROHLOFF gauge
Figure 202: Example of a KMC digital gauge
1 Insert gauge between two chain links on the
right-hand side.
Figure 203: Gauge is inserted
2 Lower gauge down to the left-hand side.
Figure 204: Lower gauge to the left
If the gauge does not fit between the links, the
chain is not worn yet.
Figure 205: Gauge does not fit
If the gauge does not fit between the links, the
chain is worn and must be replaced. Contact
specialist dealer.
Figure 206: Gauge fits

 Loading...