• Do not process more than one batch without
interruption.
• Let the appliance cool down for 4 minutes before
you continue processing.
Recipe Example: Mashed Potatoes
1 kg cooked potatoes
200 ml warm milk
• Place the potatoes in a bowl and mash for
30 seconds with speed «II».
• Add the milk. Resume mashing for another
30 seconds.
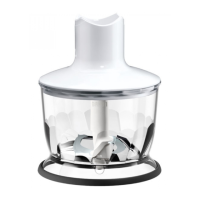
Chopper Accessory (C)
The choppers (9/10/11) are perfectly suited for
chopping meat, hard cheese, onions, herbs, garlic,
vegetables, bread, crackers and nuts.
Use the «hc» chopper (9) for fine results.
It is not suitable for meat.
Use the «ca» (10) and «bc» chopper (11) for larger
quantities and for hard foods.
Furthermore, the «bc» chopper offers a variety of
other applications like shakes, drinks, purées,
batter or crushed ice.
Refer to the Processing Guide C for maximum
quantities, recommended times and speeds.
For «hc» chopper do not exceed the quantity of
ingredients higher than max line. Maximum
operation time for the «hc» chopper: 1 minute for
large amounts of wet ingredients, 30 seconds for
dry or hard ingredients.
NOTE: leave an interval of at least 3 minutes before
operating again (To prevent faults). Immediately
stop processing when motor speed decreases and/
or strong vibrations occur.
Before Use
• Pre-cut foods into small pieces for easier
chopping.
• Remove any bones, tendons and gristle from
meat to help prevent damage to the blades.
• Make sure the anti-slip rubber ring (9d/10d/11e)
is attached to the bottom of the chopper bowl.
Assembly and Operation
• Carefully remove the plastic cover from the blade.
• The blades (9b/10b/11b/11c) are very sharp!
Always hold them by the upper plastic part and
handle them carefully.
• Place the blade on the center pin of the chopper
bowl (9c/10c/11d). Press it down and give it a
turn so that it locks into place.
• Fill the chopper with food and put on the lid
(9a/10a/11a).
• For ice crushing, fill up to 7 ice cubes into the
chopper bowl (11d) and use the special ice blade
(11c).
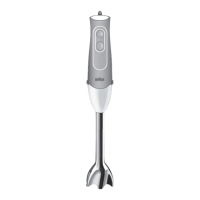
• Align the chopper with the motor part (3) and
click together.
• To operate the chopper, switch on the appliance.
During processing, hold the motor part with one
hand and the chopper bowl with the other.
• Always chop harder foods (e.g. parmesan
cheese) at full speed.
• When chopping is complete, unplug and press
the release buttons (4) to detach the motor part.
• Lift the lid up. Carefully take out the blade before
pouring out the contents of the bowl. To remove
the blade, slightly turn it then pull it off.
Caution
• Do not use the chopper accessories (9/10/11) to
process extremely hard foods, such as unshelled
nuts, coffee beans, grains, or hard spices e.g.
nutmeg. Processing these foods could damage
the blades.
• Only the «bc» chopper accessory with the special
ice blade is allowed to crush ice cubes.
• Never place the chopper bowl in the microwave
oven.
«bc» Recipe Example: Pancake Batter
375 ml milk
250 g plain flour
2 eggs
• Pour milk into the «bc» bowl, then add flour and
finally the eggs.
• Using speed «II», mix the batter until smooth.
«hc» Recipe example: Honey-Prunes (as a pancake
stuffing or spread):
50 g prunes
70 g creamy honey
10 ml water (vanilla-flavoured)
• Fill the «hc» chopper bowl with prunes and
creamy honey.
• Chop 4 seconds at maximum speed
• Add 10 ml water (vanilla-flavoured).
• Resume chopping for another 1,5 seconds.
Coffee and Spice Grinder
Accessory (D)
The grinder is perfectly suited for grinding any kind
of dry spices or other ingredients, such as pepper,
cloves, chili, coffee or soya beans, rice, poppy s
For finest results, use the highest speed.
Assembly and Operation
• Make sure the anti-slip rubber base (12d) is
attached to the bottom of the bowl.
• Always hold the grinder knife (12b) by the upper
plastic part and handle it carefully.
• Place the blade on the center pin of the grinder
bowl (12c) and spin it slightly so that it drops
down and locks into place.
8
5722114424_4192-MQ3xxx_GB_AU_NZ.indd 85722114424_4192-MQ3xxx_GB_AU_NZ.indd 8 22.10.20 13:4222.10.20 13:42
 Loading...