Do you have a question about the Brother ULT-2001 and is the answer not in the manual?
| Built-in Fonts | 5 |
|---|---|
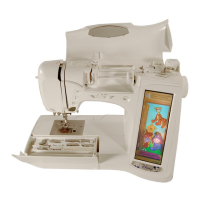
| LCD Display | Yes |
| Thread Tension Control | Automatic |
| Needle Threading System | Automatic |
| Presser Feet | 7 |
| Stitch Length | 5 mm |
| Stitch Width | 7 mm |
| Free Arm | Yes |
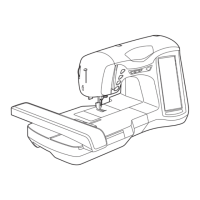
| Type | Sewing and Embroidery |
Covers essential safety measures to prevent electric shock, burns, fire, and injury during machine operation.
Guidelines for safe use, including keeping hands clear of moving parts and unplugging.
Core tasks for starting machine operation.
Steps for safely connecting the machine to a power source and turning it on.
Bobbin winding and upper thread threading procedures.
How to enable automatic reinforcement stitching for secure seams.
Instructions for using the automatic thread cutter for efficient trimming.
Guide to selecting utility stitch patterns.
Steps for selecting desired utility stitch patterns from the machine's display.
Detailed instructions for sewing various utility stitches.
Instructions for sewing straight stitches, zigzag stitch patterns, and basting.
Guide to selecting character and decorative stitch patterns from the machine's library.
Step-by-step guide for sewing character and decorative stitch patterns.
Essential preparatory steps before starting any embroidery project.
Step-by-step guide for preparing the machine and beginning an embroidery project.
Instructions for securely attaching the embroidery unit to the sewing machine.
Procedure for safely detaching the embroidery unit from the sewing machine.
Guide to selecting embroidery designs from machine memory or external media.
Explanation of the embroidery sewing screen elements and their functions.
Essential steps for preparing the embroidery frame and fabric.
Guidance on using stabilizer material for fabric support and preventing shrinkage during embroidery.
Instructions for selecting the correct frame size and setting the fabric properly.
Step-by-step guide for correctly inserting and stretching fabric into the embroidery frame.
Procedure for correctly attaching the embroidery frame to the machine's holder.
Steps for positioning and checking the embroidery pattern.
How to move the embroidery pattern using arrow keys to adjust its position.
Process for checking the embroidery pattern's position and boundaries within the frame.
Viewing a preview of the final embroidery design before starting the stitching process.
The process of sewing an embroidery design.
Step-by-step instructions for threading the machine and starting the embroidery process.
Procedure to follow when the bobbin thread runs out during embroidery.
Steps to take when the upper or bobbin thread breaks during the embroidery process.
Guidance on adjusting thread tension for correct embroidery stitch formation.
Procedure for aligning the embroidery pattern's start position on the fabric.
Guide to designing custom stitch patterns using the grid sheet and defining stitch points.
Steps for entering stitch data by marking points and defining stitch properties.
Procedure for inputting stitch points and sequences to create custom designs.
Procedure for editing existing custom stitch data, including moving points and designs.
Procedure for safely replacing the machine's light bulb.
Routine cleaning procedures for the sewing machine.
Procedures for adjusting screen brightness and touch panel responsiveness.
Procedure for adjusting the screen brightness for optimal visibility.
Steps to calibrate the touch panel if it does not respond correctly to input.
Explanation of common error messages displayed on the LCD and their corresponding solutions.
Technical specifications for the sewing machine and embroidery unit, including dimensions and weight.