CLAGE
EN
27
5. Direct connection
Note: Fasten the screw nuts with caution, to avoid damage to the valves or the piping
system.
For direct connection, the two ½inch screw-in nipples and the ½inch seals must be
screwed into the ½inch union nuts of the hot-water and cold-water connectors. The
two ½inch caps of the side outlets of the hot-water and cold-water connectors must
be removed and screwed onto the open end of the screw-in nipples. Put the water
flow reducer “D” into the hot water connection piece. The hot-water and cold-water
connectors must then be screwed into the ⅜inch union nut of the appliance inlet and
outlet pipe, together with the ⅜inch seals.
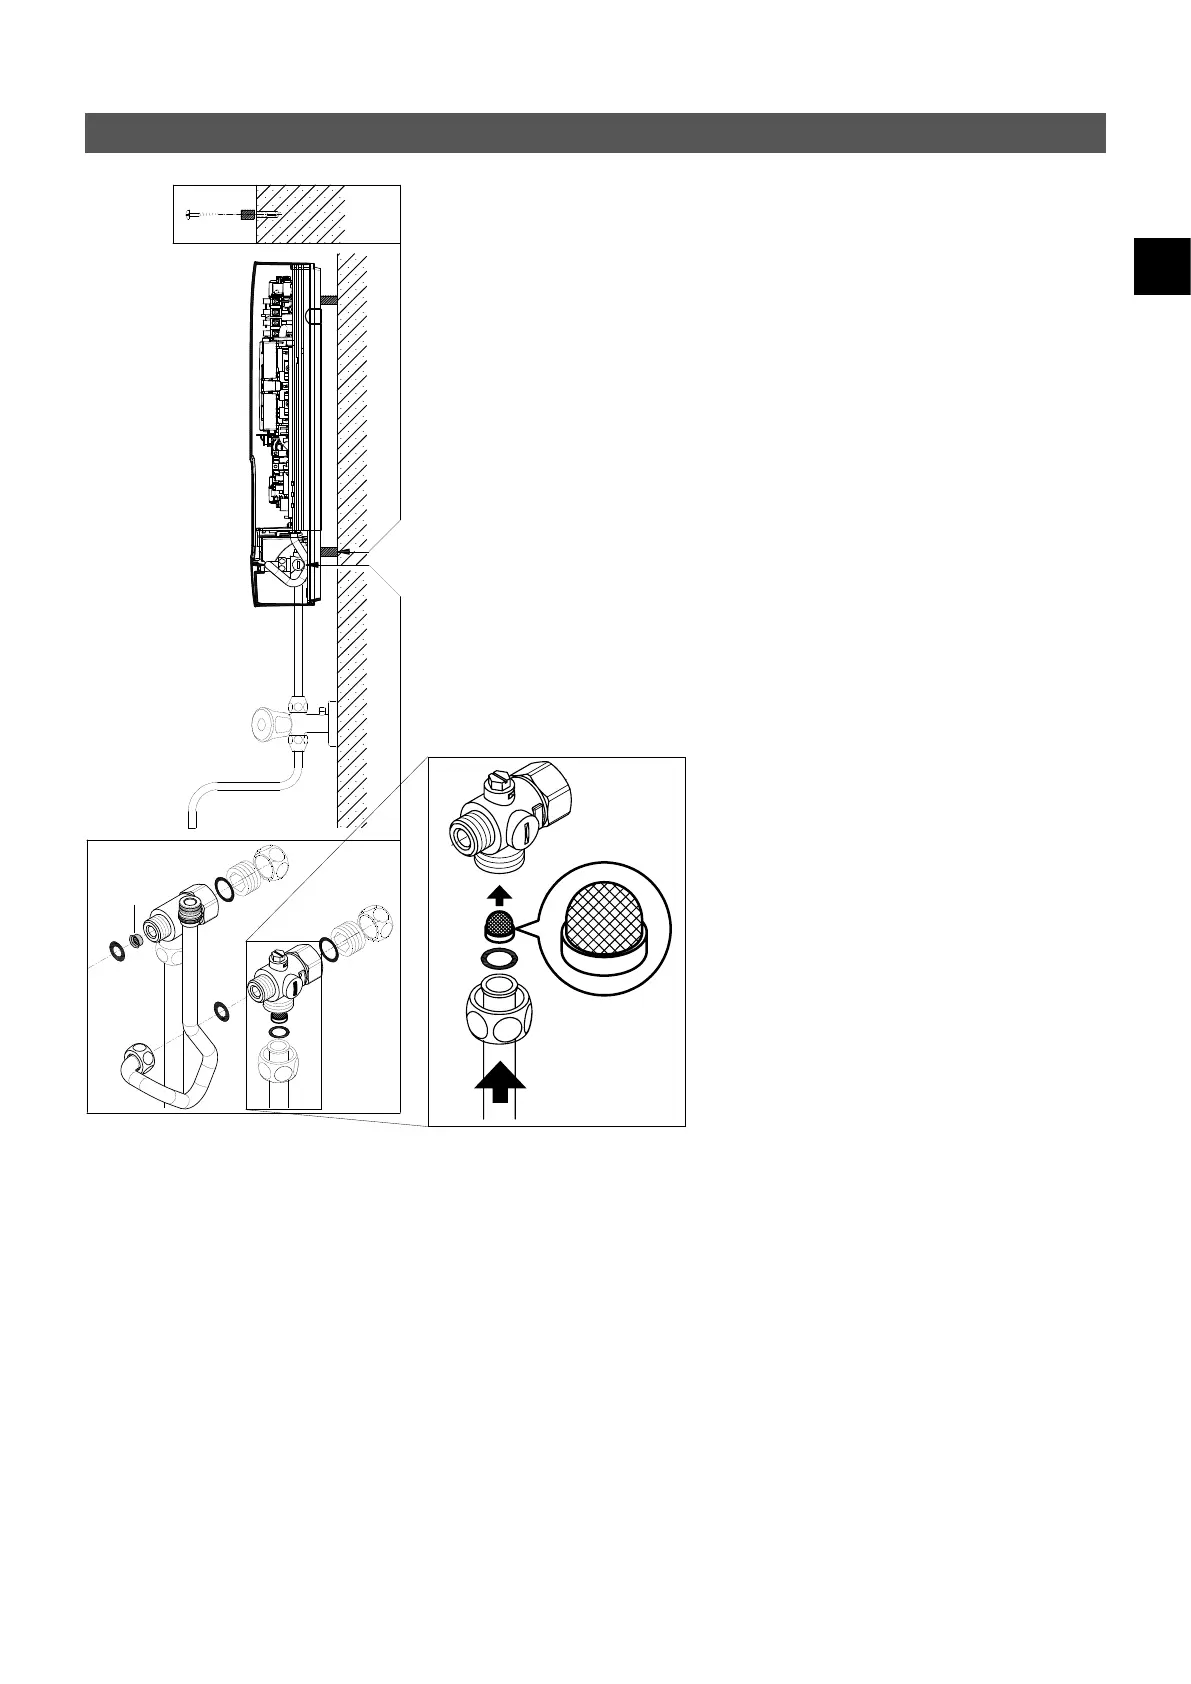
For direct connection, it may be advisable to mount the appliance at a distance as illus-
trated alongside, using the spacer sleeves supplied. The two fixing holes near the lower
pipe connections are also to be professionally fixed with 6 mm dowels and screws.
The flared end of the pipes must be screwed into the ½inch side outlets of the hot-
water and cold-water connectors with ½inch union nuts and ½inch seals. The holes
required for the pipes must then be opened of the housing with the aid of a blunt
implement.
In case of direct connection please note: Put the strainer into the cold water connec-
tion!
D
 Loading...