© Sears Brands, LLC.
Every effort has been made to ensure that the information in this document is accurate and current. However, we reserve the right to change, alter or otherwise improve the product and this document at any time without prior notice.
Remove the Packaging Materials
• Remove the cardboard from the crate. Remove any steel banding
securing the unit to the crate. Locate the manual packet.
Read the Operator’s Manual
• Locate the operator’s manual in the manual packet. You should always
read and follow the instructions in the operator’s manual. Proper care,
performance tips, and safety information are located in this important
document.
Check the Tire Pressure
• Reduce the tire pressures to the pressures shown below. Tires are over-
inflated for shipping purposes and must be set to the correct pressures for
optimum traction.
Rear Tire Pressure: 10-12 PSI
Front Tire Pressure: 18-20 PSI
Check Engine Oil Level
Note: Engine is shipped with oil. Add 10W-30 premium engine oil if oil level
is low. See Operator’s Manual for complete engine oil specifications and
maintenance requirements.
• Lift the seat deck (A, Figure 4) to access the engine compartment.
• Clean the area around the dip stick/oil fill tube (A, Figure 5). Remove the
dip stick from the oil fill tube and wipe the dip stick with a clean rag.
• Insert the dip stick into the oil fill tube (thread in or push down
completely).
• Remove and check the engine oil level (B). Oil level should be between
Full and Add marks. If necessary, add oil to the oil fill tube.
• Replace and fully secure the dip stick (A).
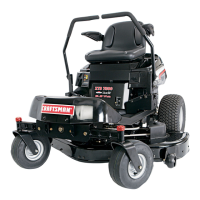
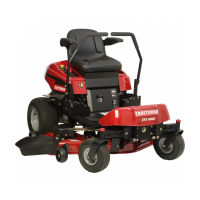
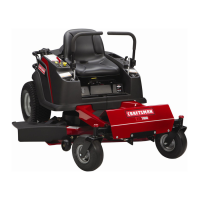
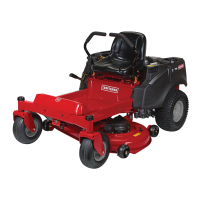
ZTS 7500
107.28786 (21HP Briggs & Stratton with 42” Mower)
107.26786 (21HP Briggs & Stratton with 42” Mower, California)
107.28791 (26HP Kohler with 50” Mower)
107.28790 (26HP Briggs & Stratton with 50” Mower)
QUICK
START GUIDE
HAVE QUESTIONS?
Do not return to store. We can help.
Call Customer Service Toll-Free
1-800-222-3136
Or visit our website www.craftsman.com
Items Included:
■ Operator’s Manual
■ Keys
Make sure you have all
items before assembly.
1
For Assembly You Will Need:
• Utility knife • Pry Bar • Tin Snips or Banding Cutter
• Unleaded fuel • 6-10 amp Battery Charger
• Tire Pressure Gauge
Figure 2
Figure 4
Figure 5
Fill-Up with FRESH Gasoline
• Lift the seat deck (A, Figure 4) to access the fuel cap and tank.
• Remove the fuel tank cap and fill the tank with fresh fuel (Figure 7).
After fueling, securely install the cap and wipe up any fuel that may
have spilled. See the Operator’s Manual for fuel recommendations.
The single most common service issue is stale or contaminated fuel!
Fuel should not be more than 30 days old. Use fuel stabilizer to extend
the life of your fuel, and always store fuel in an approved, sealed,
plastic gas can. Stale fuel clean-out is not covered under your warranty.
Fuel Tank Capacity: 3 Gallons (11.36L)
Start the Engine
The numbered steps below correspond to the numbered call-outs in
Figure 8 at left.
1. Sit in the seat.
2. Move ground speed levers to START/PARK positions (move both
levers out).
3. Turn mower blades to OFF (push switch down).
4. Move engine speed control to FAST position.
5. Pull choke knob up to CLOSED position.
6. Turn ignition switch to START to crank the engine.
7. After the engine starts:
-Release the ignition switch key (it will return to the RUN position).
-Push the choke knob down to OPEN position.
NOTE: Always set the engine speed to FAST for driving and mowing.
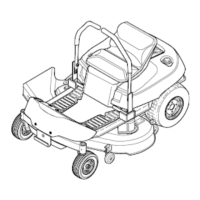
Drive the Unit Off the Crate
• Start the engine using the procedure above.
• Use the mower cutting height switch (Figure 1) to raise the mower
deck to its highest cutting height.
• Pull the ground speed control levers in to DRIVE positions
(Figure 8 inset) and slowly move them forward to drive the unit off
the crate. When you are off the crate, return the ground speed
control levers to their START/PARK positions (Figure 8).
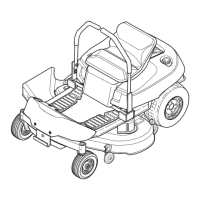
Mowing
• Read and understand mowing section of Operator’s Manual.
• Set the mower cutting height to the BEST CUT position found on the
mower cutting height indicator (A, Figure 9).
• Turn the mower blades on by pulling the mower blade switch
(3, Figure 8) UP.
• Pull the ground speed control levers in to DRIVE positions and
begin mowing.
Stopping the Rider and Engine
• Return the ground speed control levers to START/PARK positions
(Figure 8) to stop rider movement and engage the parking brake.
• Turn the mower blades OFF by pushing the mower blade switch
down to the OFF position (3, Figure 8).
• Turn the ignition switch (6, Figure 8) to OFF. Remove the key.
Figure 8
2
3
6
7
8
Figure 3
control and roll-overs.
on it.
• Avoid sudden turns.
• Go up and down slopes, not across.
all controls.
switches, etc.) in place and working.
• Remove objects that could be thrown by the blade.
placing hands or feet near blade(s).
set parking brake.
Rotating blades cut off arms and legs.
with the blades off. They may fall off or return
for another ride when you are not expecting it.
backing.
monoxide gas.
• Avoid inhaling exhaust fumes.
• Only operate outdoors.
Gasoline is flammable.
before refueling.
• Keep unit cleaned of debris.
before using this product.
10º Max.
10º Max.
A
Oil Capacity
26HP Briggs & Stratton:
2 Quarts (1.9L) with oil filter.
Oil Capacity
21HP Briggs & Stratton:
1.5 Quarts (1.42L) with oil filter.
Oil Capacity
26HP Kohler:
1.6 Quarts (1.5L) with oil filter.
B
A
A
B
A
B
9
10
Ground Speed Levers -
DRIVE START/PARK
Positions Positions
Charge the Battery
• Lift the seat deck (A, Figure 4) to access the battery. If the unit is being put
into service after the month and year indicated on the battery date tag
(located on top of battery) charge the battery for one hour at 6-10 amps.
Refer to the SERVICE & ADJUSTMENTS section of the operator’s manual
for battery charging information.
5
WARNING
Corrosion hazard.
Batteries contain acid. Always keep the battery upright and do not spill the
battery acid. Avoid contact with skin and eyes.
Explosion hazard.
Changing the battery produces explosive hydrogen gas. Only charge the
battery in a well ventilated area, away from any ignition source such as a
water heater, electric motor, or a lit cigarette.
Wear Protective Equipment
Always wear gloves and safety glasses when handling the battery and
battery cables.
A