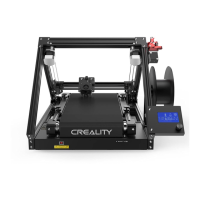
User Guide to CR-30 Landon Lemmons
User Guide for CR-30 3-D Printer:
Start-Up & Operation:
1. Power on printer by connecting power and flipping the power switch located directly
beside the power plug. Once the power switch is flipped to the on position the printer
will power on and you will be directed to the controller home screen.
2. The corresponding CR-30 Cura slicer software can be accessed on the Creality website.
This software is also downloaded on the computer which is directly beside the printer
itself. This software can be used to upload STL CAD files which all common CAD program
files can be converted into.
3. Before uploading any code or CAD model to the CR-30, make sure that the printer is
leveled and make sure that the nozzle tip has the desired clearance distance (Distance
from nozzle tip to Heat bed).
4. To level the print bed, the four adjustable knobs located under the conveyor print bed
can be adjusted by turning them all individually. The level located in the lab toolbox can
be used to guarantee the correct level.
5. To ensure that the nozzle is at an optimal distance from the heat bed, a piece of paper
can be used to determine the appropriate distance between the two. The paper should
be able to slide between the two objects, however there should be a minimal amount of
friction still present between them.
6. Any CAD model which is desired to be printed should be uploaded on the S-D card which
is plugged into the front base of the CR-30. The computer beside the printer can be used
to upload files directly to the S-D card.
7. To ensure a quality print, it is recommended to use the smallest print resolution as well
as use a low print speed. Also make sure to separate parts which are printed on the
same job, appropriately far apart inside of the Cura software.
8. Once the S-D card is plugged into the printer, the print control screen can be used to
navigate to the print from S-D card section. (Note that the printer will begin to preheat
based on print settings once powered on. This can be altered for better performance
based on print filament type and print speed settings.)
9. In the print from S-D section, look for the named file which you desire to print. Make
sure and verify the print name to lessen material waste.
10. Once the above steps have been completed you can begin the print. The base layer is
critical to observe to determine how well the part will print.
11. If the part needs to be cancelled, carefully navigate to the cancel, or stop part menu.
Based on the part defect select either option to safely stop the part print.