DO GUIDE
DO Complete the Installation
1. Once all connections have been made, use the six 4-40 x 1/4" screws to attach the MPC3-302 assembly to the mounting plate.
NOTE: The six 4-20 x 3/4" screws are used to attach the MPC3-302 assembly to the TTK-MP/MPC/IPAC enclosure. For more information, refer to
the TTK/MP/MPC/IPAC & SMK-MP/MPC/IPAC Installation Guide (Doc. 6782).
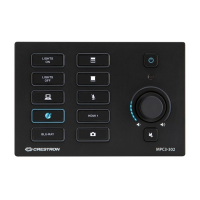
MPC3-302
3-Series
®
Media Presentation Controller 302
DO Attach the Mounting Plate
The Crestron
®
MPC3-302 3-Series
®
media presentation controller installs
into a 3-gang U.S. electrical box.
NOTE: The MPC3-302 may also be installed onto a tabletop or other at
surface using the TTK-MP/MPC/IPAC tabletop kit and the optional
SMK-MP/MPC/IPAC swivel mount kit. For more information and installation
instructions, refer to the TTK/MP/MPC/IPAC & SMK-MP/MPC/IPAC
Installation Guide (Doc. 6782) at www.crestron.com/manuals.
Use the four 6-32 x 1" screws to attach the MPC3-302 mounting plate to the
electrical box. Ensure that the mounting plate is level and ush against the
electrical box after installation.
DO Connect the Device
Route all necessary cables through the rear of the electrical box, and then
make connections to the MPC3-302 as shown in accompanying illustration.
NOTE: All cable connections must be made prior to attaching the
MPC3-302 assembly to the electrical box.
Observe the following when connecting the MPC3-302:
• Use Crestron power supplies for Crestron equipment.
• Power is supplied to the MPC3-302 over a single Ethernet cable.
A PoE+ (Power over Ethernet) power supply or a network switch
capable of PoE+ is recommended (both sold separately).
• The MPC3-302 must use PoE+ to supply power to a
Cresnet
®
network device via the NET connector.
• Ensure that the device is properly grounded by connecting the
chassis ground lug to an earth ground (building steel).
• Apply power after all connections have been made.
DO Check the Box
QUANTITY ITEM PART NUMBER
1 Bit, Torx
®
, T8, Security 2025915
1 Plate, Metal, Mounting, 6.5" x 4.3" x 1.5" 2049785
6 Screw, 4-20 x 3/4", Pan Head, Phillips, Thread Forming 2007140
6 Screw, 4-40 x 1/4", Pan Head, Phillips 2007156
4 Screw, 6-32 x 1", Pan Head, Phillips 2007251
1 Screw, Security, Torx 2051148
MPC3-302-B Only
10 Button Cap, Black 2049780
1 Button Cap, Mute, Black 2049784
1 Button Cap, Power, Black 2049782
1 Cover, Black 4527101
1 Labels, Sources, 30 Piece Set, Black 4527386
MPC3-302-W Only
10 Button Cap, White 2049779
1 Button Cap, Mute, White 4527719
1 Button Cap, Power, White 4527718
1 Cover, White 4527100
1 Labels, Sources, 30 Piece Set, White 4527385
Drywall
surface
3-gang U.S.
electrical box
Mounting
plate
Screw (4):
6-32 x 1"
I/O
LAN PoE
To any Cresnet
network device
10BASE-T / 100BASE-TX
Ethernet to LAN
IR:
To IRP2 emitter
or serial devices
RELAY:
To controllable
devices
COM:
To any
RS-232 device
I/O:
To digital or
analog devices
Ground
Screw (6):
4-40 x 1/4"
plate
MPC3-302
assembly