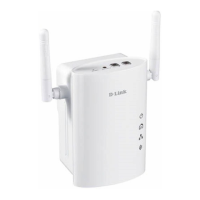
DHP-W306AV
Manual Setup (Wireless Settings)
One Touch AP Conguration (Wireless Settings)
Start Here
Quick Install Guide
2
After completing the Installation, verify
that the Power & the PowerLine LEDs
are lit. If not, insert into another outlet
and repeat Step 2 in the Installation
section.
4
Open a web browser and enter http://dlinkap in
the address eld.
©2011 D-Link Corporation/D-Link Systems, Inc. All rights reserved. D-Link and the D-Link logo are registered
trademarks of D-Link Corporation or its subsidiaries in the United States and/or other countries. Other
trademarks or registered trademarks are the property of their respective owners.
Maximum wireless signal rate derived from IEEE Standard 802.11g and 802.11n specications. Actual
data throughput will vary. Network conditions and environmental factors, including volume of network
trac, building materials and construction, and network overhead, lower actual data throughput rate.
Environmental conditions will adversely aect wireless signal range.
Product specications, size and shape are subject to change without notice, and actual product appearance
may dier from that depicted on the package. Visit dlink.com (US) or dlink.ca (Canada) for more details.
Installation Tips
Installation
3
U.S. and Canadian customers can contact D-Link technical support through our web site or by
phone. You can nd software updates and user documentation on the D-Link website as well
as frequently asked questions and answers to technical issues.
Before you contact technical support, please have the following ready:
• Model number of the product (e.g. DHP-W306)
• Hardware Revision (located on the label on the bottom of the product (e.g. rev A1))
• Serial Number (s/n number located on the label on the bottom of the product).
United States
Telephone: (877) 453-5465
Internet: http://support.dlink.com
Canada
Telephone: (800) 361-5265
Internet: http://support.dlink.ca
Technical Support
Version 1.2 (November 1, 2011)
1. For best results, use in a standard wall outlet without any other products plugged into the same
outlet. Connecting this product to a power strip or a surge protector may adversely aect the
performance of this product.
2. Avoid using the PowerLine adapters in an electrical outlet that is located near an appliance
that uses a lot of power such as a washer, dryer, refrigerator, microwave, hair dryer, or air
conditioning system.
3. Plug the PowerLine adapters in the same room in order to verify whether your home’s
electrical wiring is suitable. Once congured you may place the PowerLine adapters in the
location of your choice.
Start Here
Press and hold the WPS button on the DHP-W306AV
for 5 seconds. The WPS LED will blink.
2 31
Connect the DHP-W306AV to your computer with
an Ethernet cable. Verify that the Ethernet LED is
lit on the DHP-W306AV. This will indicated a good
connection.
1
Press the WPS button on your existing wireless
router or access point. The WPS LED will blink.
If any of the above items are missing, please contact your reseller.
One PowerLine AV
Wireless N Extender
One Ethernet Cable
CD-ROM with Manual and Utility
Power LED - A solid light indicates that the device is
receiving electrical power.
PowerLine LED- A solid light indicates that the device is
connected to the PowerLine Network.
LED Colors:
Green - Link rate/quality is the best.
Amber - Link rate/quality is better.
Red - Link rate/quality is good.
Ethernet LED - A solid light indicates that the Ethernet
port is linked and will blink during data transmission.
A solid light indicates that the wireless segment is ready.
This LED blinks during wireless data transmission.
DHP-W306AV
LEDs (from top to bottom)
PowerLine
AV
Wireless N Extender
Package Contents
Simple Connect Button
WPS/PowerLine LED
DHP-W306AV
PowerLine AV Adapter
Simple Connect Button
WPS Button
2
You must have at least one existing PowerLine
device for the DHP-W306AV to work. Plug the
DHP-W306AV into an AC wall outlet. Verify that
the Power LED is lit. If not, insert into another
outlet.
3
Once the Power LEDs stop blinking, verify that the
PowerLine LED is lit on both adapters. This indicates
that your adapters are properly connected to each
other. If the LED is not lit, insert the DHP-W306AV
into a dierent outlet and repeat step 2.
1
To secure your network, press the Simple
Connect button for 2 seconds on one of your
existing PowerLine devices. The Power LED will
start to blink. Then, within 2 minutes, press the
Simple Connect button on the DHP-W306AV for
2 seconds.
Room 1
Room 2
Room 1
Room 2
DHP-W306AV Existing PowerLine Device
Router Internet
DHP-W306AV Existing PowerLine Device
Simple Connect
Button
Simple Connect
Button
Internet
Router
DHP-W306AV
Existing PowerLine Device
Room 1
Room 2
Internet
Router
You may now attach Ethernet devices such as a
computer, game console, or media player via an
Ethernet cable. With the Ethernet device powered on,
verify that the Ethernet LED is lit on the DHP-W306AV
to indicate a good connection. Once the Setup
is complete, choose one of the sections below to
complete your Wireless Settings.
4
Room 1
Room 2
Router
Internet
Existing PowerLine Device
WPS Button
Once nished, your DHP-W306AV and your wireless router
will share the same wireless SSID encryption.
4
After completing the Installation, verify that
the Power & the PowerLine LEDs are lit. If not,
insert into another outlet and repeat Step 2 in
the Installation section.
Click Next and follow the on-screen instructions
to quickly congure your wireless settings for the
DHP-W306AV.

 Loading...