D-Link
DI-704 Quick Installation Guide
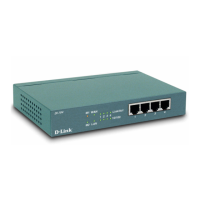
1. Hardware Installation
A. Setup LAN connection: connect an Ethernet cable (straight-through) from your
computer’s Ethernet port to one of the LAN ports of the DI-704.
B. Setup WAN connection: connect the network cable from your cable or DSL modem
to the WAN port of the DI-704. Use the cable that came with your Cable or DSL
modem. If you don’t see a link light on the WAN LED, try the other network cable.
C. Power on: connect the power cord to power inlet and turn the power switch on. The
DI-704 will automatically enter the self-test phase. When in the self-test phase, the
indicators M1 and M2 will be lit for about 5 seconds, and then M1 and M2 will flash
three times to indicate that the self-test operation has finished. Finally, the M1 will
flash continuously once per second to indicate that the DI-704 is in normal operation.
*If you are using PPPoE, begin Step 5.
If you are not using PPPoE, proceed to Step 2 below.
2. Find and Write Down Your Computer's Internet Settings
A. Open the Control Panel
B. Find and Double Click the Network Icon