Danfoss Heating
5
GB
5. Referring to the wiring diagrams on page 6-12, connect the unit
as shown.
6. The unit is supplied ready for use in systems having PUMPED
primaries. Should the unit be required for use in a system having
GRAVITY primaries, remove the small link located on the rear of
the unit. The link, which is clearly labelled can be found on the
bottom RIGHT hand side of the unit.
7. Ensure all dust and debris are cleared from the area.
8. Locate the module on the latches at the bottom of the wallplate
and hinge upwards to fully engage the unit connectors into the
wallplate. Tighten the two fi xing screws to secure the unit to the
wallplate.
9. Before setting the programme, check the unit and circuit. Switch
ON the mains supply and press both WATER & HEATING rocker
switches to the ON position - both red LED’s should now be
illuminated. Adjust any remote thermostat to check the services
operate correctly.
10. Then press both WATER and HEATING rocker switches to the OFF
position and check that both services do not operate.
11. Finally, press both WATER and HEATING rocker switches to
TIMED position prior to programming the unit.
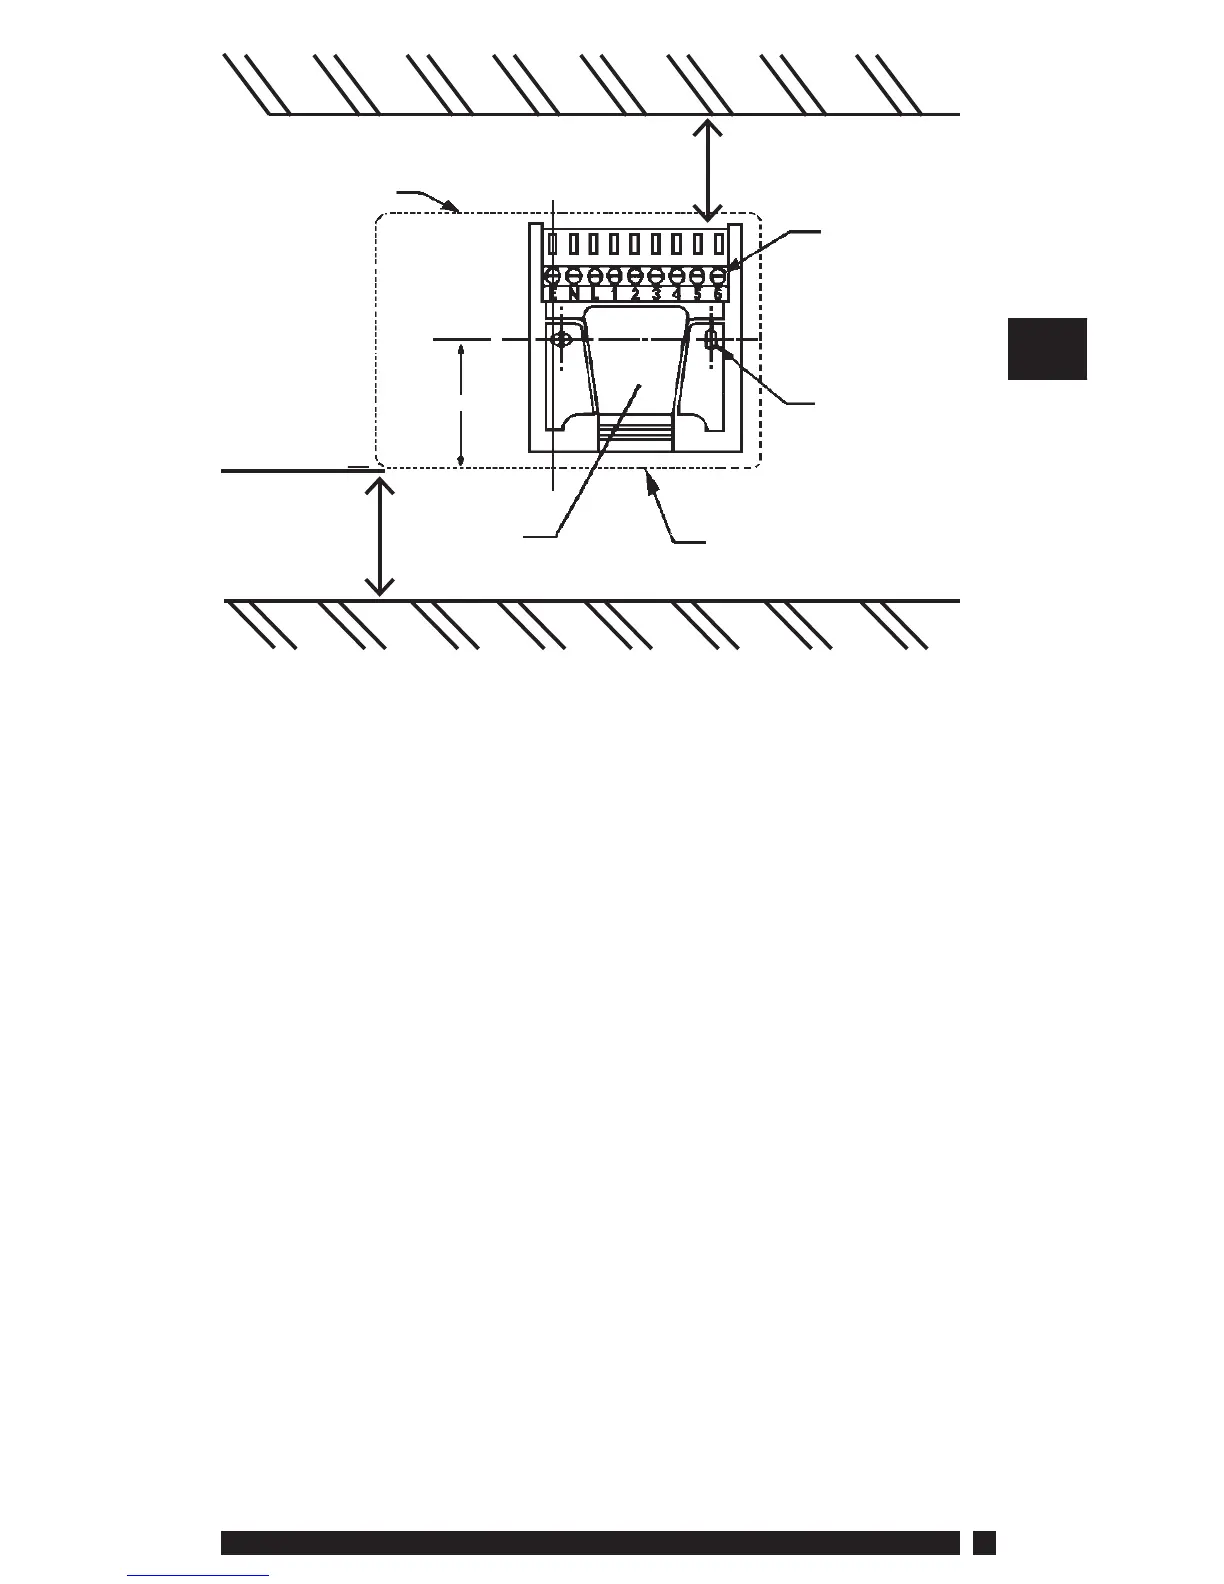
Leave at least
25mm below
product
Rear entry
cable access
Cable aperture
knockouts
Wall or
plasterbox
fi xing
Terminal
block
Outline of
programmer
Leave suffi cient space
for screwdriver access
C/L
 Loading...