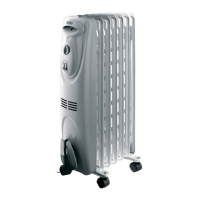
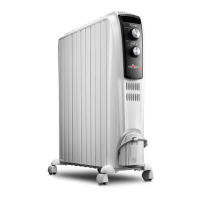
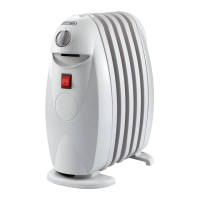
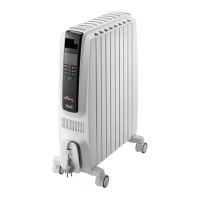
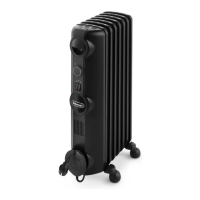
This document describes the DeLonghi KH770920/KH771220 oil-filled electric radiator, providing instructions for its setup, operation, and maintenance.
General Features
The radiator is designed for heating rooms and comes with various features for user convenience and safety. Upon unpacking, ensure the appliance and its power cable are free from damage. If any damage is found, do not operate the appliance.
Fitting the Feet
The radiator requires assembly of its feet and castors.
- Standard models: Remove the feet and castors from the packaging. Fit the castors onto the spindles of the feet and push firmly until they click into position (Figure 1). Verify each castor is securely fitted by pulling it. For some models, castors may be pre-mounted. Attach the feet to the bottom of the radiator, between the last two elements, using the threaded U-bolt and wing nuts, as shown in Figures 2, 3, and 4. Depending on the type (A or B), mount the feet as shown in Figure 5 or 6.
- Models with "Easy wheel" system: For these models, turn the radiator upside down on a rug or soft surface to protect the paint finish. Fully unfold the castors by turning them outwards (Figure 7). Then, return the radiator to its upright position.
- Important: During operation, the radiator must always be kept in a vertical position (wheels at the bottom, controls at the top). Any other position can be dangerous.
Electrical Connection
Before plugging in the radiator, check that the mains voltage matches the value indicated on the appliance's rating plate. Ensure the socket and power line are appropriately dimensioned. The radiator must only be connected to efficiently earthed sockets. This appliance complies with EEC Directive 89/336 and D.M. 476/92 regarding electromagnetic compatibility.
Instructions for Use
Switching on:
Plug the radiator into the mains socket. Turn the thermostat to its maximum setting. Switch on the radiator using the appropriate switch(es) as described below:
a) Models with single switch (1 power level):
- Pressing the "I" button: Total power on (indicator light on).
- Pressing the "O" button: Indicator light off.
b) Models with double switch (3 power levels):
- Pressing the "I" button: Minimum power (indicator light on).
- Pressing the "II" button: Intermediate power (indicator light on).
- Pressing both "I" and "II" buttons: Maximum power (both indicator lights on).
To turn off the appliance, switch off both switches or unplug it from the wall socket.
Adjusting the thermostat:
Once the room reaches the desired temperature, slowly turn the thermostat anticlockwise until the indicator light goes out (or a "click" is heard), and no further. The set temperature will then be automatically regulated and maintained by the thermostat.
Frost protection function:
With the thermostat set to the "*" position and the switches pressed, the appliance will maintain the room temperature at approximately 5°C, preventing freezing with minimal energy consumption.
c) Models with a 24-hour time-clock (Figure 8):
To program heating:
- Check the current time (e.g., 10:00 AM). Rotate the numbered timer disk clockwise until the number 10 aligns with the pointer "▲" on the timer.
- Set the desired operating periods by pushing the teeth inwards. Each tooth represents a 15-minute period. The visible sectors will correspond to the operating periods. Once set, the radiator will automatically operate daily during the programmed times.
- Important: The radiator must always be plugged into the socket for the timer to function.
- To change the programming, move the teeth back to their initial position (outwards) and set new operating periods.
- To operate the appliance without programming, push all the teeth into the center (outwards). In this case, to completely turn off the appliance, you must not only turn off the switches but also unplug it from the mains to prevent the timer from continuing to operate.
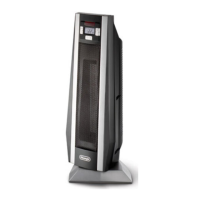
Turbo Heating:
Some models are equipped with a heating fan for faster room heating. To activate this function, push the button into the "fan" position.
- Important: A safety device will switch off the appliance if it overheats due to dust accumulation on the air intake and output grills. To restart, unplug the appliance, allow it to cool down, clean the air intake and output grills with a vacuum cleaner, then replug and turn it on again.
Maintenance
Before any maintenance, unplug the radiator from the mains and allow it to cool.
The oil-filled electric radiator requires no special maintenance. Dust can be removed with a soft, dry cloth. Never use abrasive powders or solvents. If necessary, use a vacuum cleaner to remove concentrated dirt.
- Never cover the appliance during operation as this will lead to dangerous overheating. If this recommendation is not followed, a safety device will turn off the radiator. Contact technical assistance to reset it.
- Never use the radiator near a bath, shower, basin, or swimming pool.
- Never use the radiator to dry damp garments.
- Never rest the power cable on hot elements.
- Use the radiator only in a vertical position.
- If the supply cord is damaged, it must be replaced by the manufacturer, its service agent, or similarly qualified persons to avoid a hazard.
- When using the radiator for the first time, operate it at maximum power for at least two hours. During this period, ventilate the room well to eliminate the "new" smell from the appliance.
- It is normal for the appliance to emit a squeaking noise when first turned on.
- The appliance must never be placed immediately under a fixed mains socket.
- This radiator is filled with a precise quantity of oil. Repairs requiring the appliance to be opened must be carried out exclusively by the manufacturer or an authorized service center. In case of oil leaks, contact the manufacturer or the authorized service center.
- When scrapping the appliance, respect legislation on oil disposal.
- Do not use the appliance in rooms with a base area of less than 4 m².