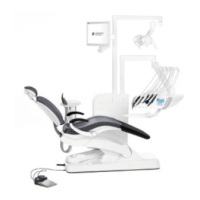
Intego Treatment center care and cleaning plan
A continuously updated list of approved care, cleaning, and disinfecting agents can be downloaded from the Dentsply Sirona internet website under REF 59 70 905:
www.dentsplysirona.com/manuals
Subject to technical changes and errors. Print no. D3543.104.01.06.02 Order no. 64 57 399 08.2018 Change no. 125 414
For more details, refer to the operating instructions.
The national requirements and recommendations for hygiene and disinfection must be observed (e.g. RKI, ADA, CDC etc).
After each patient
Clean/disinfect surfaces
CAUTION! Use only care, cleaning, and disin-
fecting agents approved by Dentsply Sirona!
• Disinfect surfaces and upholstery
• Disinfect user interfaces
• Care, disinfection/sterilization of treatment
instruments (see the operating instructions
of the respective treatment instruments)
• Clean and disinfect/sterilize the compo-
nents of the ApexLocator
• Disinfect instrument holders
• Disinfect handles
• Disinfecting the tray
• Disinfect connectors for suction hose
cleaning
• Maintain and clean the operating light (see
LEDlight, LEDlight Plus or LEDview Plus
operating instructions)
Clean/disinfect the water paths and
suction system
CAUTION! Use only care, cleaning, and disin-
fecting agents approved by Dentsply Sirona!
A) Clean the gold trap
CAUTION! Dispose of amalgam residues in
an environmentally correct manner!
B) Clean/disinfect the (removable) cuspidor
bowl (special cleaning agent))
C) Purge the instruments that were used
with the purge function or manually
D) Clean the suction hoses
NOTE: If no hose cleaning present, aspirate a
glass of cold water.
E) Sterilize suction handpieces
To prevent reflux, please use the suction
cannula with supplementary air intakes.
Weekly
Clean and care for upholstery
CAUTION! Use only cleaning and care
agents for upholstery approved by Dentsply
Sirona!
Follow the instructions for use of the
cleaning and care agents exactly.
Prevent agent FD360 from contacting
chrome-plated surfaces.
Cleaning the bottom surface of the
mount (A) for the backrest component
Clean the foot switch
Clean the underside of the foot switch with a
moist cloth (water).
TS dentist element
Change the cotton wool roll on the turbine
hose
CS dentist element
Change oil collector
Lubricating suction handpieces
Separate suction handpieces and grease the
O-rings after thermal disinfection or steriliza-
tion as well as once a week.
Daily
Disinfect the suction hoses using the
cleaning adapters (A)
• daily at noon and
• and at the end of the work day.
Purge water lines
Purge the tumbler, the 3-way syringes, and
the instrument water lines with the purge
function or manually.
• at the start of every work day
• at the end of the work day
Sterilize silicone mats and handle
covers
Thermally disinfect the tray and cup
holder
Disinfect dentist and assistant element
Empty the central suction sieve
Wear protective gloves when emptying the
central suction sieve!
Collect amalgam residues in a closed
container with water.
CAUTION! Dispose of amalgam residues in
an environmentally correct manner.
Clean emptied suction sieve under running
water.
Monthly or as required
Clean the filter insert of the standard wet
suction
On the Start screen, press the "Extract
residual water" button before removing the
filter for cleaning.
Emptying the collector of the air jet
pump
Change filter (C) for water (A) and air
(B)
Empty the sediment tank (D) (optional)
Wear protective gloves when emptying the
sediment tank!
Microbiological water test
• At regular intervals according to results
and
• after periods of disuse > 1 week.
Sanitize the treatment center
1. Set maximum water flow on the instru-
ments
2. Place tumbler under the tumbler outlet
3. Switch to fresh water bottle
4. Fill the disinfectant for disinfecting the
water lines into fresh water bottle
5. Starting sanitation
6. Treating the water lines with the disinfec-
tant for disinfecting the water lines
7. Allow 24 hours reaction time
8. Purging water lines with water
9. Cleaning the suction hoses
Replace amalgam rotor
IMPORTANT! The rotor must be replaced
after 12 months at the latest!
1. "Amalg" appears on the user interface.
Conduct disinfection.
2. Only with the unit switched on: remove
amalgam rotor.
3. Fill in collected amalgam residues, close
amalgam rotor.
4. Remove amalgam rotor from lower part
and dispose of in an environmentally
correct manner.

 Loading...