[page 16] | gpelectric.com
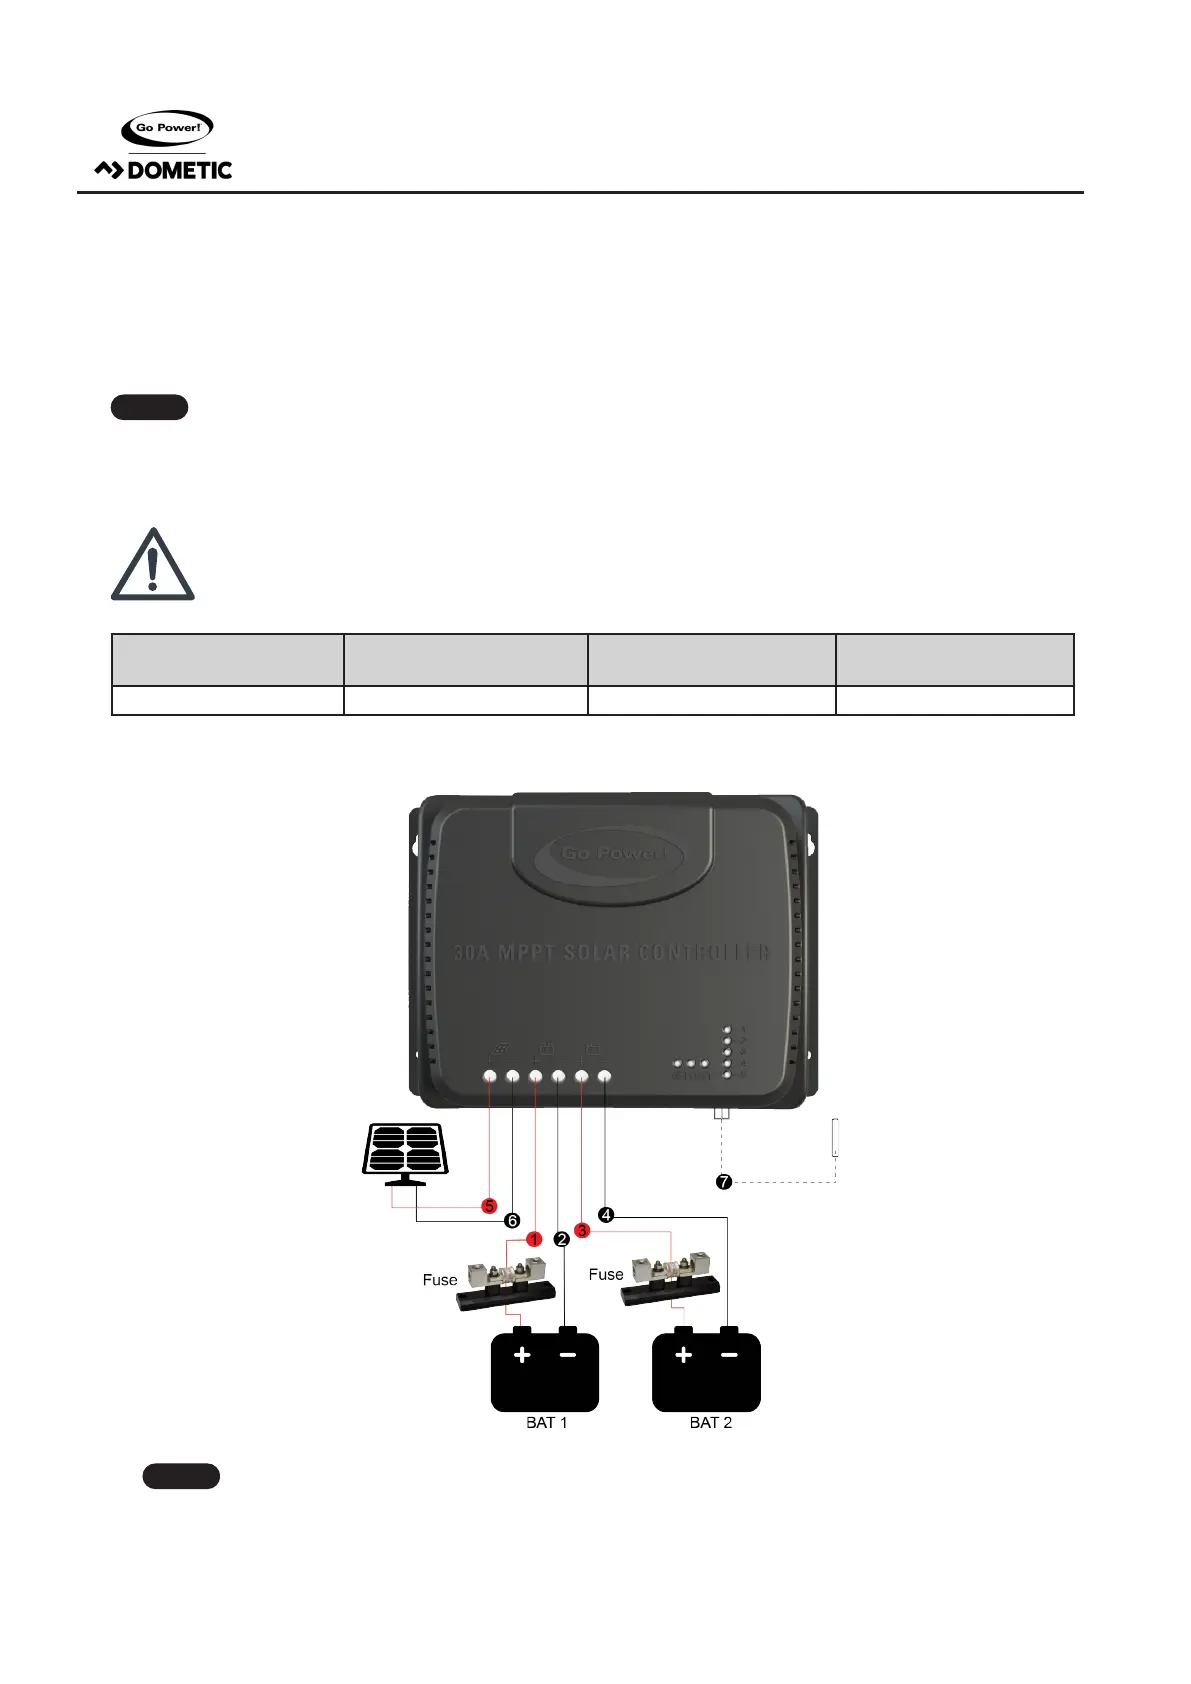
STEP 4: WIRING
Wiring and installation must comply with national and local electrical code requirements.
The wire from the solar array most commonly enters the RV through the fridge vent on the roof or by using the Go Power! Cable
Entry Plate (sold separately) that allows installers to run wires through any part of the roof. PV connections should connect directly
to the controller.
Positive and negative battery connections must connect directly from the controller to the batteries and
positive and negative PV connections must connect directly from the solar array to the controller. Wires that
are as short as possible and adequately sized (see table below) should always be used. Use of a positive
and/or negative distribution bus that is properly sized is recommended between the controller and battery –
do not stack wires on the battery terminals.
Warning: Danger, Electric shock hazards! We strongly recommend connect a fuse or circuit breaker to the
PV array and battery terminals to prevent electric shock hazards during wiring or error operation, and make
sure that fuse or circuit breaker is disconnected before wiring.
PV MAX INPUT CURRENT
PV WIRE DIAMETER
(MM2/AWG)
RATED CHARGE CURRENT
BATTERY WIRE DIAMETER
(MM2/AWG)
30A 8/8 30A 8/8
We recommend the wiring sequence shown below.
1.
The battery fuse should be installed as close as possible to the battery terminal. The recommended distance
is not more than 150mm.
2. The battery temperature will read 25°C (xed value) when the controller is not connected
to a remote temperature sensor.
Note
Note
INSTALLATION

 Loading...