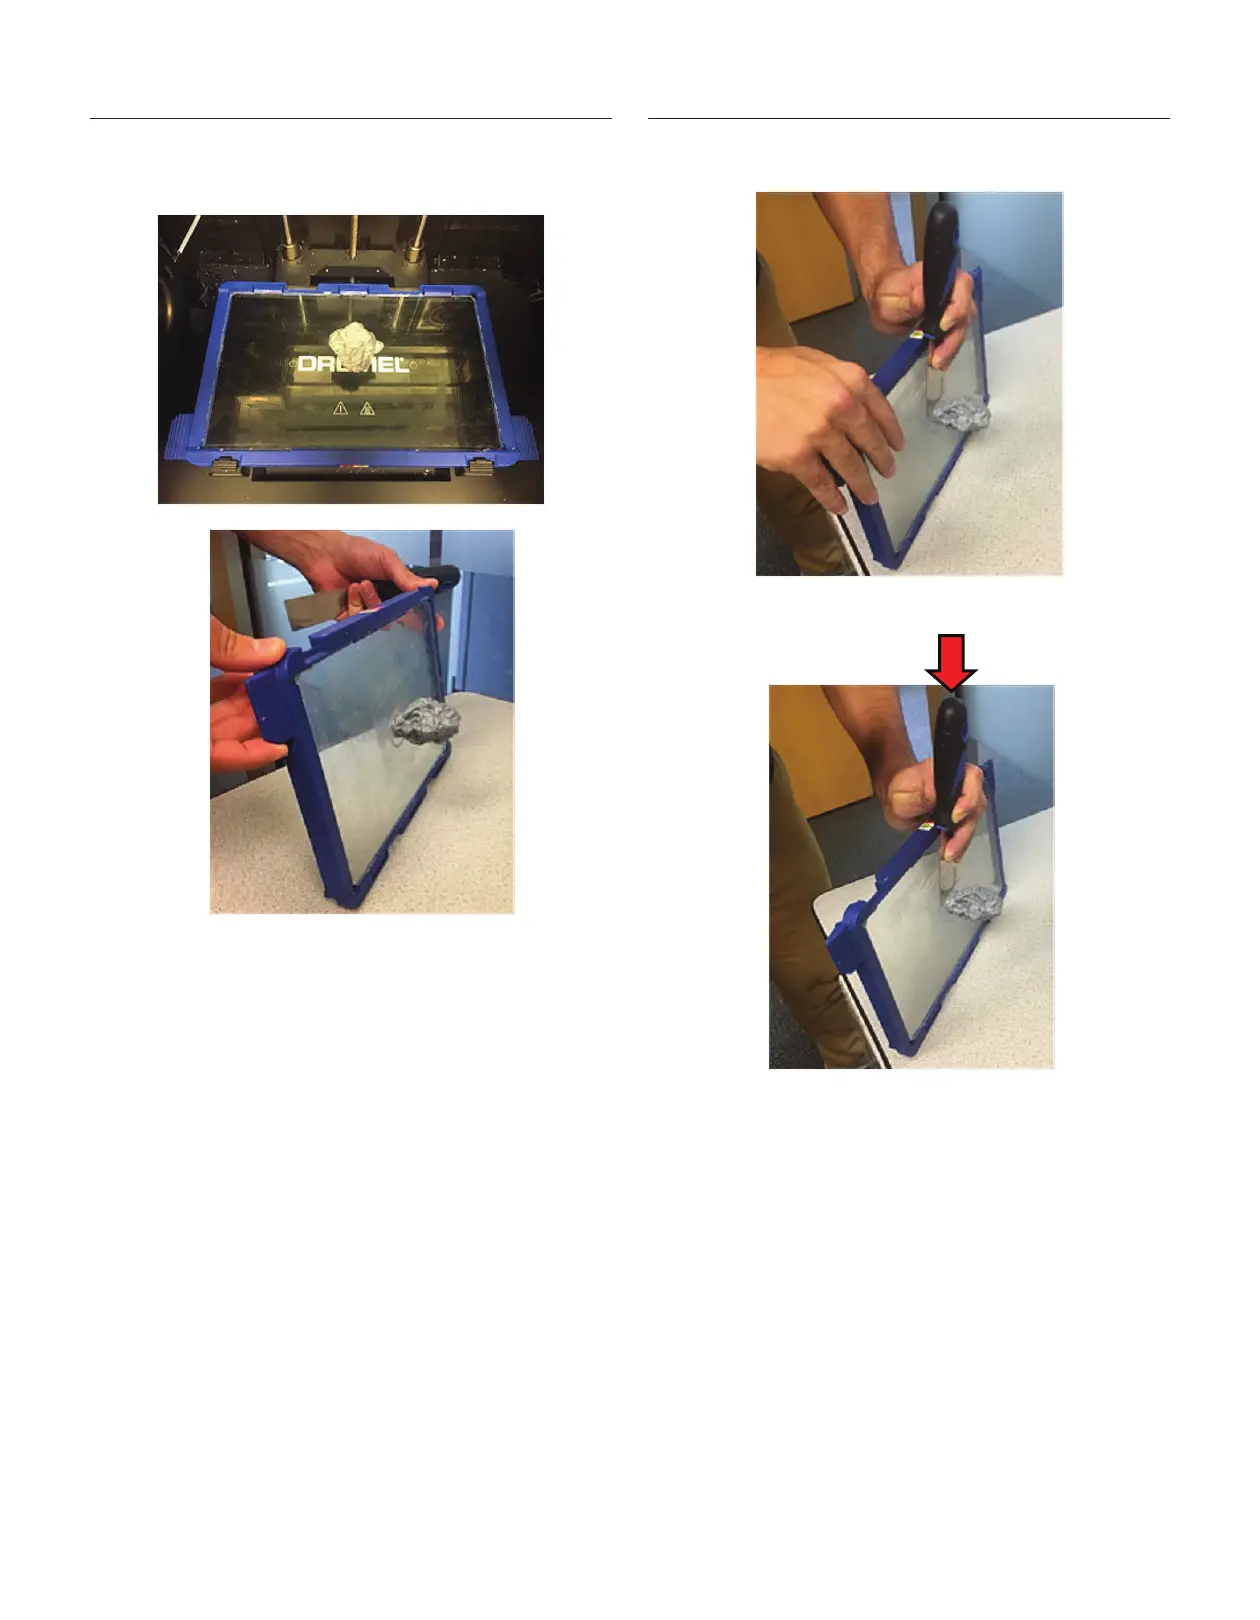
Step 2: Remove build plate from printer
a. Remove the build plate from the printer using the tabs on
right and left side of build plate (shown in picture 1). Place
i
t vertically against a sturdy surface (shown in picture 2).
b. Ensure the build plate is well secure and will not slip once
object removal tool is being used.
Step 3: Remove the printed part
a. Place the tip of the object removal tool where the print is
attached to the build plate (shown in the figure below).
b. Give a firm bump on the top part of the object removal tool
(see red arrow).
c. Repeat this process if needed until the part detaches from
the build plate.
Congratulations!
You are now ready to build. Build On.
2610038113 08/2018
1.
2.

 Loading...