4 / 6
EN Installation and configuration manual
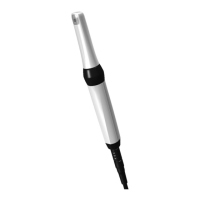
VistaCam iX
Only trained experts may position and install the appliance and start it
up for the first time.
Minimum system requirements
Imaging program VistaSoft, VistaConnect, DBSWIN or VistaEasy by
Dürr Dental
Third-party software on request
Computer system See "System requirements for computer systems for
imaging" (9000-618-148/01)
5
1 Connection to computer
The USB connecting cable for the connection to the computer is included
in the delivery contents. When the power supplied using a cable alone is
insufficient then the USB-connecting cable with power unit (order number
2108-150-52) or an active USB-Hub should be used.
To extend the cable to 10 m, you need:
- active Hub (no need for USB connection cable with power supply)
- USB repeater 4,8 m (Order-No. 2106-155-63)
- USB extension cord, max. 2,5 m
Where a Tower or Desktop-PC is being used then always use one
of the USB-connections at the back of the PC. Do not connect the
camera to a front USB-connection.
2 VistaSoft/VistaConnect
2.1 Installation
VistaSoft
The camera can be used directly after connection. The installation of a unit
driver is not necessary.
VistaConnect
i Start driver installation under Start > All programs > Duerr Dental >
Driver Setup > Install Dürr Dental drivers.
i Select the required language.
The Dürr Dental Driver Setup installation wizard opens.
i Follow the instructions of the installation wizard.
2.2 Configuration
The camera is preconfigured in the imaging software and can be used
directly.
Setting-up the unit
The unit settings are only available for units with firmware version
1.9 and higher (from serial number C001929; update firmware if
necessary).
Acquisition settings
Camera triggering Time at which the still image is created if the
capture ring is pressed:
– Focus and capture on pressing
– Focus and capture on release
Standby settings
Standby time Time until automatic switch-off if the camera is
not moved.
Preset: 2 minutes (120 seconds)
i Click on
Units [Geräte].
i Working in the list, click on the unit VistaCam iX.
i Click Configure [Konfigurieren].
i Click
Unit settings.
i Select „Settings“.
i Close Flyout to save the changes.
Test camera
You can test the function of the capture ring and the recognition of the
interchangeable head.
i Click on
Units [Geräte].
i Working in the list, click on the unit VistaCam iX.
i Click Configure [Konfigurieren].
i Click on
Maintenance.
i Click on Capture ring.
The option box is filled if the software recognises that the capture ring has
been pressed.
i Click on Camera head.
i The option box is filled if the software recognises that the interchangeable
head has been placed on.
3 DBSWIN/VistaEasy
3.1 Installation
• Close all programs.
• Insert the supplied DBSWIN DVD (from Version 5.2) into the DVD drive.
The start screen appears.
• If the DVD does not start to play automatically, execute the file
CD_Start.exe.
• Select the required language.
• Open the Driver tab.
• Click Duerr Dental Driver Installation.
DÜRR DENTAL AG
Höpfigheimer Strasse 17
74321 Bietigheim-Bissingen, Germany
9000-618-179/01
2016/11/14