IM02602002E
www.eaton.com Page 12-1
MP-3000
This section is designed to assist maintenance personnel in carry-
ing out troubleshooting procedures. It gives three general areas of
information:
• Operator Panel monitoring procedures (Subsection 12.1)
• Troubleshooting monitored equipment (Subsection 12.2)
• Troubleshooting the MP-3000 (Subsection 12.3)
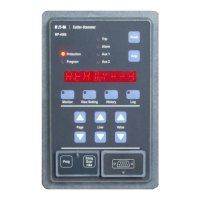
The Operator Panel performs the following operations:
• Reporting of system status messages (Subsection 12.1.1)
• Programming setting values (Subsection 12.1.2)
• Reviewing setting values (Subsection 12.1.3)
• Monitoring motor operating parameters (Subsection 12.1.4)
• Retrieving motor history data (Subsection 12.1.5)
• Retrieving the logs of motor events (Subsection 12.1.6)
Viewing the motor starting current prole (Subsection 12.1.7) is avail-
able only through PowerNet and not on the front panel.
The Display Window provides a reporting function during the normal
operation of the MP-3000 with the Default Mode display. This group
of messages is referred to as the system status messages. Table 4.1
lists the normal operation reporting messages.
The Operator Panel is used to enter setting values. Refer to Section 5
for a detailed procedure for entering or modifying setting values.
Of the 152 settings that actually congure MP-3000 functions, 141 can
be reviewed at any time, even with the motor running. Press the View
Setting mode pushbutton, and navigate through the settings in the
same way as in the Program mode. Table 4.3 lists the settings. The
View Setting mode does not allow any changes.
To check settings of the real-time clock, use the MONT TIM page of the
Monitor mode.
The Monitor mode allows maintenance personnel or operators to ob-
serve motor operating conditions, including phase currents, unbalance,
motor temperatures, thermal-model bucket level, and time limits on
restarting imposed by jogging functions. Refer to Table 4.2 for a listing
and description of these parameters. Note that the software version
number appears in this mode.
Press the History mode pushbutton. Refer to Table 4.4 for the four
pages of information available for review in the History mode, includ-
ing the numbers of each of the different types of trips and alarms, and
the highest currents and temperatures with time tags. The accumula-
tion of these historical values can be selectively cleared and restarted
using settings P14L1 to P14L4 in the Program mode. Refer to Section
5.14.
Press the Log mode pushbutton. Pages include a log book of the last
100 events, a log of the last 20 abnormal events with more details,
and a detailed log of the last four starts. The MP-3000 logs motor
events in chronological order with details and time tag as listed in
Table 4.5.
One particular logging function, the starting current prole display,
cannot be viewed on the MP-3000 front panel. The prole data must
be uploaded via data communications to a PowerNet host computer
after the start. PowerNet provides an informative plot of the actual
starting current curve, plotted along with the cold-start protection limit
curve, for checking of coordination. See Figure 2.1 for an example.
The MP-3000 stores the proles for the last four starts. See the Pow-
erNet Help function or the User’s Manual for instructions on viewing
the prole. Refer to Section 10 for information on connecting data
communications to the MP-3000.
If the monitored equipment malfunctions, certain troubleshooting
information from the MP-3000 assists in localizing the problem. The
description is given in two categories—alarm conditions (Subsec-
tion 12.2.1) and trip conditions (Subsection 12.2.2).
-
An alarm condition occurs when one of the electrical characteristics
exceeds its programmed setting value. Start delays, and run or pickup
delays, must expire before the alarm occurs. The red alarm LED lights
and a message appears in the display window to assist with the isola-
tion process. Multiple alarms are alternated or cycled in the display.
Connect external devices, such as an annunciator, to the Alarm relay
of the MP-3000, to get the attention of operators who can act to solve
the problem. The form C alarm relay contacts are brought out to
terminals 17, 18, and 19. See Figure 6.5.
Setting Page 8, settings P8L1 to P8L22, permits the selection of the
alarm or trip events that will operate the alarm relay. Normally, the
User should direct all alarms of functions in use to the alarm relay by
these settings.
The alarm relay should be used in Mode 2, and all alarm conditions
should be directed to it.
The annunciator connects to terminals 17 and 18. With this connec-
tion, an alarm occurs if the relay or its power supply fails. All other
problems that the MP-3000 can actively report are alarmed in the
same manner.
 Loading...