GB
- 10 -
Fitting the lower push bars (see Fig. 5)
•
Slide the lower push bars (Fig. 5/Item 6) onto
the push bar brackets.
•
Screw the tubes together, using the screws
supplied (Fig. 5/Item 13).
There are 3 assembly holes so that the height
of the push bar can be adjusted to specifi c user
requirements at any time. Use the hole which is
best suited for you, making sure that you use the
same hole on both sides.
Fitting the upper push bar (see Figs. 6-8)
•
Position the upper push bar (Fig. 1/Item 5)
such that its holes line up with the holes of the
lower bar.
•
Screw the tubes together, using the screws
supplied (Fig. 2/Item 13).
•
Remove the screws (Fig. 7/Item A) and take
off the cover (Fig. 7/Item B).
•
Fit the switch box in the holes provided on
the right-hand side of the push bar and screw
back in place again with the cover (Fig. 8/Item
B) and the screws (Fig. 8/Item A).
•
Use the cable clips (Fig. 9a/9b) to attach the
power cable to the tubes of the push bars so
that it is possible to open and shut the ejector
flap.
•
You can use one of the two cable clips (Fig.
9b/Item 12) to keep the hexagon key (Fig.
9b/Item A) which is needed for changing the
roller.
Please ensure that the ejector fl ap can be opened
and closed easily!
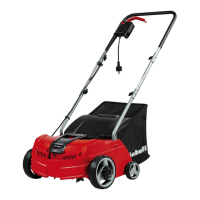
Assembling the grass basket
(see Figs. 10)
•
To hang the grass basket on the scarifier you
must lift the ejector flap (Fig.10/Item 10) with
one hand and with the other hand take hold of
the grass bag by the handle and hook it onto
the scarifier from above (Fig.10).
Danger!
Before you ever hook the grass basket to the sca-
rifi er you must ensure that the motor is switched
off and the cutting unit is not rotating.
Adjusting the scarifi er depth (see Fig. 11)
The scarifi er depth is adjusted at both front
wheels via the adjustment mechanism. For this,
pull out the adjusting screw and turn the wheel to
the left or right into one of the available positions
(0/I/II/III).
The scarifi er depth must always be identically set
on both sides!
0 = drive/transport position
I = scarifi er depth 3 mm
II = scarifi er depth 7 mm
III = scarifi er depth 9 mm
Electrical connection
The equipment can be connected to any normal
socket with 230V AC. It is only acceptable to con-
nect it to a shockproof socket with a 16A circuit
breaker. Furthermore, a residual-current-operated
protective device with max. 30 mA should be con-
nected upstream.
Power cable
Please only use power cables that are not dama-
ged. The total length of the power cable should
not exceed 50 meters; going beyond this distance
will reduce the power output of the electric motor.
The power cable must have a cross-section of 3 x
1.5 mm2. The insulating sheath of scarifi er power
cables is frequently damaged.
Some of the causes for this are:
•
Cracking from running over the cable
•
Pinching when the power cable is dragging
under doors and pulled through windows
•
Cracking due to old age of the insulation
•
Kinking by improperly fastening or guiding the
power cable
The power cables must, at the very minimum, be
of type HO5RN-F and 3-stranded. The cable type
must be printed somewhere on the power cable.
Only purchase power cables that are marked as
such! Plugs and socket couplers for the power
cables must be made from rubber and be splash-
proof. There is a limit to how long power cables
can be. Longer power cables require larger con-
ductor cross-sections. Power cables and connec-
ting lines must be regularly checked for damage.
Ensure that the lines are de-energized before
checking them. Completely unwind the power
cable. Also check power cable entry points, plugs
and socket couplers for kinks.
Anl_GC_SA_1231_1_EX_UK_SPK7.indb 10Anl_GC_SA_1231_1_EX_UK_SPK7.indb 10 24.08.2023 10:54:1124.08.2023 10:54:11
 Loading...