LI MIT ED WARR ANTY
Emerson Radio Corp. warrants manufacturing defects in original material, including
original par ts an d wor kmanship, under norm al us e and conditions, for a period of
nin e ty (9 0 ) day s fro m the d ate o f orig i nal p urch a se in the U . S. With y our d a ted
proof of purcha se, we will provi de repa ir serv ice at no charge for lab or and part s,
or repla c e t h e product a t o u r d iscretion. Fo r r e pair or repl a c e m e n t, pack your
unit in a p a d d e d box, enc l o s e y our check or m o n e y order pay a b l e t o Emerson
Radio Co r p . i n the amount o f $ 9 . 0 0 to cover shi p p i n g and handlin g c o s t s, and
enclosed a copy of your proof of purchase. Send your unit to:
Emerson Returns Facility
11500 Philadelphia ST
Mira L oma, CA 91752
ATTN: Returns Department
This warranty does not cover damage from negligence, misuse, abuse, accident,
failure to follow operating instructions, commercial use, rental, repairs by an
unauthorized facility, or products purchased, used, serviced or damaged outside
of the United States.
THIS WARRANTY GIVES YOU SPECIFIC LEGAL RIGHTS, AND YOU MAY
ALSO HAVE OTHER RIGHTS WHICH VARY FROM STATE TO STATE.
AU 89 8N
• it shows “1-7”, the Everyday mode is selected.
• If it shows “1-5”, the Weekdays only mode is selected .
• If it shows “6-7”, the Weekends only mode is selected.
To chan ge t he Ala rm M ode sett ing for Al arm 1, h old the AL ARM 1 se ttin g bu tton
an d p ress the ALA RM MO DE butto n u ntil the DAY O F WEE K i ndica tor s sho w t he
des ired mod e se ttin g, W eek d ays onl y, We eken ds o nly, o r E v ery d ay o per a tio n .
Rele a s e the ALAR M M ODE a n d AL A R M 1 s e t t ing b u t t ons a n d the d i s p lay wi l l
return to the correct time.
Follow the same procedure to select the desired Alarm Mode for Alarm 2 if necessary.
Wh ene ver y ou want to check th e wak e u p tim e o r the al arm m ode sett ing s, si mpl y
pre ss e ithe r th e A LAR M 1 o r A L ARM 2 se ttin g bu tton s. The disp lay will cha nge
fr om corre ct time to wake up time and the DAY OF W EEK indi cat ors w ill show yo u
the alarm mode which is currently selected.
Release the ALARM 1 or ALARM 2 setting buttons to return to correct time.
1.) Pr ess the RAD IO ON /OF F but ton to t urn the rad io 'O n'. T he frequ enc y of the
tuning frequency will show for a few seconds on the display.
2.) Set the BAND by pressing button to AM or FM as the desired, it toggles
each time you press the button.
3.) Set the VOLUME by pressing or to a level that is neither
too high nor too inaudible.
4.) Select your desired station with the TUNING control.
a) Pr ess or sli ghtl y, th e re c eiv i ng f req u enc y wi l l i n cre m ent or
decrement by one step.
b) P ress and hold or for one sec ond t hen rele ase , Au to Stati on
Seeking will be engaged, the receiving frequency will increment or decrement
automatically until a station with acceptable reception is found.
5.) Adjust the VOLUME control to the desired setting.
6.) Wh en you a re finis hed list eni ng, p res s the RA DIO O N/O FF bu tto n to tur n the
radio 'Off'.
When you have a few favorite radio stations to listen to,you may like to save them,
and pick one out of them in a few seconds without needing to search it each time.
Our digital tuning technology allows you to do this easily by following the following
steps:
BAND
BAND
VOLUME + VOLUME -
TUN E + T U NE -
TU NE + T UNE -
1.) Make sure the radio is ON and the AM/FM band is selected.
2.) Tun e to t he d es ired station by the TUNING control as described.
3.) Press , "P XX" blinks, indicating the memory location to store the
currently listening station.
4.) While "P XX" is blinking, press or can change the memory
lo cat ion from 1 thr oug h 10. For e.g . , " P 0 3" me ans the cur ren t l isten ing
station is about to stored into the 3rd location of the memory.
5.) After deciding the memory location, press again, the currently listening
station is stored.
6.) The display will turn to the frequency of the stations afterwards, and after
a few seconds, the correct time shows.
1.) Make sure the radio is ON and the AM/FM band is selected.
2.) Press MEMORY , "P XX" shows on the display, and the station according to the
memory location is tuned.
3.) While "P XX" is showing on the display, press or can change
the memory location from 1 through 10, and the station stored in the location
is tuned once the location is changed to.
4.) The display will turn to the frequency of the stations afterwards, and after a
few seconds, the correct time shows.
AM - The AM bar antenna is inside the cabinet. If AM reception is weak, change
the position of cabinet until the internal antenna picks up the strongest signal.
FM - The FM antenna is built in to the Line cord connecting the AC adapter.
If FM reception is weak try Varying the position and direction of the Line cord
until you find the strongest signal.
" •
STORE
TUNE + TUNE –
STORE
TUNE + TUNE –
NOTE: Alarm 1 and Ala rm 2 h av e different buzzer sounds.
• Alarm l is a Single beep" sound. Alarm 2 is a "Double beep" sound.
You w ill be a ble to t ell whic h al arm is g oing off by the soun d th at i t ma kes.
1 .) R econ firm the wak e up tim e an d al arm mode set ting s fo r th e al arm you are
using, Alarm 1 , Alarm 2, or both alarms.
2.) Press ALARM 1 or ALARM 2 button slightly, and repeat doing so if necessary,
until ALARM 1 "BUZZER" or ALARM 2 "BUZZER" indicator is lit on the display.
3.) At the sel ecte d wa ke u p ti me t he b uzze r wi ll s ound . It w ill cont inu e for on e
ho ur an d then shut off au to ma ti ca ll y.
4.) To stop th e buz zer soon er, pre ss th e R ADIO ON/ OFF b utt on. T he bu zze r wil l
st op but t he alarm re mains se t and wi ll tu rn the b uzz er on ag ain a t t he sa me
time on the following day (depending on the Alarm Mode setting).
5.) If you do n ot w ant the alar m to tur n th e ra dio on t he f ollo wing day, pre s s t h e
appropriate ALARM button until the ALARM indicator on the display is OFF.
.) Press the SLEEP button.The display will briefly
show "10" and the radio will begin to play.
After 10 minutes countdown the radio will shut
of f aut oma tical ly. Ea ch time you press t he SLEEP button the slee p t imer wil l
start at 10 minutes. This is the sleep timer default setting.
2.) To i n c rease o r decr e a s e the a m ount o f time t h a t the r a dio w i l l play b e fore
sh utt ing o ff, h old the SLE EP bu tto n and pr ess e ith er th e S ET + or - but ton to
change the display to the desired sleep time, up to a maximum of "90" minutes
or a minimum of "02" minutes.
NOTE: When you change the sleep timer from the 10 minute default setting to a
di ffe rent set ting, th e new se tting be comes th e def aul t set tin g. Wh ene ver y ou
activate the sleep timer it will begin with your new default setting and count down
to zero from t ha t po in t.
3.) To canc el the s lee p tim er befor e i t cou nts down to '00' an d shu t t he ra dio 'Off '
immediately, press the SNOOZE/SLEEP OF F Ba r.
You may also set one alarm for wake to RADIO and the other for wake to BUZZER.
Just press the ALARM 1 and ALARM 2 buttons to the desired status as shown on the
ALARM indicators.
Af ter the ala rm tu rns 'On' in the mor ning you can SNO OZE/S LEE P OFF butt on on
the top cabinet for a few extra minutes sleep. The corresponding ALARM indicator
will flash. The alarm will stop for approximately 9 minutes and then comes 'On' again.
The Snooze operation may be repeated several times if desired but after one hour
the alarm will not come on again.
You can program the sleep timer to play the radio for up to 90 minutes and then shut
'Off' automatically.
1
If t h e cabin e t becom e s dusty, w i p e it w i t h a so f t cloth . I f the c a binet b e comes
smudged or dirty, clean it with a soft, slightly dampened cloth .
N e v e r al l o w w a t e r o r a n y li q u i d to g e t i ns id e t h e c a b i ne t. N e v er u s e a n y
ab ras ive c lea ners or clean ing pads as thes e w ill d ama ge th e f inish of your ra dio .
• Dispose of the old battery properly. D o n o t l e a v e i t l y i n g a r o u n d w h e r e a
youn g c hild o r pet c o u l d pla y w ith , o r swall o w it. I f t he ba t t e ry is s w allow e d .
contact a physician immediately.
B a t t e r y m a y e x pl o d e i f m i s t r e a t e d . D o n o t a t te m p t t o r e ch a r ge i t o r
disassemble it. Do not dispose of the old battery in a fire.
•
CARE AND MAINTENANCE
su ppl ying pow er to th e Sma rtS et com puter me mory. Onc e you pl ug th e r adio in,
your household outlet supplies the power, and the battery is not being used. A fresh
lithium battery can supply power to the SmartSet computer for at least 3 years even
if it is never connected to an AC power supply. If your clock radio was connected to
your AC supply within a few months after it was manufactured, and you experience
only the normal, nuisance type, short duration power interruptions, your battery may
last for up to 5 years or even longer.
When the battery power drops below a certain level,the LOW BATT.indicator
will 'Flash'. When you see this indicator, you should change the battery as soon as
it is convenient for you to do so. To change the battery proceed as follows:
1.) Pu rch ase a re place men t 3V lit hium bat tery whe rever ba tteri es are s old . Th e
battery type is CR2032 or equivalent.
2.) Remove the battery from its package so it is ready to install.
If yo u do not chan ge the b uil t in lit hium bat tery wit hin a re asona ble peri od of time
after you see the warning indicator, the lithium battery may become exhausted
a n d w il l n o l on g er b e a bl e t o s up p ly b a ck u p p ow e r t o t he S m ar t Se t
in ter nal c omp uter. If the unit is disc onn ected fr om th e AC ou tlet aft er th e b atter y
is ex haust ed or if a power in terru pti on oc cur s, th e S martS et mem ory will be lost
and the clock will need to be reset when the power is restored.
Be su re to in stall a fresh li thium ba ttery be fore you rese t t he cl ock , oth erw ise t he
clock will need to be reset each time the power is interrupted.
The initial default setting is "12:00 AM, Sunday , January 1st (1. 1), 2012".
If yo u not ice that th e tim e o n you r S martS et clo ck radio is comp let ely i nco rrect ,
and the DAY OF WEEK indicator is also wrong, press the MONTH/DATE button to
see the date.
If the date display is showing "1. 1 " (January 1st),
you p r o bably e x perie n c e d a t o t a l mem o r y loss .
To reset the clock after a total memory loss, proceed
as follows:
1 .) Follow the instructions on page 10,11 and install a new CR2032 lithium battery
in the battery compartment.
2.) Connect the radio to your AC outlet and let the clock set itself.
3.) Depress the MONTH/DATE and TIME buttons together. The display will change
from 'Tim e' t o 'Year'.
While holding in the MONTH/DAT E a n d T I M E b u t t o n s , p r e s s t h e S E T +
button to set the display to the correct year, then release the buttons.
4.) Depress the MONTH/DAT E b u t t o n . T h e d i s p l a y w i l l c h a n g e f r o m ' Time'
to 'Month/Date' (MM/DD).
While holding in the MONTH/DATE button, press the SET + button to set the display
to the correct Month and Date. The DAY OF WEEK indicator will change automatically
as you adjust the Month/Date settings. When the correct Month and Date appear
on the display, release the buttons.
5.) Depr ess the TIM E but ton and the SET + b utton to set the disp lay to t he corre ct
Time. Be sure to conf irm that you hav e se t th e ti me c orre ctly to 'AM' or 'PM'
b y ob se rv in g th e AM i nd ic at or.
6.) After you set the Time, rec onfi rm t hat the Day, a nd M ont h /Da t e d i spl a ys a re
s till correct. Make final adjustments if necessary.
The SmartSet clock memory is now reset and the new lithium battery will maintain
it for the next 5 t o 8 year s, d epen ding on the numb er a nd d urat ion of t he p ower
ou tag es you experience.
After resetting the clock, don't forget to reset your wake up times and alarm
mode settings, and sleep timer settings as well.
8
10
12 14
9
11
13 15
CR2032
POSITIVE(+)
The Serial Number can be found on the bottom cabinet. We suggest that you record
the Serial Number of your unit in the space below for future reference.
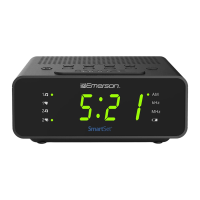
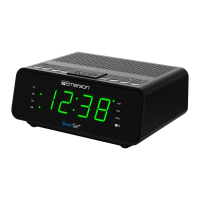
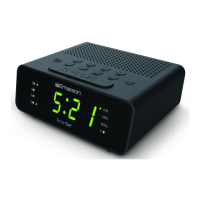
Model Number: CKS1800
Serial Number: _ _ _ _ ______ _ _ _ _ ______ _ _ _ _ _____
List ening To Th e Radio
Chec king The Wake Up Times And Alarm Mo de
Storing and Recalling Radio Station Memory
Storing to the Memory
Recalling Station from the Memory
Ante nna Information
Wake To BU ZZER
Radi o And Buzzer Ope ration
Snoo ze/Repeat Al arm
Slee p To Music Timer
DIMM ER Control
Chan ging The Lithium Battery
IMPORTANT: Leave the AC ad apter connected to your AC outlet.
Thi s wi ll p rovi de p ower to the Smar tSet c ompu ter memo ry w hile the ori gina l
lithium battery is removed.
3.) Turn the radio face up and use a small screw driver to remove the screw securing
the battery holder to the cabinet.
4.) Remove the original battery from the holder and insert the new battery into the
holder the same way, observing the positive (+) direction. Slide the holder with
the new battery back into the slot in the cabinet.
5.) Replace the screw that secures the battery holder in the cabinet.
6.) Turn the radio right side up and confirm that the LOW BATT indicator is 'Off'.
7.) Save these instructions. You'll have to do this again five to eight years from Now!
WAR NI NG : DA NG ER O F EX PL OS IO N IF B ATTERY IS IN CO RR EC TLY REPLACED.
REPLACE ONLY WIT H THE SAME OR EQUIVALENT TYPE.
BE CAREFUL NOT TO LOSE THIS SMALL SCREW!
Rese tting The Clock After A Total Memo ry Loss
If the lith ium batt ery is e xhau sted and you exp erie nce an i nter rupt ion in t he AC
power supply, the clock will reset itself to its initial default setting when the power is
restored.
Care O f Cabinets
Lithium Battery Precautions
CKS18 00-305- 00 P rinte d in Chin a
IMPO R TA N T: Reme m b e r tha t t he st a t i on an d v olume s e tting s y ou ch o o s e for
the Sle ep To M u sic ope r ati o n a r e t h e s a me s ett i ngs you wil l he a r i f yo u se t th e
alarm for Wak e To Radio the following morning.
The DIMMER control was set to High position at our factory.
If you find the clo ck d ispl ay i s to o br ight in a da rken ed r oom, set the Dim mer by
pressing SNOOZE / SLEEP / DIMMER Button.
Li ke all b att eries , e ventu all y the bu ilt i n l ithiu m b atter y w ill n eed to be r eplaced. A
numb e r of fa c t o rs, s u c h as, t h e leng t h of ti m e betwe e n the d a t e the r a d io wa s
manufactured and the date you plugged it in for the first time determine the amount
of time before replacement. During this initial storage period, the lithium battery is
OFF
®
®
®
®
®
®
®
IMPORTANT NOTE
FOR ADDITIONAL SET-UP OR OPERATING ASSISTANCE
PLEASE CALL:
1-800-898-9020 OR
1-800-695-0098 OR
E-MAIL TO: internet@emersonradio.com
 Loading...