9
Section 3
Rev. 06/15
Safety, Installation, Operations & Service Manual
DOPSM2080X012
Care must be used to not damage valve.
Several TESCOM regulators are supplied with internal filters. They will be located
either in the inlet port or in the main valve area of the regulator. In each case, they
should be removed and replaced before reassembly.
3.2.5 Reassembly
The regulator is reassembled in the reverse order of disassembly, observing the following
precautions. Please reference the Bill of Material and Assembly Drawing for the correct
location of replacement parts and correct torque specifications.
1. Inspect all parts and replace those worn or damaged with TESCOM replacement parts.
2. All parts should be cleaned to the cleanliness level required for safe operation with
the media and system they will be used in. All parts in the flow stream must be free of
particles which could prevent proper seating of the main valve.
3. Apply a thin uniform coating of fluorocarbon grease to any or all of the following parts:
Indentation of spring button, threaded portion of adjusting screw, entire threaded area
of the bonnet, all O-rings, all threaded parts internal to regulator.
Do not apply any type of grease to threaded internal parts of regulators that come
standard with metal to metal diaphragm seals. These models include the following
regulator series: 23, 449-254, 44-2200, 44-2300, 44-2500, 44-2600, 44-2800, 44-2900,
44-3200, 44-4600, 44-4700, 44-5800, 64-2600, 64-2800, 64-3600, 64-5400, 74-2400,
74-3000 AND 74-3800.
NOTE: Do NOT apply any type of grease to the inlet or outlet connections.
4. Valve seat must be installed with the chamfered side towards the main valve.
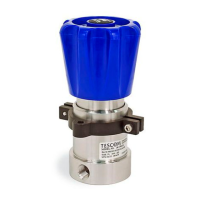
5. Standard Regulator with Control Knob - The body and bonnet are best joined by
holding the bonnet assembly open end up and dropping all required items into place
one at a time. The last item to be placed in the bonnet will be the diaphragm. It can
be centered on the seating surface of the bonnet before the body assembly is inverted
and screwed into the bonnet firmly – hand tight. Regulator should then be placed in
vise and bonnet re-torqued to correct specifications. See Assembly Drawing.
6. Dome/Combination Spring and Dome Loaded Regulators are more easily reassembled
by holding regulator firmly in vise and reinstalling dome.
7. Self-Venting Regulator - If your regulator has an adjustable relief valve mechanism, it is
set on final assembly at the factory and usually will not require further adjustment. If
adjustment becomes necessary, use the following procedure after regulator has been
installed:
Step 1. Remove hole plug in control knob.
Step 2. Using control knob, apply 10 to 15 psi on downstream side.
Step 3. Turn CW vent adjusting screw (located under hole plug) until media can be
heard escaping through vent valve.

 Loading...


