Easy Interactive Tools
With a computer, you can use Easy
Interactive Tools. This software
lets you use the interactive pens
or your finger as a mouse to annotate,
save, and interact with content from
your computer.
Command toolbar
Built-in Toolbar
Without a computer, you can use the
toolbar that is built into the projector
(PC Free Annotation). This lets you
annotate images from a document
camera, tablet, DVD player, or other
source connected to your projector.
Students and colleagues can connect
their own laptops and annotate on the fly
using the built-in toolbar, without installing
software.
Choosing the Right Tool
If you already have annotation software, you can use it
with your BrightLink projector. If you are using Microsoft
®
Office 2003 or later, you can also use the “inking tools”
to add handwritten notes to your documents and
PowerPoint
®
presentations.
Here are some tips on choosing from the tools that came
with your BrightLink projector:
Built-in
Toolbar
Easy
Interactive
Tools
No computer?
Use pen or finger as a
mouse
Use the board to draw
on computer content
Draw on board using
the computer
Use two pens and
up to two fingers
simultaneously
Use up to two pens
and six fingers
simultaneously*
Save annotations as a
JPEG
Save annotations in
image, PDF, or editable
format
* Depending on connection type. See the online
BrightLink User’s Guide for more information.
Using the Remote Control
Select from various
image sources
connected to the
projector
Turn projector
on/off
Access menu
system for additional
adjustments
Calibrate
Temporarily
turn off image
and sound
Page through
documents
Switch between
PC Interactive and
PC Free Annotation
Zoom in and out
Stop video action
Display Home
screen
Enter
For more information on using the remote control:
•
See the online BrightLink User’s Guide.
•
Watch a video or two at
www.epson.com/brightlinkvideos (U.S.) or
www.epson.ca/brightlinkvideos (Canada).
5
When you see the Touch Calibration screen, press
to select Yes.
A green circle appears in the upper left corner of
your projected image.
6
Touch and hold the center of the circle with your
finger until the circle disappears and another one
appears.
Note: Make sure you touch the center of each circle;
otherwise the calibration may not be accurate.
7
Continue until all of the circles disappear.
For more detailed instructions, see the online BrightLink
User’s Guide.
Need Help?
Telephone Support
The Epson
®
PrivateLine
®
service is for you!
All you have to do is call (800) 637-7661. This service is
available for the duration of your warranty period.
You may also speak with a projector support specialist by
dialing (562) 276-4394 (U.S) or (905) 709-3839 (Canada).
Support hours are 6 am to 8 pm, Pacific Time, Monday
through Friday, and 7 am to 4 pm, Pacific Time, Saturday.
Days and hours of support are subject to change without
notice. Toll or long distance charges may apply.
Online Support
To access the online User’s Guide, get FAQs, and more,
visit www.epson/com/brightlinkdownloads (U.S.) or
www.epson.ca/brightlinkdownloads (Canada) and
select your product.
EPSON is a registered trademark and EPSON Exceed Your Vision is a registered
logomark of Seiko Epson Corporation. BrightLink and PrivateLine are registered
trademarks of Epson America, Inc.
Mac is a trademark of Apple Inc., registered in the U.S. and other countries.
General Notice: Other product names used herein are for identification purposes
only and may be trademarks of their respective owners. Epson disclaims any and
all rights in those marks.
This information is subject to change without notice.
© 2016 Epson America, Inc., 9/16 CPD-52474
Printed in XXXXXX
Calibration
Calibration coordinates the position of the pen or your
finger with the location of your cursor. If the pen or
finger position and cursor location don’t match, you can
perform auto calibration, or you can calibrate manually for
even greater accuracy.
Note: You must perform pen calibration before calibrating
finger touch.
Pen Calibration
1
To start pen calibration, press the User button on the
remote control, or press the Home button and select
Auto Calibration.
2
When you see the Auto Calibration screen, do one of
the following:
• Press to run auto calibration, then wait until
calibration is complete.
• Select No, then press and follow the steps
below to calibrate manually.
3
Select Manual Calibration, then press .
4
When you see the Manual Calibration screen, press
to select Yes.
5
Touch the center of the circles on the screen with
your pen to perform manual calibration.
Finger Touch Calibration
Note: If you are unable to perform finger touch
calibration, make sure that the installer properly installed
the Touch Unit and performed the angle adjustment.
1
To start finger touch calibration, press the User
button on the remote control, or press the Home
button and select Auto Calibration.
2
When you see the Auto Calibration screen, select
No, then press and follow the steps below.
3
Select Touch Unit Setup, then press .
4
Select Touch Calibration, then press .
Start Here
Follow the steps on this card to get started with your
BrightLink projector:
1
Connecting your computer and installing interactive
software
2
Interacting with the screen
3
Using the built-in toolbar
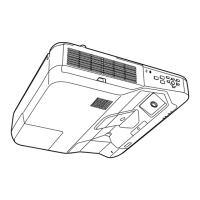
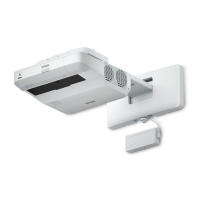
BrightLink Interaction
The BrightLink interactive pens turn any wall or table into
an interactive area, with or without a computer.
The projector control toolbar lets you control the projector
from the screen just as you would using the remote
control.
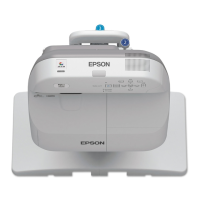
BrightLink
®
696Ui
Drawing toolbar