Start Here
Read these instructions before using your printer.
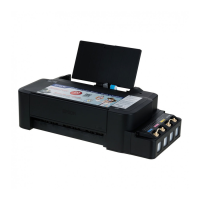
L200
Make sure the printer is NOT CONNECTED to
your computer.
When you’re done, remove the CD. You are ready to copy, print, and scan.
See the instructions on the back of this sheet CD or on your on-screen
User’s Guide.
6
If the Auto Play window appears, click on Run
Epsetup.exe. If the Add New Hardware screen
appears, click Cancel and disconnect the UBS
cable.
1
2
Before printing, attach the ink tank unit onto the printer. Don’t lay the ink
tank unit down, or position the unit higher or lower than the product.
10
Do not connect the printer
to your computer or turn
on the printer until you are
instructed to do so.
Match the ink color with the
correct tank and then fill with ink
up to the upper line on the tank.
5
8
Seal each bottle with stopper. Do not dispose of ink
bottles yet. You will need to enter the codes printed on
each bottle when you install the printer software.
7
Repeat steps 3 to 6 for each bottle and
corresponding ink tank.
6
Fit ink tank cap securely.
4
Replace bottle cap tightly, or
ink may leak.
Do not open ink bottles until you are ready to fill the ink tanks. Ink bottles are
vacuum packed to maintain reliability.
This product requires careful handling of ink. Ink may splatter when the ink tanks are
filled or refilled with ink. If ink gets on your clothes or belongings, it may not come off.
Epson recommends that you wear plastic gloves when filling the ink tanks.
9
Install software
4
Ink charging takes approximately 20 minutes. Do not unplug or turn off the
printer until ink charging is complete. The power light stops flashing.
Do not cancel the installation program before the procedure is completed,
or you will have to run the program again.
5
4
To use the product, you need to
enter the IDs that are printed on
each ink bottle, then click Next.
For initial setup
Extra black ink
3
Remove ink tank cap.
Remove only one tank cap
at a time.
1
Do not pull ink
tubes.
2
When you fill the ink tanks, it is recommended that you place a sheet of
paper under the ink tank unit. If ink spills, wipe it off immediately to avoid
permanent stains.
Keep ink bottles out of the reach of children and do not drink the ink.
Fill ink tanks
2
1
Don’t load paper sideways; always load it short edge first.
Load paper with the
printable side faceup.
3
2
Load paper
3
3
4
If your computer does not have a CD/DVD drive, you can download
the printer software from Epson’s support site.
Be sure to set the transportation lock to the printing position
when using the printer, otherwise ink is not delivered and print quality
problems may occur. Set the transortation lock to the transport
position only when transporting, otherwise ink may leak.
Connect the USB cable and turn
on the printer when you see this
screen.
1
Remove all protective materials