3 Raise the control panel if necessary.
4 Select your language, date, and time on the LCD screen.
Note: You can change these settings later using the product’s control
panel. For more information, see the online User’s Guide.
Install ink cartridges
Caution: Keep the ink cartridges out of the reach of children and do not drink
the ink.
Note: The included initial cartridges are designed for reliable printer setup and
cannot be used as replacement cartridges or resold. After setup, the remaining
ink is available for printing.
1 Open the front and printer covers.
2 Shake the ink cartridges gently about 15 times, then unpack them.
Caution: Do not touch the areas shown below. Doing so may prevent
normal operation and printing.
3 Insert the cartridges in the slot for each color. Push the cartridges
in until they click.
4 Close the front and printer covers.
Epson
®
SureColor
®
P700/P900
Start Here
IMPORTANT: Before using this product, make sure you read these
instructions and the safety instructions in the online Userʼs Guide.
Note: This printer is designed for use with Epson
®
cartridges only, not
third-party cartridges or ink. For important ink information, visit
www.epson.com/epsonink (U.S.) or www.epson.ca/epsonink (Canada) or
see your printer box.
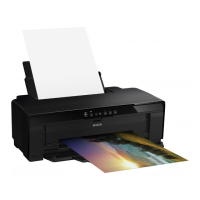
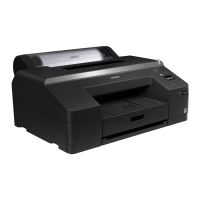
The illustrations show the SureColor
®
P700, but the steps are the same
for the SureColor P900, unless otherwise specified.
Choose a location for the printer
Choose a location for the printer that is near a wall outlet where the
power cord can be easily unplugged. Avoid places subject to rapid
changes in temperature and humidity. Also keep the printer away from
direct sunlight, strong light, or heat sources.
Make sure the productʼs rubber feet rest completely on a sturdy surface
capable of supporting the following weight:
SureColor P700: 30 lb (13.7 kg)
SureColor P900: 35 lb (15.9 kg)
Unpack
1 Make sure you have these items:
Printer
Disc tray
Ink cartridges
Limited warranty
Power cord
Note:
See the online Userʼs Guide for instructions on using the disc tray.
Do not open ink cartridge packages until you are ready to install the ink.
Cartridges are vacuum packed to maintain reliability.
2 Remove all protective materials from the product.
3 Open the front and printer covers, and remove all protective
materials from inside the product.
Caution: Do not touch the ink tube.
4 Close the printer and front covers.
5 Open the rear paper feeder and port cover, and remove all
protective materials.
6 Close the port cover and rear paper feeder.
Turn on
1 Connect the power cable.
Caution: Do not connect to your computer yet.
2 Press the power button.
5 When you see a message to begin ink
charging on the LCD screen, select OK.
The printer begins charging the ink delivery system. This takes
about 15 minutes. When you see a completion message on the
LCD screen, charging is complete.
Caution: Donʼt turn o the printer, load paper, or open any covers while
the printer is charging or youʼll waste ink.
Load paper
See the online Userʼs Guide for information about loading capacity,
available paper types and sizes, and using the disc tray.
Rear paper feeder
You can load plain paper, and most glossy and matte papers, in the rear
paper feeder.
1 Open and extend the rear paper feeder.
SureColor P700 SureColor P900
2 Slide the edge guides all the way out.
3 Insert paper, glossy or printable side up, and short edge first.