UNDERSTANDING YOUR CO ALARM
Display glows and horn chirps when Alarm is first activated.
DIGITAL DISPLAY: All segment s are turned on for a sho rt time up on initial power.
Then the temperature is displayed in degrees C.
ALARM RECEIVING BATTERY POWER
Horn is silent. Temperature will b e displayed in degrees C .
DURING TESTING
One beep sounds when you press button. It is later followed by a 4 b eep pattern that comes tw ice.
DIGITAL DISPLAY: Display glows a nd shows “ tst”.
Several p pm CO levels are also displayed and t he alarm level is shown increasing.
CO ALARM
Sensor has detec ted enough CO to trigger an alar m. Blue backlight glo ws and horn sounds
loudly (repeating 4 beeps, pause). See “I f Your CO AlarmSounds” for details. During
an alarm, move everyone to a source of fresh air. DO NOT move the CO Al arm!
DIGITAL D ISPL AY: “CO” alternating with the ppm number, a full level, a nd “EVA CUATE”.
CO ALARM REQUIRES SERVICE (MALFUNCTION SIGNAL)
The horn s ounds 3 “chirps” ever y minute. CO Alarm ne eds to be rep laced.
DIGITAL D ISPL AY: “Err” is displayed.
CO ALA RM END O F LIFE
The horn s ounds 3 chir ps every minute. CO Alarm needs to be replaced.
DIGITAL DISPLAY: “End” is displayed.
USING T HE PEA K CO MEMO RY
The CO Memory Fe ature lets you check the highes t level of CO recorde d during an alarm.
NOTE: These bars will not appear whe n CO accumulation is low. The bars will be
displayed w hen unit is ex posed fo r a longer time and CO accumulatio n is higher.
TO CHECK CO MEMORY:
1. Press and release the Test But ton until the peak C O level is displayed.
TO CLE AR CO MEM ORY:
1. Automatically resets after 24 hours.
2. a. Press and r elease Test B utton until blue backlight glows.
b. Press a nd releas e Test Button to enter “clear mode”.
c. Press a nd release Test Button quickly one more time to clear.
NOTE: Must pre ss and release. Press and hol d will run int o “Test Mode”.
NOTE: The highes t CO level will be saved for 24 hours. DO NOT clear the CO Memory re ading
if you plan to call someone to inves tigate a C O problem! Clear the C O Memor y reading only
after t he investigator ha s checked yo ur home. If t he investigator will not arri ve within t he 24
hour time pe riod before the uni t automat ically re sets, be sure to write down th e peak level.
INS TALL ATION
WHERE TO INSTALL CO AL ARMS
The National Fire Protec tion As sociat ion (NFPA) recommends t hat a CO Alarm should be centr ally located outside of each s eparat e sleeping a rea in the immediate vicinity of the bedro oms. For added
protec tion, ins tall addi tional C O Alarms in each sepa rate bedroom, and o n every level of your hom e.
If your bedroom hall way is longe r than 40 feet (12 meters), install a CO Alar m at BOT H ends of the hallway.
In a Singl e-leve l Home:
• Install at least o ne CO Ala rm near or within each separat e sleeping a rea.
• For added protection, install an additional C O Alarm at least 2 0 feet (6 meters) away from the furnace or fuel burning heatsource.
In a Multi-level H ome:
• Install at least o ne CO Ala rm near or within each separat e sleeping a rea.
• For added protection, install at lea st one CO A larm on each level of the home. If yo u have a basement, ins tall that CO Alar m at the top o f the basement stairs.
• For added protection, install an additional C O Alarm at least 2 0 feet (6 meters) away from the furnace or fuel burning heat source.
In a Mobil e Home:
• Install CO Alarms on inside walls ONLY. Uninsulated outside w alls and ro ofs of mobile homes often transfer he at and cold from outdoors.
WHERE CO ALARMS SHOULD NOT BE INSTALLED
DO NOT install t his CO A larm:
• In garages, kitchens, fur nace rooms, or in any ex tremely dusty, dir ty or greasy areas.
• Closer t han 20 feet (6 meters) from a fur nace or other fuel bur ning heat source, or fuel burning applianc es like a water heater.
• Within 5 feet (1.5 meter s) of any cooking appliance.
• In extremely humid areas. This alarm should be at lea st 10 feet (3 me ters) fr om a bath or shower, sauna , humidifier, vaporizer, dis hwasher,
laundry room, utility ro om or other source of high humidit y. Const ant expo sure to high or low humidity, may reduc e batte ry life.
• In areas w here temperature is colder than 40˚ F (4.4˚ C) or hotter than 100˚ F (37.8˚ C ). These a reas include unconditioned
crawl spaces, unfinished attics, uninsulated or poorly insulated ceilings, porches, and garages.
• In turbulent air, like near ceiling fans, heat vents, air conditioners, fresh air ret urns, or open windows. Blowing air may prevent CO from reaching t he sensors.
• In direct sunlight.
HOW TO INSTALL YOUR CO ALARM
Read “Where To Ins tall CO Alarms” before starting.
Before you start installation, find the pair of self-adhesive labels included with this C O Alarm. O n each label write in the phone numb er of your eme rgency re sponder ( like
911) and a qualified applian ce technician. Place one label near the CO A larm, an d the other label in the “fresh a ir” location you plan to go if the a larm sounds.
NOTE: Activate alarm prior to mounting.
1. Activating the Battery. Move the activation switch to ON position. Utilize a small tool to help
activate switch i f needed. O nce unit is activated, it cannot be turned off.
NOTE: Horn chir ps, and all segment s are turned on for a sho rt time up on activation.
2. Test the CO Alar m. See “We ekly Testin g”.
3. To Permanent ly Deac tivat e The Alarm. This C O Alarm contains a sealed, non-replaceable
battery. Once it r eaches th e end of its s ervice life, or af ter 10 years you must ins tall a new C O
Alarm. D eactivate the CO Alarm by inserting a tool below edge where shown and break tab.
Then slide activation switch to DEACT IVATE mode.
NOTE: Once you deactivat e this unit , it will not detect CO or alarm an d cannot be reactivated.
4. This CO Alarm can either be wall mounted or placed on a tabletop. If Alarm
is placed on a tabletop, be sure the Alarm is no more than 3 f eet (0.9 me ter)
from the f loor to minimize the risk of causing permanen t damage to t he
Alarm in t he event that it is accidentally knocked t o the ground.
GARAGE
SUGGESTED AREAS FOR INSTALLING ADDITIONAL CO ALARMS
BEDROOM
BEDROOM
HALL
LIVING ROOM
KITCHEN
BASEMENT
BEDROOM
REQUIRED TO MEET NFPA RECOMMENDATIONS
1. AGENCY APPROVED CLICHÉS, LABELS AND NAMEPLATES – ALL ARTWORK
CHANGES, OR REVISIONS MUST BE APPROVED BY COMPLIANCE
ENGINEERING – AURORA. THERE ARE NO EXCEPTIONS!
2. ELECTRONIC FILES FOR ARTWORKS ARE STORED AND DISTRIBUTED AS
FOLLOWS:
• ONE DISK FOR OUTSIDE VENDOR
• ARENA FILE – AURORA MARKETING DEPARTMENT.
3. THIS APPROVED DOCUMENT IS REQUIRED FOR IQC INSPECTION OF
VENDOR PARTS DELIVERED TO BRK BRANDS, INC. FOR ACCEPTANCE AND
APPROVAL, DELIVERED PARTS MUST MATCH THE RESPECTIVE ARTWORK
DOCUMENTATION.
4. REFER TO N04-3123-000 FOR PACKAGING AND CONSTRUCTION DETAILS.
5.
NOTES:
PART NUMBER
N04-3123-000
ELECTRONIC FILE NO.
N043123000A
DATE CODE IS TO BE PERMANENTLY AND LEGIBLY STAMPED ON THE ALARM
IN A CONTRASTING COLOR, MINIMUM HEIGHT IS 3/64TH INCH (1.2 MM) WITH
FORMAT “YYYY MMM DD”
WHERE:
“YYYY” IS THE 4 DIGIT YEAR DESIGNATION,
“MMM” IS THE 3 DIGIT MONTH DESIGNATION
(FIRST 3 LETTERS OF THE MONTH), AND
“DD” IS THE 2 DIGIT DAY DESIGNATION
MAINTENANCE AND TESTING:
ALARM IS SEALED, WITH NO SERVICEABLE PARTS.
BATTERY IS NOT REPLACEABLE. CONSTANT USE AT
HIGH OR LOW TEMPERATURES OR HIGH HUMIDITY
MAY REDUCE BATTERY LIFE. TEST WEEKLY.
GENTLY VACUUM MONTHLY.
CARBON MONOXIDE CANNOT BE SEEN OR
SMELLED BUT CAN KILL YOU. IF ALARM SIGNAL
SOUNDS: 1) OPERATE TEST / SILENCE BUTTON.
2) CALL YOUR EMERGENCY SERVICES
(FIRE DEPARTMENT OR 911).
3) IMMEDIATELY MOVE TO FRESH AIR – OUTDOORS
OR BY AN OPEN DOOR / WINDOW.
1. TO ACTIVATE ALARM,
MOVE SWITCH TO ON
POSITION.
2. PRESS TEST BUTTON
TO ENSURE ALARM IS
ACTIVATED.
TO DEACTIVATE
BATTERY, BREAK
AWAY TAB AND
MOVE SWITCH TO
DEACTIVATE
POSITION. ONCE
DEACTIVATED, THE
ALARM CANNOT BE
REACTIVATED AND
MUST BE REPLACED.
ON
DEACTIVATE
MODEL NO. CO710
TO ORDER REPLACEMENT USER’S
MANUAL OR TO RETURN ALARM
CALL CONSUMER AFFAIRS :
1-800-323-9005
• www.firstalert.com
CONFORMS TO
UL STD 2034
3055574
SINGLE
STATION
CO ALARM
ALARM GUIDE:
5 “CHIRPS” – END OF LIFE SIGNAL
3 “CHIRPS” – MALFUNCTION
4 BEEPS – CO ALARM
CO LEVEL (PPM) RESPONSE TIME (MIN)
150 10 - 50
CARBON MONOXIDE SENSITIVITY
BRK BRANDS, INC.
25 SPUR DRIVE
EL PASO, TX 79906
MADE IN MEXICO N04-3123-000
3
1
IMPOR TANT! PL EASE R EAD CA REFU LLY AND SAVE .
The warnings/limitations card a nd manual contains import ant info rmation
about your Carbo n Monoxid e (CO) Alarm’s opera tion. If you are installing
this CO A larm for use by other s, you must leave this ma nual— or a copy of
it—wi th the end user. Reference product card fo r additio nal infor mation.
USER’S MANUAL
CARBON MONOXIDE AL ARM
10 YEAR S EAL ED BATTERY OPERATED CARBON M ONOXIDE
ALA RM WITH DIGITAL DISPL AY AND SIL ENCE FEATURE
Printed in Mexico
M08-152718-CO710A-CA K3 8/16
Model CO710A
HOW YOUR CO ALARM WORKS
GENERAL INFORMATION
• CO Alar m conta ins a seal ed, non -replaceabl e batte ry. Onc e it reach es the en d of its s ervic e life, o r afte r 10 years— whic hever co mes fir st—you must in stall a n ew CO Ala rm.
• High tem perat ures, low temp eratu res, hi gh humid ity, impact or dro pping c an adver sely af fect L CD displays.
A CO Alar m measures the CO levels in the air. It w ill alarm if CO levels rise quickly (if the heat exchanger on your furnace
breaks, for example), or if CO is consistently present (a slow C O leak on a fu el-burning appliance).
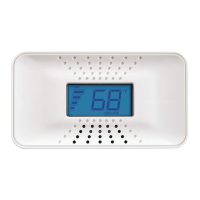
This car bon monox ide alarm features a permanen tly inst alled sensor, digital display with blue back light, and an 85 dB al arm horn. It also
has a silenc e feature to tempor arily quie t the alarm horn. Dur ing standby, the temperature is displayed in degrees C.
THE PARTS OF YOUR CO ALARM
CONF ORMS TO CSA 6.19-01
SCALE 1 : 1
D
C
B
A
B
C
D
1
2
3
4
5
6
7
8
8
7
6
5
4
3
2
1
E
F
E
F
CO710
SHEET 1 OF 2
UNLESS OTHERWISE SPECIFIED:
SCALE: 2:1
WEIGHT:
REV
DWG. NO.
C
SIZE
TITLE:
NAME
DATE
COMMENTS:
Q.A.
MFG APPR.
ENG APPR.
CHECKED
DRAWN
FINISH
MATERIAL
INTERPRET GEOMETRIC
TOLERANCING PER:
DIMENSIONS ARE IN INCHES
TOLERANCES:
FRACTIONAL
ANGULAR: MACH
BEND
TWO PLACE DECIMAL
THREE PLACE DECIMAL
APPLICATION
USED ON
NEXT ASSY
PROPRIETARY AND CONFIDENTIAL
THE INFORMATION CONTAINED IN THIS
DRAWING IS THE SOLE PROPERTY OF
<INSERT COMPANY NAME HERE>. ANY
REPRODUCTION IN PART OR AS A WHOLE
WITHOUT THE WRITTEN PERMISSION OF
<INSERT COMPANY NAME HERE> IS
PROHIBITED.
A
DO NOT SCALE DRAWING
1. Test Button
2. Activation + Deact ivation t ab (back of unit).
3. Silence But ton
4. (Behind Co ver) Ala rm Horn: 8 5dB audible alarm for
test, al arm, and unit malfunction warning.
5. Peak level But ton.
6. Digital Display with blue backlight.
© 2016 BRK B rands, I nc. All ri ghts res erved. D istributed by BR K Brand s, Inc. • BR K Brands, Inc. is a subsidiar y of Newell Brands I nc. (N YSE:NWL) • F irst Alert
®
is registered
tradema rk of The First Alert Trust • 3 901 Lib erty S treet R oad, Aur ora, IL 6050 4-8122 • C onsumer A ffair s: (800) 323- 9005 • www.fir stalert.ca • w ww.brkelectro nics.co m
K3
TO MOUNT ON THE WALL
Tools you will need :
• pencil
• drill with 3 /16” or 5mm drill bit
• flathead screwdriver
• hammer
• mounting template
1. Choose a locatio n on the wall. Do not install the A larm closer than 4” (102 mm) from where the wall me ets the ce iling.
2. Hold the mounting guide template against the wall, and make a mark inside each keyho le where you will drill your mounting holes as sh own in the diagram below.
3. Use a 3/16” (5 mm) drill bit to drill through t he marks you made for the mountin g holes.
4. Insert the plastic s crew anch ors into t he mounting holes until they are flush wit h the wall. I f necessary, tap t hem gently with a hamm er.
5. Insert the screws into the anchors until the screw head is 1/8 inch (3 mm) away from the wall.
6. Slide the CO Alarm onto the screw s until you feel it click in to place.
7. Test the C O Alarm as described in “Weekly Testing.”
Mounting Guide Template
2 5/8 inch es (66 .68 mm)
IF YOUR CO ALARM SOUNDS
Actua tion of yo ur CO Ala rm indicates t he pres ence of c arbon monoxide ( CO) whic h can kill you. In oth er word s, when y our CO Al arm soun ds, you m ust not i gnore it !
See “Ge neral Li mitat ions of C O Alarm s” for details in cluded i n the car d packag ed with a larm.
IF THE ALARM SIGNA L SOUNDS:
1. Immediately move to fr esh air— outdoors or by an op en door or window. Do a head count to check that all persons are accounted for. Do no t re-enter the premises, or move away
from the open door or w indow unt il the emerg ency ser vices re sponder has arrived, the premises have be en aired ou t, and your C O Alarm remains in its normal condition.
2. Call your emergency services, fire department or 911. Write down the number of your local emergency service here:_________________________________________________
3. After following steps 1-2, if your CO Alarm re activates within a 24-hour p eriod, re peat steps 1-2 and call a qua lified ap pliance technician t o investigate for sources of
CO from f uel-burning equipment and appliances, a nd inspec t for prop er operation of thi s equipment. If problems are identifie d during thi s inspection have th e equipment
serviced immediately. Note any combustion equipment not ins pected by the technician, and consult the manufac turers’ instru ctions , or contact the manufacturers dire ctly,
for more in formation about CO safety and this equipment. Make sur e that motor vehicles a re not, and have not, b een opera ting in an at tached garage or ad jacent to t he
residence. Write down the number of a qualified appliance technician here: __________________________________________________________
USING THE SILENCE FEATURE
The Silence Feature is for your c onveni ence only and will n ot corr ect a CO p roble m. Alway s check yo ur home f or
a poten tial pr oblem af ter an y alarm. F ailure t o do so can r esult in i njury o r death .
The Silen ce Featu re is intended to tempo rarily silence your CO Alarm’s alarm horn while you co rrect the problem —it will
not corr ect a CO pr oblem. While the alar m is silence d it will con tinue to monitor the air for CO.
To Activat e the Sil ence Fe ature : Press and hold the Silence but ton until the horn is s ilent.
Once you a ctiva te the Si lence F eatur e: the Silence cycle will last approximatel y 4 minutes .
NOTE: After i nitial 4-minute Silence cycle, the CO Alarm re-evaluate s present CO levels and respon ds accordingly. If CO
levels rema in potent ially dangerous -or star t rising hi gher- the horn will start sounding again.
While t he dete ctor is s ilenc ed:
If the CO A larm. .. This means...
Is silent for only 4 minutes, then starts sounding loudly —4 beeps, pause, 4 beeps, pause CO levels are still potentially dangerous.
If the CO A larm. .. This means...
Remains silent after you pres sed the Silence but ton CO levels are dropping.
UNDERSTANDING YOUR CO ALARM
Display glows and horn chirps when Alarm is first activated.
DIGITAL DISPLAY: All segment s are turned on for a sho rt time up on initial power.
Then the temperature is displayed in degrees C.
ALARM RECEIVING BATTERY POWER
Horn is silent. Temperature will b e displayed in degrees C .
DURING TESTING
One beep sounds when you press button. It is later followed by a 4 b eep pattern that comes tw ice.
DIGITAL DISPLAY: Display glows a nd shows “ tst”.
Several p pm CO levels are also displayed and t he alarm level is shown increasing.
CO ALARM
Sensor has detec ted enough CO to trigger an alar m. Blue backlight glo ws and horn sounds
loudly (repeating 4 beeps, pause). See “I f Your CO AlarmSounds” for details. During
an alarm, move everyone to a source of fresh air. DO NOT move the CO Al arm!
DIGITAL D ISPL AY: “CO” alternating with the ppm number, a full level, a nd “EVA CUATE”.
CO ALARM REQUIRES SERVICE (MALFUNCTION SIGNAL)
The horn s ounds 3 “chirps” ever y minute. CO Alarm ne eds to be rep laced.
DIGITAL D ISPL AY: “Err” is displayed.
CO ALA RM END O F LIFE
The horn s ounds 3 chir ps every minute. CO Alarm needs to be replaced.
DIGITAL DISPLAY: “End” is displayed.
USING T HE PEA K CO MEMO RY
The CO Memory Fe ature lets you check the highes t level of CO recorde d during an alarm.
NOTE: These bars will not appear whe n CO accumulation is low. The bars will be
displayed w hen unit is ex posed fo r a longer time and CO accumulatio n is higher.
TO CHECK CO MEMORY:
1. Press and release the Test But ton until the peak C O level is displayed.
TO CLE AR CO MEM ORY:
1. Automatically resets after 24 hours.
2. a. Press and r elease Test B utton until blue backlight glows.
b. Press a nd releas e Test Button to enter “clear mode”.
c. Press a nd release Test Button quickly one more time to clear.
NOTE: Must pre ss and release. Press and hol d will run int o “Test Mode”.
NOTE: The highes t CO level will be saved for 24 hours. DO NOT clear the CO Memory re ading
if you plan to call someone to inves tigate a C O problem! Clear the C O Memor y reading only
after t he investigator ha s checked yo ur home. If t he investigator will not arri ve within t he 24
hour time pe riod before the uni t automat ically re sets, be sure to write down th e peak level.
INS TALL ATION
WHERE TO INSTALL CO AL ARMS
The National Fire Protec tion As sociat ion (NFPA) recommends t hat a CO Alarm should be centr ally located outside of each s eparat e sleeping a rea in the immediate vicinity of the bedro oms. For added
protec tion, ins tall addi tional C O Alarms in each sepa rate bedroom, and o n every level of your hom e.
If your bedroom hall way is longe r than 40 feet (12 meters), install a CO Alar m at BOT H ends of the hallway.
In a Singl e-leve l Home:
• Install at least o ne CO Ala rm near or within each separat e sleeping a rea.
• For added protection, install an additional C O Alarm at least 2 0 feet (6 meters) away from the furnace or fuel burning heatsource.
In a Multi-level H ome:
• Install at least o ne CO Ala rm near or within each separat e sleeping a rea.
• For added protection, install at lea st one CO A larm on each level of the home. If yo u have a basement, ins tall that CO Alar m at the top o f the basement stairs.
• For added protection, install an additional C O Alarm at least 2 0 feet (6 meters) away from the furnace or fuel burning heat source.
In a Mobil e Home:
• Install CO Alarms on inside walls ONLY. Uninsulated outside w alls and ro ofs of mobile homes often transfer he at and cold from outdoors.
WHERE CO ALARMS SHOULD NOT BE INSTALLED
DO NOT install t his CO A larm:
• In garages, kitchens, fur nace rooms, or in any ex tremely dusty, dir ty or greasy areas.
• Closer t han 20 feet (6 meters) from a fur nace or other fuel bur ning heat source, or fuel burning applianc es like a water heater.
• Within 5 feet (1.5 meter s) of any cooking appliance.
• In extremely humid areas. This alarm should be at lea st 10 feet (3 me ters) fr om a bath or shower, sauna , humidifier, vaporizer, dis hwasher,
laundry room, utility ro om or other source of high humidit y. Const ant expo sure to high or low humidity, may reduc e batte ry life.
• In areas w here temperature is colder than 40˚ F (4.4˚ C) or hotter than 100˚ F (37.8˚ C ). These a reas include unconditioned
crawl spaces, unfinished attics, uninsulated or poorly insulated ceilings, porches, and garages.
• In turbulent air, like near ceiling fans, heat vents, air conditioners, fresh air ret urns, or open windows. Blowing air may prevent CO from reaching t he sensors.
• In direct sunlight.
HOW TO INSTALL YOUR CO ALARM
Read “Where To Ins tall CO Alarms” before starting.
Before you start installation, find the pair of self-adhesive labels included with this C O Alarm. O n each label write in the phone numb er of your eme rgency re sponder ( like
911) and a qualified applian ce technician. Place one label near the CO A larm, an d the other label in the “fresh a ir” location you plan to go if the a larm sounds.
NOTE: Activate alarm prior to mounting.
1. Activating the Battery. Move the activation switch to ON position. Utilize a small tool to help
activate switch i f needed. O nce unit is activated, it cannot be turned off.
NOTE: Horn chir ps, and all segment s are turned on for a sho rt time up on activation.
2. Test the CO Alar m. See “We ekly Testin g”.
3. To Permanent ly Deac tivat e The Alarm. This C O Alarm contains a sealed, non-replaceable
battery. Once it r eaches th e end of its s ervice life, or af ter 10 years you must ins tall a new C O
Alarm. D eactivate the CO Alarm by inserting a tool below edge where shown and break tab.
Then slide activation switch to DEACT IVATE mode.
NOTE: Once you deactivat e this unit , it will not detect CO or alarm an d cannot be reactivated.
4. This CO Alarm can either be wall mounted or placed on a tabletop. If Alarm
is placed on a tabletop, be sure the Alarm is no more than 3 f eet (0.9 me ter)
from the f loor to minimize the risk of causing permanen t damage to t he
Alarm in t he event that it is accidentally knocked t o the ground.
GARAGE
SUGGESTED AREAS FOR INSTALLING ADDITIONAL CO ALARMS
BEDROOM
BEDROOM
HALL
LIVING ROOM
KITCHEN
BASEMENT
BEDROOM
REQUIRED TO MEET NFPA RECOMMENDATIONS
1. AGENCY APPROVED CLICHÉS, LABELS AND NAMEPLATES – ALL ARTWORK
CHANGES, OR REVISIONS MUST BE APPROVED BY COMPLIANCE
ENGINEERING – AURORA. THERE ARE NO EXCEPTIONS!
2. ELECTRONIC FILES FOR ARTWORKS ARE STORED AND DISTRIBUTED AS
FOLLOWS:
• ONE DISK FOR OUTSIDE VENDOR
• ARENA FILE – AURORA MARKETING DEPARTMENT.
3. THIS APPROVED DOCUMENT IS REQUIRED FOR IQC INSPECTION OF
VENDOR PARTS DELIVERED TO BRK BRANDS, INC. FOR ACCEPTANCE AND
APPROVAL, DELIVERED PARTS MUST MATCH THE RESPECTIVE ARTWORK
DOCUMENTATION.
4. REFER TO N04-3123-000 FOR PACKAGING AND CONSTRUCTION DETAILS.
5.
NOTES:
PART NUMBER
N04-3123-000
ELECTRONIC FILE NO.
N043123000A
DATE CODE IS TO BE PERMANENTLY AND LEGIBLY STAMPED ON THE ALARM
IN A CONTRASTING COLOR, MINIMUM HEIGHT IS 3/64TH INCH (1.2 MM) WITH
FORMAT “YYYY MMM DD”
WHERE:
“YYYY” IS THE 4 DIGIT YEAR DESIGNATION,
“MMM” IS THE 3 DIGIT MONTH DESIGNATION
(FIRST 3 LETTERS OF THE MONTH), AND
“DD” IS THE 2 DIGIT DAY DESIGNATION
MAINTENANCE AND TESTING:
ALARM IS SEALED, WITH NO SERVICEABLE PARTS.
BATTERY IS NOT REPLACEABLE. CONSTANT USE AT
HIGH OR LOW TEMPERATURES OR HIGH HUMIDITY
MAY REDUCE BATTERY LIFE. TEST WEEKLY.
GENTLY VACUUM MONTHLY.
CARBON MONOXIDE CANNOT BE SEEN OR
SMELLED BUT CAN KILL YOU. IF ALARM SIGNAL
SOUNDS: 1) OPERATE TEST / SILENCE BUTTON.
2) CALL YOUR EMERGENCY SERVICES
(FIRE DEPARTMENT OR 911).
3) IMMEDIATELY MOVE TO FRESH AIR – OUTDOORS
OR BY AN OPEN DOOR / WINDOW.
1. TO ACTIVATE ALARM,
MOVE SWITCH TO ON
POSITION.
2. PRESS TEST BUTTON
TO ENSURE ALARM IS
ACTIVATED.
TO DEACTIVATE
BATTERY, BREAK
AWAY TAB AND
MOVE SWITCH TO
DEACTIVATE
POSITION. ONCE
DEACTIVATED, THE
ALARM CANNOT BE
REACTIVATED AND
MUST BE REPLACED.
ON
DEACTIVATE
MODEL NO. CO710
TO ORDER REPLACEMENT USER’S
MANUAL OR TO RETURN ALARM
CALL CONSUMER AFFAIRS :
1-800-323-9005
• www.firstalert.com
CONFORMS TO
UL STD 2034
3055574
SINGLE
STATION
CO ALARM
ALARM GUIDE:
5 “CHIRPS” – END OF LIFE SIGNAL
3 “CHIRPS” – MALFUNCTION
4 BEEPS – CO ALARM
CO LEVEL (PPM) RESPONSE TIME (MIN)
150 10 - 50
CARBON MONOXIDE SENSITIVITY
BRK BRANDS, INC.
25 SPUR DRIVE
EL PASO, TX 79906
MADE IN MEXICO N04-3123-000
3
1
IMPOR TANT! PL EASE R EAD CA REFU LLY AND SAVE .
The warnings/limitations card a nd manual contains import ant info rmation
about your Carbo n Monoxid e (CO) Alarm’s opera tion. If you are installing
this CO A larm for use by other s, you must leave this ma nual— or a copy of
it—wi th the end user. Reference product card fo r additio nal infor mation.
USER’S MANUAL
CARBON MONOXIDE AL ARM
10 YEAR S EAL ED BATTERY OPERATED CARBON M ONOXIDE
ALA RM WITH DIGITAL DISPL AY AND SIL ENCE FEATURE
Printed in Mexico
M08-152718-CO710A-CA K3 8/16
Model CO710A
HOW YOUR CO ALARM WORKS
GENERAL INFORMATION
• CO Alar m conta ins a seal ed, non -replaceabl e batte ry. Onc e it reach es the en d of its s ervic e life, o r afte r 10 years— whic hever co mes fir st—you must in stall a n ew CO Ala rm.
• High tem perat ures, low temp eratu res, hi gh humid ity, impact or dro pping c an adver sely af fect L CD displays.
A CO Alar m measures the CO levels in the air. It w ill alarm if CO levels rise quickly (if the heat exchanger on your furnace
breaks, for example), or if CO is consistently present (a slow C O leak on a fu el-burning appliance).
This car bon monox ide alarm features a permanen tly inst alled sensor, digital display with blue back light, and an 85 dB al arm horn. It also
has a silenc e feature to tempor arily quie t the alarm horn. Dur ing standby, the temperature is displayed in degrees C.
THE PARTS OF YOUR CO ALARM
CONF ORMS TO CSA 6.19-01
SCALE 1 : 1
D
C
B
A
B
C
D
1
2
3
4
5
6
7
8
8
7
6
5
4
3
2
1
E
F
E
F
CO710
SHEET 1 OF 2
UNLESS OTHERWISE SPECIFIED:
SCALE: 2:1
WEIGHT:
REV
DWG. NO.
C
SIZE
TITLE:
NAME
DATE
COMMENTS:
Q.A.
MFG APPR.
ENG APPR.
CHECKED
DRAWN
FINISH
MATERIAL
INTERPRET GEOMETRIC
TOLERANCING PER:
DIMENSIONS ARE IN INCHES
TOLERANCES:
FRACTIONAL
ANGULAR: MACH
BEND
TWO PLACE DECIMAL
THREE PLACE DECIMAL
APPLICATION
USED ON
NEXT ASSY
PROPRIETARY AND CONFIDENTIAL
THE INFORMATION CONTAINED IN THIS
DRAWING IS THE SOLE PROPERTY OF
<INSERT COMPANY NAME HERE>. ANY
REPRODUCTION IN PART OR AS A WHOLE
WITHOUT THE WRITTEN PERMISSION OF
<INSERT COMPANY NAME HERE> IS
PROHIBITED.
A
DO NOT SCALE DRAWING
1. Test Button
2. Activation + Deact ivation t ab (back of unit).
3. Silence But ton
4. (Behind Co ver) Ala rm Horn: 8 5dB audible alarm for
test, al arm, and unit malfunction warning.
5. Peak level But ton.
6. Digital Display with blue backlight.
© 2016 BRK B rands, I nc. All ri ghts res erved. D istributed by BR K Brand s, Inc. • BR K Brands, Inc. is a subsidiar y of Newell Brands I nc. (N YSE:NWL) • F irst Alert
®
is registered
tradema rk of The First Alert Trust • 3 901 Lib erty S treet R oad, Aur ora, IL 6050 4-8122 • C onsumer A ffair s: (800) 323- 9005 • www.fir stalert.ca • w ww.brkelectro nics.co m
K3
TO MOUNT ON THE WALL
Tools you will need :
• pencil
• drill with 3 /16” or 5mm drill bit
• flathead screwdriver
• hammer
• mounting template
1. Choose a locatio n on the wall. Do not install the A larm closer than 4” (102 mm) from where the wall me ets the ce iling.
2. Hold the mounting guide template against the wall, and make a mark inside each keyho le where you will drill your mounting holes as sh own in the diagram below.
3. Use a 3/16” (5 mm) drill bit to drill through t he marks you made for the mountin g holes.
4. Insert the plastic s crew anch ors into t he mounting holes until they are flush wit h the wall. I f necessary, tap t hem gently with a hamm er.
5. Insert the screws into the anchors until the screw head is 1/8 inch (3 mm) away from the wall.
6. Slide the CO Alarm onto the screw s until you feel it click in to place.
7. Test the C O Alarm as described in “Weekly Testing.”
Mounting Guide Template
2 5/8 inch es (66 .68 mm)
IF YOUR CO ALARM SOUNDS
Actua tion of yo ur CO Ala rm indicates t he pres ence of c arbon monoxide ( CO) whic h can kill you. In oth er word s, when y our CO Al arm soun ds, you m ust not i gnore it !
See “Ge neral Li mitat ions of C O Alarm s” for details in cluded i n the car d packag ed with a larm.
IF THE ALARM SIGNA L SOUNDS:
1. Immediately move to fr esh air— outdoors or by an op en door or window. Do a head count to check that all persons are accounted for. Do no t re-enter the premises, or move away
from the open door or w indow unt il the emerg ency ser vices re sponder has arrived, the premises have be en aired ou t, and your C O Alarm remains in its normal condition.
2. Call your emergency services, fire department or 911. Write down the number of your local emergency service here:_________________________________________________
3. After following steps 1-2, if your CO Alarm re activates within a 24-hour p eriod, re peat steps 1-2 and call a qua lified ap pliance technician t o investigate for sources of
CO from f uel-burning equipment and appliances, a nd inspec t for prop er operation of thi s equipment. If problems are identifie d during thi s inspection have th e equipment
serviced immediately. Note any combustion equipment not ins pected by the technician, and consult the manufac turers’ instru ctions , or contact the manufacturers dire ctly,
for more in formation about CO safety and this equipment. Make sur e that motor vehicles a re not, and have not, b een opera ting in an at tached garage or ad jacent to t he
residence. Write down the number of a qualified appliance technician here: __________________________________________________________
USING THE SILENCE FEATURE
The Silence Feature is for your c onveni ence only and will n ot corr ect a CO p roble m. Alway s check yo ur home f or
a poten tial pr oblem af ter an y alarm. F ailure t o do so can r esult in i njury o r death .
The Silen ce Featu re is intended to tempo rarily silence your CO Alarm’s alarm horn while you co rrect the problem —it will
not corr ect a CO pr oblem. While the alar m is silence d it will con tinue to monitor the air for CO.
To Activat e the Sil ence Fe ature : Press and hold the Silence but ton until the horn is s ilent.
Once you a ctiva te the Si lence F eatur e: the Silence cycle will last approximatel y 4 minutes .
NOTE: After i nitial 4-minute Silence cycle, the CO Alarm re-evaluate s present CO levels and respon ds accordingly. If CO
levels rema in potent ially dangerous -or star t rising hi gher- the horn will start sounding again.
While t he dete ctor is s ilenc ed:
If the CO A larm. .. This means...
Is silent for only 4 minutes, then starts sounding loudly —4 beeps, pause, 4 beeps, pause CO levels are still potentially dangerous.
If the CO A larm. .. This means...
Remains silent after you pres sed the Silence but ton CO levels are dropping.