~
User's
Manual
• -
Dry
Chemical
Fire
Extinguisher
IMPORTANT! Please read carefully
and
save.
This user's
manual
contains important information about your fire extin-
guisher's operation.
If
you
are
in
stalling this fire extinguisher for
use
by
others,
you
must
lea
ve
this
manual-or
a copy of
it-with
the end
user.
Read
.extinguisher label
and
the
en
tire user's manual
ca
refully before
,nstalling
or
uSing
the
unit.
Make
sure
everyone
in
your household
is
completely familiar with the operation of the extinguisher,
and
review
the
instructions
regularly.
In
an
emergency,
you
will
not
have
time
to
read
instructions.
1108-0191-000
M 10
/06
®
Model
FE1A10G15
wnl:nl:
I U I
....
'IALL
I
nl~
I:A
Iln\llUI~nl:n
A Fire
Extinguisher
Should
Be
Mounted:
In
the
vicinity
of
(but
not
on
or
in) a
potential
source
of
heat
and/or
fire, like
an
oven
or
stove.
Where
it
is
easy
to
reach
,
near
an
exit
or
an
escape
route
from
the
room.
In a
location
that
is
convenient, in
plain
sight,
and
3-1/2
to
5
feet
(1
to
1.5 meters) above
the
floor.
Store
the
extinguisher
high
enough
to
keep
it
out
of
the
reach
of
small
children.
On a clean,
dry
surface
where
the
temperature
does
not
go
above 120· F (4g·
C)
or
below
-40·
F
(-40·
C).
HOW
TO
INSTALL THIS EXTINGUISHER
ACAUT
IONI
Do
not
mount
the extinguisher on drywall
or
plaster
without
adequate support. Use strong screws
or
bolts
to
mount
the
bracket securely into solid
wood
or
metal that can
support
it,
like a wooden partition stUd. Secure mounting
is
needed
so you can remove the extinguisher quickly and easily in
an
emergency. Also,
if
the extinguisher is
not
held securely,
it
could
drop
to
the
floor and injure people
or
damage the
extinguisher.
DO NOT BREAK THE SAFETY SEAL!
This
seal
prevents
acci<!ental
discharge
of
the
fire
extinguisher.
Break
the
seal
only
In an
emergency
before
using
the
fire
extinguisher.
NOTE: Since wall surface types
vary,
mounting
screws
are
not
.
included
. Purchase screws or bolts specifically designed for the sur-
face on which you will mount the fire extingUisher. The fire extinguisher
label lists its maximum weight. Mounting screw head type should be
#8
pan on round head screws with
#8
flat washers.
1.
rABLE
OF CONTENTS
mportant
Information
About
Fire
Extinguishers
.....••...•...
1
lead
Before Installing
or
Using
This
Fire
Extinguisher
•.
..
••...
1
Yhere
to
Install
This
Extinguisher
......••••....•.•.•...•..•
2
low
to
Install This
Extinguisher
•........
.
•....••.•....•...
2
:hecking
and
Inspecting
the
Fire
Extinguisher
•.'
.•...•••.•...
2
low
to
Operate Your Fire
Extinguisher
in a Fire
Emergency
. ,
.•
3
Ifter
the
Fire
is
Extinguished
••....
•
...
••
...•.•
•
••....•...
3
low
to
Clean
After
Using a Fire
Extinguisher
•••
•
...•••••••
• .4
f Your Fire
Extinguisher
Needs Service .
.•.....••......•••.•
4
)isposing
of
a
Used
Extinguisher
..•......
• • •
......•...•...
4
jmited
Warranty
••.......•••.•.......•.....•......•••.••
4
~
2006 BRK Brands,
Inc.,
a Subsidiary of Jarden Corporation
\11
rights reserved.
:irst Alert",
3901
Liberty Street Road, Aurora,
IL
60504-8122
;onsumer Affairs: (800) 323-9005 • www.firstalert.com
MPORTANT INFORMATION ABOUT
:IRE EXTINGUISHERS
10TE: Be sure the extinguisher is rated to fight the type of fire
nost likely to occur
in
the area you choose to install it. Since house-
lold fires commonly start
in
the kitchen, you should always install
m extinguisher
in
the kitchen. For added security, you should also
1stall additional extinguishers
in
utility areas, and other living areas
in
'our household.
Fire
extinguishers
are
classified
by
fire
type.
The A,
Band
C
rating
system
defines
the
kinds
of
burning
materials
each
fire
extinguisher
is
designed
to
fight.
The
numbers
in
front
of
the
A,
B,
or
C
indicate
the
rating
for
size
of
the
fire
the
unit
can
extinguish. Using
the
wrong
type
of
fire
extinguisher
can
do
more
harm
than
good. Make
sure
you
understand
which
fire
extinguisher
to
use
on
each
class
of
fire!
~
Class A rating: The agent/powder is suitable for
A
W
fighting small fires
in
vo
lving wood, paper, cloth,
rubber, and some plastics.
om Class B rating: The agent/powder is suitable for
~
fighting small fires involving grease, oi
l,
gasoline,
H
kerosene, and other flammable liquids.
@ " Class C rating: The agent/powder is suitable for
fighting small fires in "live" electrical equipment.
'E1A10G15
is
rated
Class
1-A:10-B:C.
~EAD
BEFORE INSTALLING OR USING
rHIS FIRE EXTINGUISHER!
ADANGER!
This
extinguisher
is
designed
for
use
against
small
fires
that
have
just
started
and are small
enough
to
fight
safely.
It
is
not
designed
to
fight
large
fires
that
are
burning
out
of
control.
If
the
fire
is
too
hot
or
smoky
for
you
to
get
within
6
feet
(2 meters)
of
it,
do
not
try
to
fight
it
yourself. Warn everyone,
evacuate
the
premises, and have
someone
call
the
Fire
Department
from
outside
the
building. Trying
to
fight
a large
fire
yourself
can
result
in
injury
or
death.
Do
not
puncture
or
bum
any
fire
extinguisher. The
contents
are
under
pressure, and
the
extinguisher
could
explode.
Never
locate
this
extinguisher
close
to
an engine, stove
or
other
source
of
heat.
It
is
pressurized
and
could
rupture
or
explode
if
exposed
to
temperatures
over 150· F (66· C).
ACAUTION!
This extinguisher contains a dry powder extinguishing agent.
The agent/powder is nontoxic,
but
can irritate skin. When using
this unit,
avoid breathing the powder.Always ventilate the area
after use.
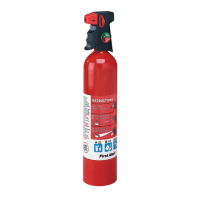
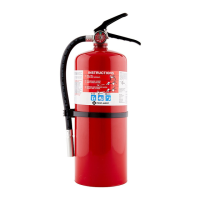
INSTALL THE MOUNTING BRACKET ON A WALL
1.
The extinguisher has a bracket for
wall mounting. Install the mounting
,
bracket on a wooden stud
or
other
~
solid surface that will support the
' ~
weight
of
the extinguisher using ' "
the screws
or
bolts you purchased "
(see "Note" above). '
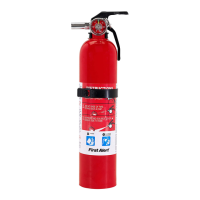
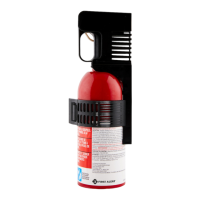
2.
After installing the mounting bracket, '
replace the extinguisher on the "
bracket with the label facing outward, "
so the label can be easily read.
Raise and wrap the bracket straps
around the cylinder and snap the
buckle closed.
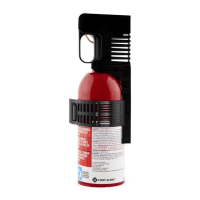
INSTALLING THE MOUNTING BRACKET IN A
MARINE CRAFT .
According
to
the
NFPA
Standard
302 (Fire
protection
Standard
for
Pleasure
and
Commercial
Motor
Craft):
• On marine crafts, portable fire extinguishers shall be located to be
readily accessible. Extinguishers shall be secured with a marine
bracket to permit immediate release.
• On marine crafts, extinguisher agent cylinders sha
ll
be mounted a
minimum
of
2 inches
(5
cm) above moist or wet surfaces to reduce
the danger of corrosion.
CHECKING AND INSPECTING THE
FIRE EXTINGUISHER
AWARNINGI
DO NOT CHECK THE PRESSURE
OR
TEST THE
ARE
EXTINGUISHER BY SQUEEZING THE TRIGGER, EVEN
BRIEFLY.
ONCE
USED,
IT WILL GRADUAlLY LOSE PRESSURE AND WILL
NOT BE FULLY CHARGED
FOR
USE IN
AN
EMERGENCY.
When
the
pointer
drops
into
the
red
area,
the
extinguisher
may
still
be
pressurized
.
You
must
discharge
the
unit
completely
before
disposing
of
it!
~:~~~~
\~~
~~~i~%~\~~~~
f,~:;,et~eWeek
~~
~
-
~
mounting bracket and inspect the ' _
'I
gauge. If the yellow pointer is
in
the If.. I
GREEN
area. the extinguisher
is
,
properly pressurized and ready to
use.
. .
__
If
the
pointer
drops
into the
RED
area,
the
extinguisher has lost some
pressure and should be replaced.
2.
Check for signs of damage or misuse. Make sure you can still
read
all
the text on the label. Carefully examine the surface of
the extingUisher for corrosion.
You
can help prevent corrosion
by cleaning the extinguisher if it gets wet
or
dirty. If you notice
corrosion during the warranty period, return the unit to First Alert·
(See "Limited Warranty"
at the end of this manual).
3.
Make sure the tanlper indicator ("safety seal") is still intact and the
nozzle is clean and unobstructed.
4. When you finish inspecting the extingUish
er,
always put it back
securely into the mounting bracket.
IMPORTANTI
For more information about fire extinguishers, consult the
NFPA
Standard
#10,
"Portab
le
Fire
Extinguishers," available from the National
Fire
Protection Association,
In
c.,
Batterymarch Park,
QUincy,
MA
02169,
USA.
2