STEP FOUR
INSTALL CAMERA TO WALL OR CEILING
© 2015, FLIR Systems, Inc.
FXV101-W_QSG_EN_FR_R3
FIND HELP AT FLIR.COM/FX
QUICK START GUIDE
A. USE THE INCLUDED MOUNTING TEMPLATE TO
DRILL HOLES ON YOUR WALL OR CEILING
B. TAP THE INCLUDED ANCHORS INTO THE HOLES
GENTLY USING A HAMMER
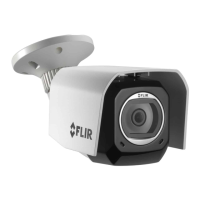
1. Latch: Lock or unlock camera
inside mount. Both latches
must be firmly locked to ensure
weatherproof rating of the mount.
2. Camera: You can remove the
camera to use on its own or with
one of the other accessories. See
FLIR.COM/FX for instructions.
3. Accessory Connector: Slide
the camera all the way right to
remove it from the mount or all
the way left to connect it.
4. Outdoor Night Vision LEDs: See
further in the dark.
5
6
7
8
9
10
12
13
14
15
11
5. Lens Cover: Keep the lens cover
clean using a slightly damp cloth.
Don’t use chemical cleaners as
they may damage the lens cover.
6. Microphone: Record sound and
communicate
7. Speaker: Communicate via 2-way
intercom.
8. Adjustment Ring: Loosen to adjust
the horizontal position of the camera.
9. Vertical Adjustment Screw: Loosen
to adjust the vertical position of the
camera.
10. Sunshade: Push towards the back
of the camera to remove sunshade.
11. QR Code: Scan during setup using the
FLIR FX app.
12. Twist Adjustment Screw: Loosen to
twist the camera head around the
stand.
13. Temperature Sensor
14. Mounting Holes: Mount the camera to
the wall or ceiling.
15. Power Cable: Run the power cable
through the cable notch on the stand
or through the wall.
CAUTION: Make sure the power connector
and power outlets are protected from the
elements when installing.
C. SECURE THE MOUNT TO THE WALL OR CEILING
USING THE INCLUDED MOUNTING SCREWS
1. LOOSEN ADJUSTMENT RING TO ADJUST THE
HORIZONTAL POSITION
2. LOOSEN WITH THE INCLUDED ALLEN KEY TO
ADJUST THE VERTICAL POSITION
3. LOOSEN WITH THE INCLUDED ALLEN KEY TO
TWIST THE CAMERA ON THE STAND
MAKE SURE TO FULLY TIGHTEN THE ADJUSTMENT
SCREWS AFTER SETTING THE POSITION
1
2
D. ADJUST THE CAMERA POSITION
1
3
4
2
STEP TWO
STEP THREE
DOWNLOAD THE FLIR FX APP TO YOUR SMARTPHONE
OR TABLET
USING THE APP, SCAN THE QR CODE ON THE BOTTOM
OF THE STAND
STEP ONE
PLUG IN THE CAMERA
FOLLOW THE PROMPTS TO COMPLETE WIFI SETUP
LAUNCH APP AND CREATE AN ACCOUNT
PLEASE WATCH THE GETTING STARTED VIDEO AVAILABLE VIA THE APP
COMPLETE STEPS 1-3 BEFORE MOUNTING CAMERA
IMPORTANT: IT IS RECOMMENDED TO INSTALL THE CAMERA IN A LOCATION
WITH A STRONG WI-FI SIGNAL. YOU CAN CHECK THE WI-FI STRENGTH USING
THE SIGNAL INDICATOR ON YOUR SMARTPHONE OR TABLET.
Cancel
Camera setup
PLACE THE QR CODE INSIDE
THE TARGET
PLEASE MAKE SURE THE
CAMERA IS TURNED ON
lch003484156
Rating: 5V DC 2A
Model No: FXV101-H
IC:8575AFXV101
FCC ID: UCZFXV101
FLIR SYSTEMS, INC.
LINTHICUM, MD 21090, USA
MADE IN CHINA
Serial:123456789012
MAC ID:123456789012
lch003484156
Rating: 5V DC 2A
Model No: FXV101-H
IC:8575AFXV101
FCC ID: UCZFXV101
FLIR SYSTEMS, INC.
LINTHICUM, MD 21090, USA
MADE IN CHINA
Serial:123456789012
MAC ID:123456789012
SECURITY HOME MONITORING
Keep an eye on the things that matter most with FLIR FX™. Using the mobile app, you can connect to your camera in Cloud
mode via a WiFi network or through Direct mode with no Internet required. Tap the camera from the Camera List to view
live video and set up SmartZone motion detection. Manage push notifications and automatic recording through the camera
settings. See your day in a minute by creating and viewing Rapid Recaps™.
A. SLIDE SUNSHADE
BACK AND REMOVE
FROM MOUNT
B. OPEN LATCHES
LATCH
QUICK START GUIDE
A. CONNECT THE CAMERA TO THE INCLUDED
POWER ADAPTER AND CONNECT THE POWER
ADAPTER TO A POWER OUTLET
CAUTION: MAKE SURE THE POWER CONNECTOR
AND POWER OUTLETS ARE PROTECTED FROM THE
ELEMENTS WHEN INSTALLING.
B. REMOVE THE PROTECTIVE FILM FROM THE
LENS COVER AFTER YOU HAVE FINISHED THE
INSTALLATION
STEP FIVE
RECONNECT POWER AND REMOVE LENS FILM
GET TO KNOW YOUR FLIR FX
IF THE APP PROMPTS YOU TO CHECK THE LED STATUS
REMOVE THE CAMERA
C. OPEN CAMERA
COMPARTMENT
D. SLIDE CAMERA OFF
WIFI LED
(BACK OF CAMERA)
REPLACE THE CAMERA WHEN COMPLETED
Direct Mode: View live or recorded
video on the microSD card directly
from FLIR FX without an Internet
connection.
Cloud Mode: View live video via
the Internet, recorded video from
the microSD card, or cloud-stored
videos and FLIR Recaps from FLIR
Cloud.
NOTE: USE THE APP OR PRESS THE
BUTTON TO
CHANGE MODES
CHARGE CAMERA FOR 30 MINUTES BEFORE
BEGINNING SET UP
FXV101-W_QSG_EN_FR_R3.indd 1-2 3/25/2015 4:06:49 PM

 Loading...