.
80PK-27: Industrial Surface Probe
80PK-8: Pipe Clamp Probe (For pipe diameter 1/4 in to 1 7/8
in)
80PK-9: HVAC Probe for piercing pipe insulation for pipe
temperature measurement
80PK-11: K-type Velcro Temperature Probe
80CK-M: Male Mini-Connector (for attachment of K-type
thermocouple wire)
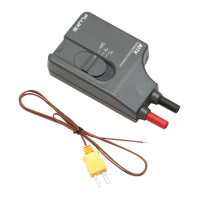
Use and Operation
Thermocouples rely upon the difference in temperature
between the measuring junction and a reference junction.
Traditionally the reference junction is another thermocouple
placed in an ice bath, however, the 80TK uses an electronic
reference junction. The converter (80TK) must be operated in a
thermal environment consistent with its specifications.
Measuring Technique
Making accurate temperature readings using a thermocouple is
a matter of identifying and minimizing the causes of error. The
largest contributor to errors is the thermal interface between
the measurement surface and the thermocouple. The next
largest contributor is the temperature difference between the
thermocouple probe and its environment.
Here are some suggestions for improving the accuracy of your
temperature measurements. Ensure that there is a good
connection between the probe and the surface you are
measuring. You can do this in many ways:
1. Increase the mounting pressure.
2. Use an interface agent (such as silicone grease) between
the thermocouple probe and the surface you are
measuring.
3. Use a thermal epoxy to attach the thermocouple.
When measuring temperatures higher than ambient, adjust the
connection of the probe to the surface until you get the highest
temperature reading. Use any of the suggestions given above
to do so.
When measuring temperatures lower than ambient, adjust the
connection of the probe to the surface until you get the lowest
temperature reading. Use any of the suggestions given above
to do so.
When measuring temperatures near ambient, make the
reading when the multimeter display is most stable.
XWWarning
To avoid electrical shock, do not use this instrument
when voltages exceeding 30 V rms, 42.4 peak, or 60 V dc
are present. The probe tip is electrically connected to
the output terminals.
Temperature Measurement
Follow this procedure to correctly use the 80TK.
1. Plug the 80TK into the multimeter. Ensure that the red
banana plug is plugged into the voltage input and the black
banana plug is plugged into the COM input.
2. Set the multimeter to the 200, 300, or 400 millivolt range.
This setting will read temperatures equal to the number of
millivolts the range has (i.e., 320 °C or F if the millivolt
range reads 320 mV).
3. Use the dc volt setting and ignore the decimal for higher
temperatures than can be accommodated by the millivolt
range. Less resolution is available when using the volt
range.
XWWarning
To avoid electrical shock, if connecting wires to the
input screws, make sure the thermocouple is removed
from the measurement surface. Completely reassemble
the instrument before use.
4. Plug the thermocouple into the 80TK thermocouple input
connector. If the thermocouple does not have a plug
attached, connect the thermocouple wires to the
thermocouple input screws inside the 80TK. The yellow
coded wire (chromel) connects to the screw marked ”+”.
5. Turn on the 80TK and the multimeter.
6. Adjust the thermal connection between the measurement
surface and the thermocouple as described previously.
7. Read the temperature on the multimeter.
Open Thermocouple Reading
If the thermocouple probe has open circuited (i.e. is broken),
the multimeter will read a steady, constant voltage. The voltage
readings are:
Range Reading
C ≥ 1.0V
F ≥ 2.2V
Battery Condition Test
1. Set the power switch to the OFF position.
2. Connect the 80TK to the multimeter.
3. Set the multimeter to the 200, 300, or 400 millivolt dc
range.
4. Read the battery test voltage on the multimeter. A
minimum reading of 75 mV is acceptable and indicates
that approximately 100 hours of battery life remain.
Battery Replacement
XWWarning
To avoid electrical shock, remove the
thermocouple from the measurement surface, or
disconnect the thermocouple from the
instrument before opening the case. Totally
reassemble the instrument before attempting to
use it.
1. Set the power switch to the OFF position.
2. Disconnect the 80TK from the multimeter.
3. Unplug or disconnect the thermocouple.
4. Turn the 80TK so the power switch is facing down.
Remove the single screw located between the banana
plugs.
5. Grasp one case half in each hand. Pull the two halves
apart, beginning at the end with the banana plugs.
6. Remove and replace the battery.
7. Reassemble the 80TK.
8. To reassemble, mate the two case halves at the end with
the thermocouple connector, then "hinge" the two halves
together.
80TK Self Test
The following test is an easy way to verify proper operation of
the 80TK:
1. Follow the Battery Replacement Procedure to open the
case.
2. Using a short piece of bare wire, short the input
thermocouple terminals together.
3. Plug the 80TK into the multimeter.
4. Turn the multimeter and the 80TK on. Set the multimeter
to 200, 300, or 400 mV range.
5. The multimeter should read the ambient room
temperature.
1.888.475.5235info@Fluke-Direct.com
Fluke-Direct.com
www.valuetronics.com
 Loading...
