Installation
NOTE: Lightly oil all bolt and stud bolt threads before installation except those specifying special sealant.
1. Clean gasket surfaces on the engine front cover and cylinder block (6010) .
If reusing the engine front cover , replace crankshaft front seal (6700) . Refer to Crankshaft Pulley and/or Damper and/or Crankshaft Front Seal in this section.
2. If a new engine front cover is to be installed:
Install oil pump and filter body .
Clean water pump gasket surface. Position a new water pump housing gasket (8507) on the engine front cover and install water pump . Install water pump retaining bolts.
Tighten to 20-30 Nm (15-22 lb-ft).
3. Lubricate crankshaft front seal with clean engine oil XO-10W30-QSP or -DSP or equivalent meeting Ford specification ESE-M2C153-E.
NOTE: Gasket and Trim Adhesive D7AZ-19B508-B or equivalent meeting Ford specification ESE-M2G52-A is recommended to hold the engine front cover gasket (6020)
in position while the engine front cover is installed.
4. Position a new engine front cover gasket on the cylinder block and install the engine front cover / water pump assembly using dowels for proper alignment.
5. Install the engine front cover retaining bolts. Tighten to 20-30 Nm (15-22 lb-ft). Install the capscrew (Part No. N804841) nearest the oil bypass filter flange last, and tighten last. Apply
Loctite® or equivalent to bolt prior to installation. Refer to illustration under Step 13 of removal procedure.
6. Install oil pan as outlined.
7. Install oil bypass filter .
8. Coat pulley sealing surface with clean engine oil XO-10W30-QSP or -DSP or equivalent meeting Ford specification ESE-M2C153-E.
NOTE: When using silicone rubber sealer, assembly must occur within 15 minutes after sealer application. After this time, the sealer may start to setup, and its sealing
effectiveness may be reduced.
9. Apply a small amount of Silicone Gasket and Sealant F1AZ-19562-A or equivalent meeting Ford specification WSE-M4G320-A2 to crankshaft keyway.
10. Position crankshaft key (6B316) in the crankshaft keyway.
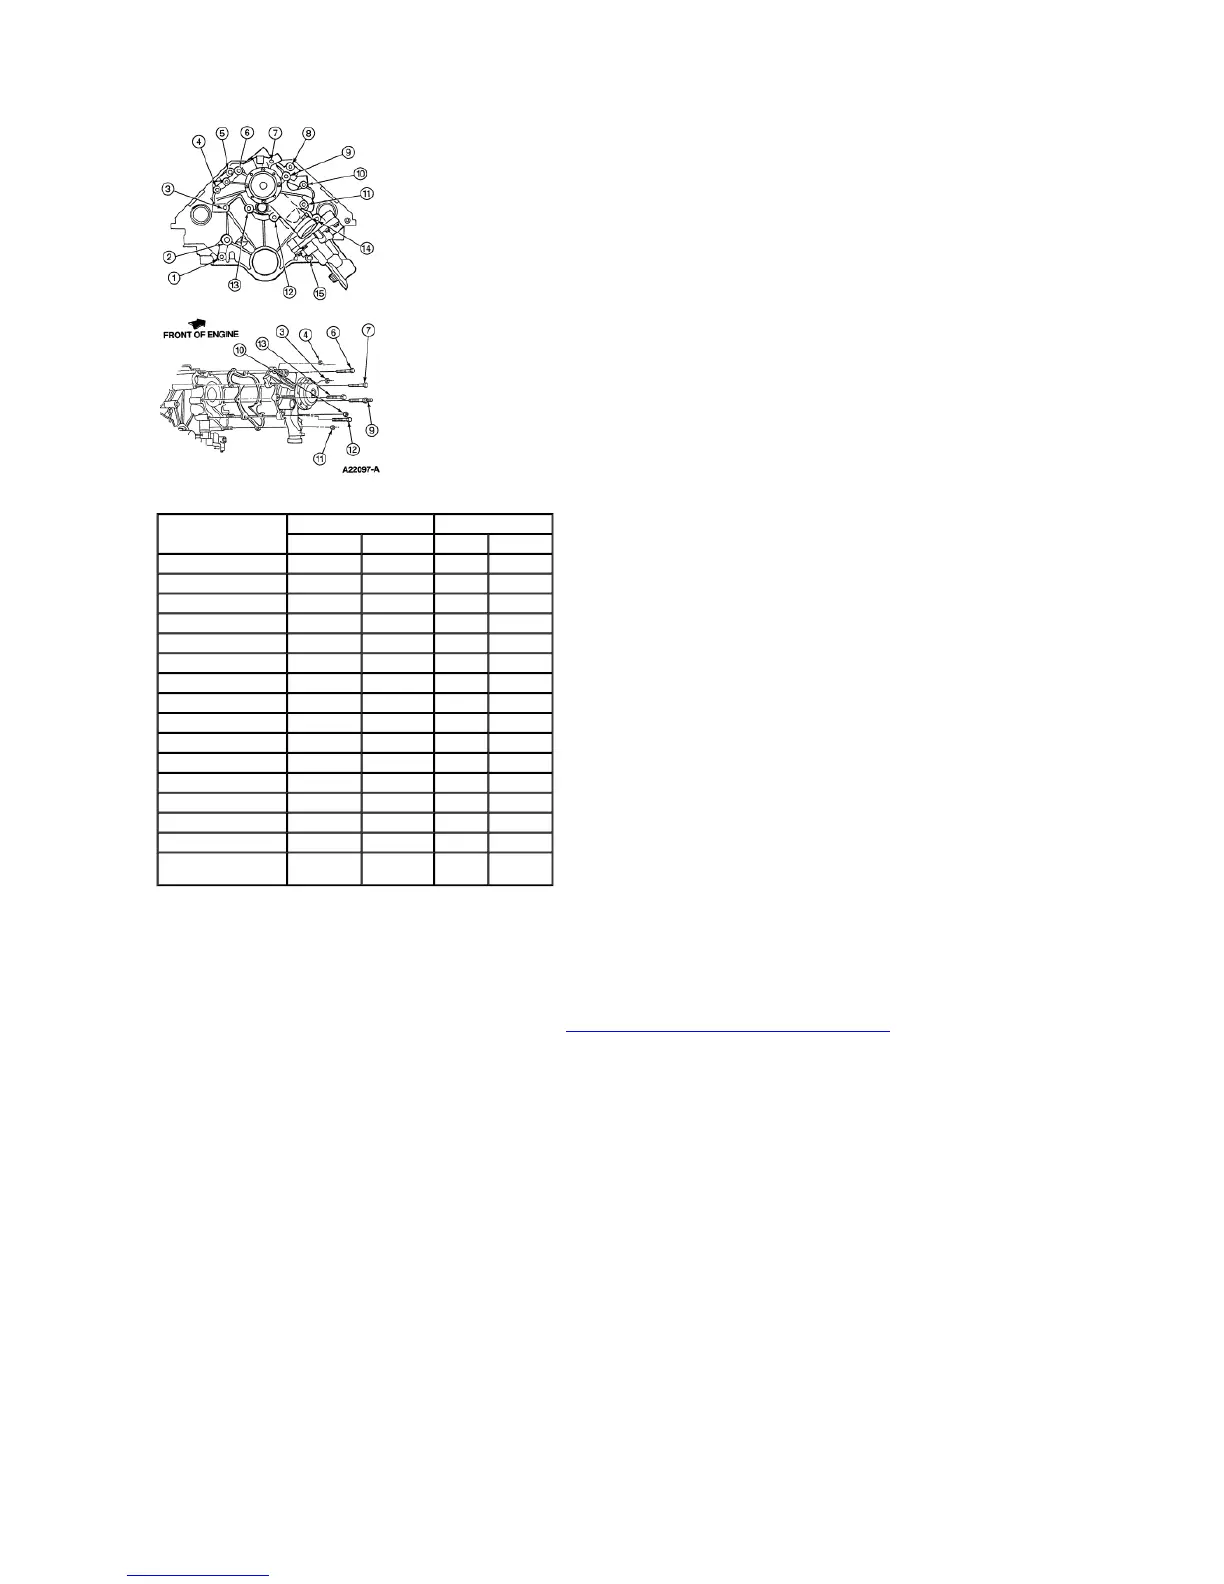
Fastener and Hole No.
Hole No. Fasteners
Water Pump Front Cover Part No. Part Name
1 — 4 N805112 Stud
2 — 2 N805112 Stud
3 2 9 N804757 Stud
4 1 8 N804757 Stud
5 — 10 N605787 Bolt
6 9 15 N605908 Bolt
7 8 16 N605908 Bolt
8 — 11 N807611 Stud/Bolt
9 7 17 N804756 Bolt
10 6 1 N805275 Stud
11 5 7 N804757 Stud
12 4 13 N605908 Bolt
13 3 14 N605908 Bolt
14 — 6 N804839 Bolt
15 — 5 N804841 Capscrew
3,4,10,11 2,1,
6,5
9,8,
1,7
N804758 Nut
http://www.fordtechservice.dealerconnection.com/pubs/content/~WSSW/~MUS~LEN/20/S

 Loading...