KA02086-Y625-02EN
© 2016 FUJITSU ISOTEC LIMITED This manual was made with recycled paper.
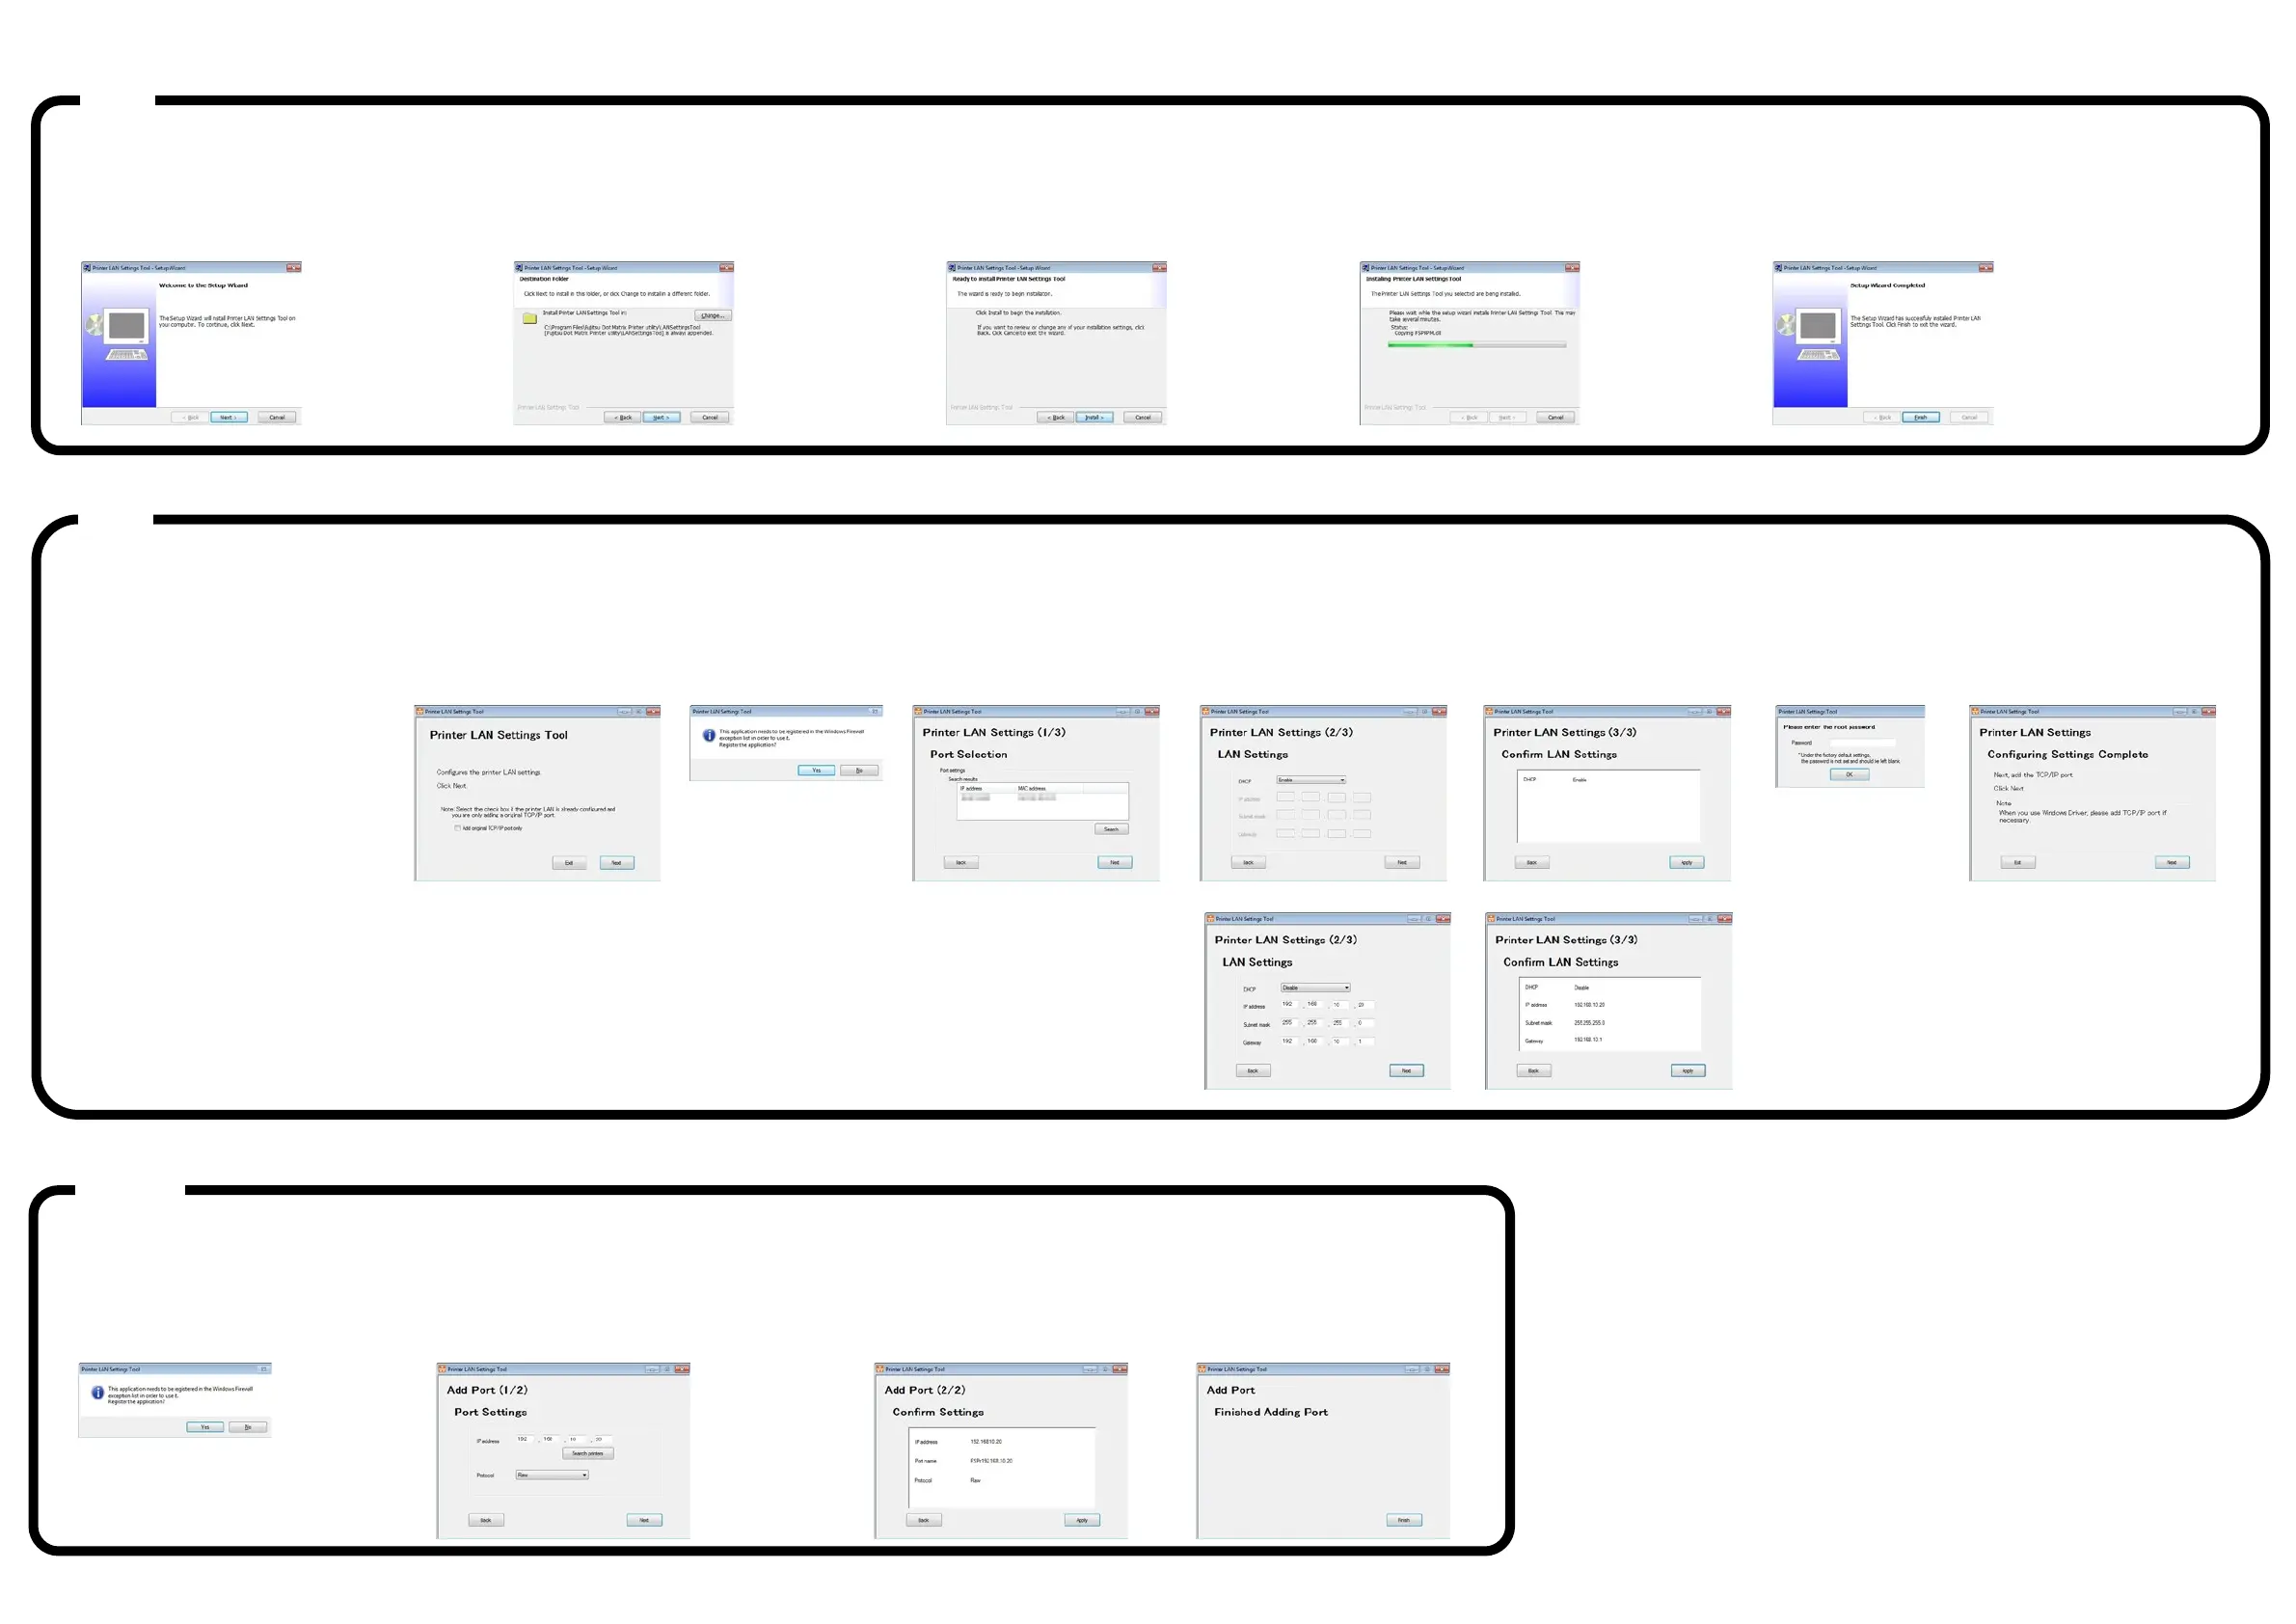
Installing Printer LAN Setting Tool
*If the [User Account Control] dialog box is displayed, click [Allow] or [Yes].
1. The Printer LAN Settings Tool window is
displayed. Click [Next].
2. Specify the installation folder. Click [Next].
* Click Change to select the installation folder.
3. Start installation. Click [Install].
4. A screen appears indicating that the
installation is in progress.
Please wait for the installation to complete.
5. This window is displayed after the "LAN Settings
Tool" installation completes.
Follow the on-screen instructions and click [Finish].
*If the [User Account Control] dialog box is displayed, click [Allow] or [Yes].
DHCP Enable: To acquire the IP address automatically from a DHCP server
DHCP Disable: To set the IP address manually
1. Click the PR-LN4 setting tool.
(*1)
For Windows 10
and Windows Server 2016:
Click [Fujitsu Dot Matrix Printer Utility]
-> [Settings Tool] from All apps in the
Windows Start menu.
For Windows 8 and later :
Click the [Settings Tool] tile in the Apps
view.
For Windows 7 and earlier:
Click [Fujitsu Dot Matrix Printer Utility]
-> [Printer LAN Tool] -> [Settings Tool]
from All Programs in the Windows
Start menu.
*1) Refer to PR-LN4 Software Guide.
1. The main screen of the tool
is displayed. Click [Next].
displayed, click [Yes].
3. Select the printer to configure
from among the search result
and click [Next].
4. Configure the IP address.
After configuring the settings,
click [Next].
*1) If a list of search results is not
displayed, click [Search].
Check the labels displayed on
the printer for the MAC address.
If you search printer set as
"Enable" of DHCP under network
environments which do not have
DHCP server, the printer's IP
address displays "0.0.0.0".
5. Confirm the settings and
click [Apply].
password" set in
the printer server
and click [OK].
7. This completes the settings.
To also create a "Original
TCP/IP Port", click [Next].
default settings, the
password is not set
and you should leave
it blank.
Adding an original TCP/IP port
*If the [User Account Control] dialog box is displayed, click [Allow] or [Yes].
1. When this screen is displayed, click [Yes].
2. Set the IP address, port name, and protocol.
Click [Next].
*1) You can also specify the IP address by searching
for the printer using [Search printers].
3. Confirm the settings and
click [Apply].
4. This completes adding the port,
click [Finish].
- This document describes the installation and usage of the PR-LN4
when it is used on FUJITSU DL7600Pro/DL7400Pro printer.
PR-LN4 is Windows-specific software to display the status of the printer.
The location and name of the documents in the CD-ROM are as follows.
- PR-LN4 Software Guide
\\Documents\PR-LN4 Software Guide\PR-LN4_SoftwareGuide.pdf
The ".NET Framework 3.5 SP1" or higher is required in order to use this tool.
If it is not installed, obtain and install the ".NET Framework 3.5 SP1" from
the Microsoft website.
Administrator privileges are required in order to run this tool.
Log into the Administrators account to run.
 Loading...