Allnewconstruction,mobilehomesandinstallation,
wherelocalcodesdonotallowgroundingthrough
neutral,requireafour-conductorbranchcircuit.For
existingconstruction,a three-conductorbranchcircuit
connectionmaybeused.
NOTETO ELECTRICIAN: The three power
l]eads supplied w_th this appliance are UL
recognized for connection to _arger gauge
household w_ring, The insulation o_ these
three _eads _s rated at temperatures much
h_gher than the temperature rating of
househol_d w_ringo The current carrying
capacity o_ the conductor is governed by the
temperature rating ef the insulation around
the wire_ rather than the w_re gauge alone°
Fig. 5
,,When installing in a new construction, or
oWhen installing range in a mobile home, or
When local codes do not permit grounding through
neutral:
1= Cut the neutral (white) lead from the crimp. Re-slrip
the neutral (white) lead to expose the proper length of
conductor.
2o Attach the appliance grounding lead (green or bare
copper) to the branch circuit grounding conductor
(green or bare) in accordance with local codes. If the
branch circuit grounding conductor is aluminum, see
"WARNIING" note.
3. Connect the range neutral (white) lead to the branch
circuit neutral (white or gray) in accordance with local
codes. If the branch circuit neutral conductor is
aluminum see "WARNIING"note.
4. Connect the range red lead to the branch circuit red
lead and the range black lead to the branch circuit
black lead in accordance with local codes. If the
residence red and black leads are aluminum
conductors, see '%VARNING" note.
2. Grasp the door at each side and lift up and off the
hinges.
CAUTION: When the door _s
re_oved and h_nge arms are at
s'Lop position, do not bump or try
to move the hinge arms° The
hinges could snap back causing
an _njuPj 1o the hands or damage to the
porcelain on the _ront oI_the range, Cover
the hinge:_ with toweling or _nsert empty
towe_ roH.,_ behind the h_nges wh_e
working _n the oven area=
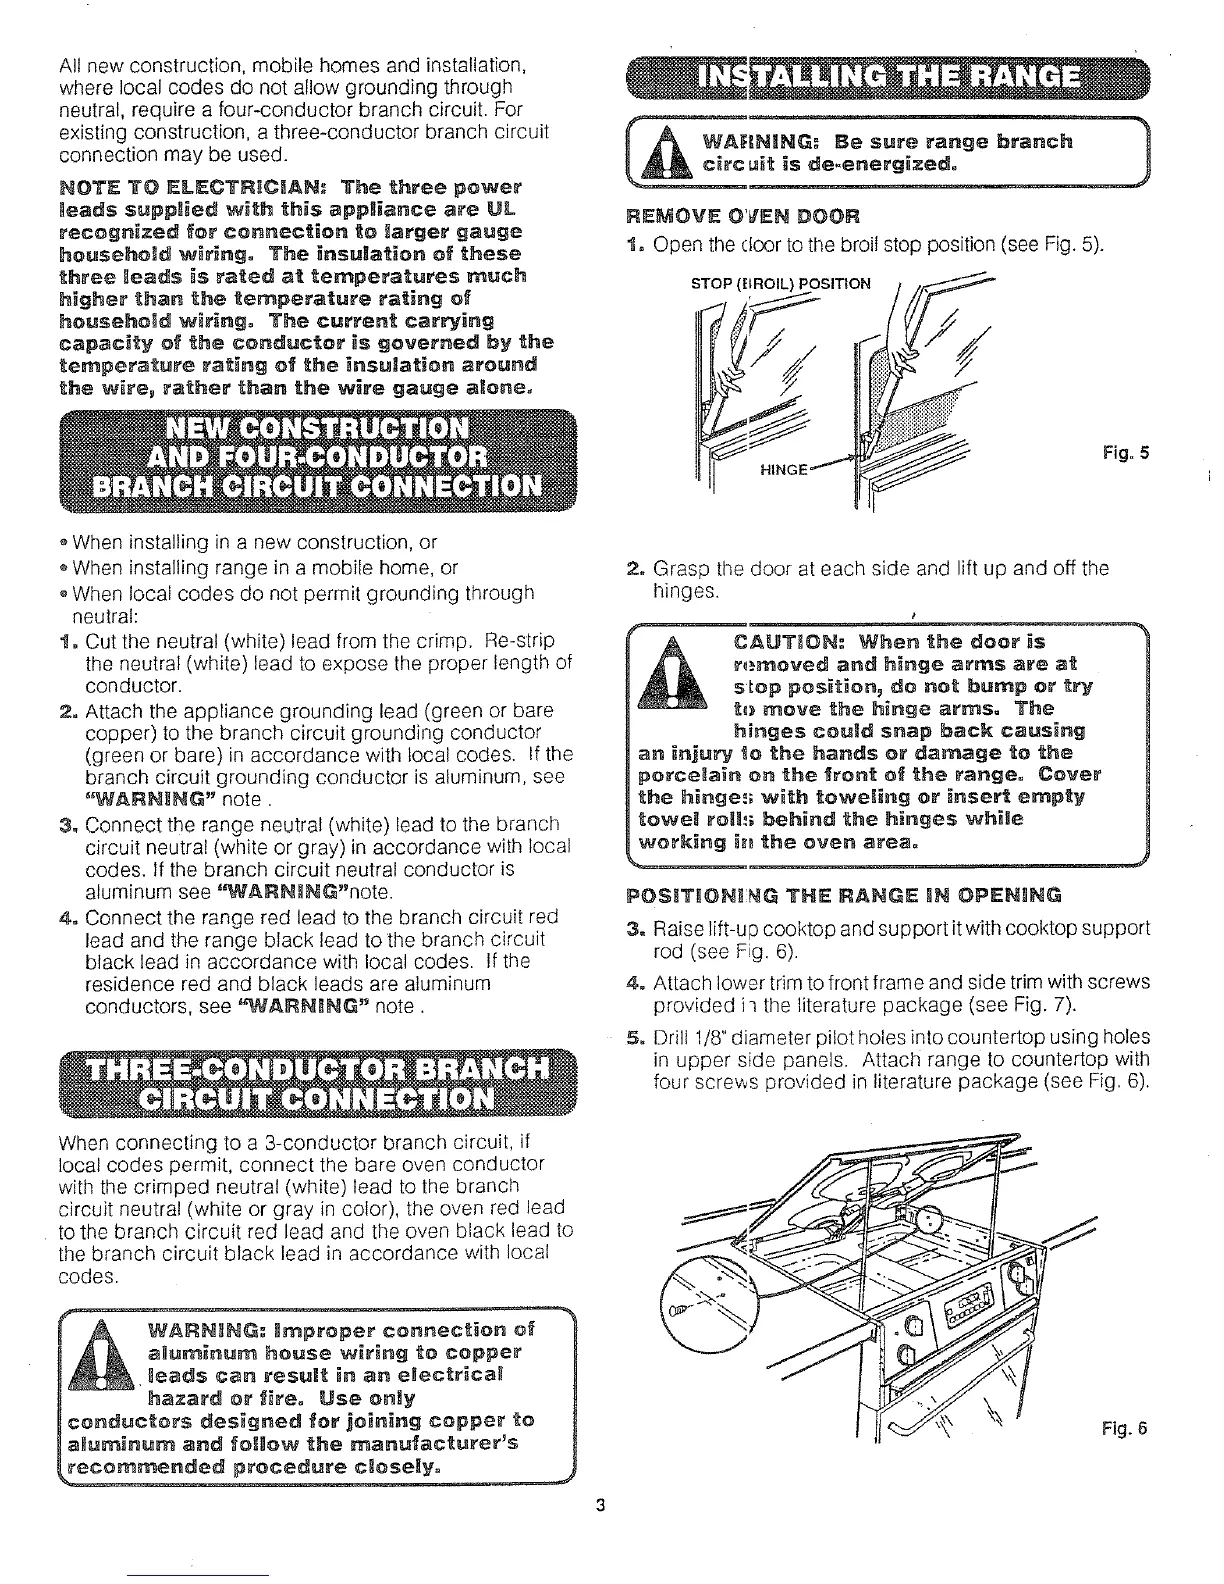
POS_T_OHI_NIG TH_ RANG_ IN OPEH_NG
:3. Raise lift-up cooktop and support it With cooktop support
rod (see Fg. 6).
4o Attach lower trim to front frame and side trim with screws
provided i_ the literature package (see Fig. 7).
5, [:)rill I/8" diameter pilot holes into counter[op using holes
in upper side panels. Attach range to countertop with
four scre_s provided in literature package (see Fig. 6).
When connecting to a 3-conductor branch circuit, if
local codes permit, connect the bare oven conductor
with the crimped neutral (white) lead to the branch
circuit neutral (white or gray in color), the oven red lead
to the branch circuit red lead and the oven black lead to
the branch circuit black lead in accordance with local
codes.
Fig. 8
 Loading...