1. Plug the telephone line cord (attached to the back of the
messaging system) into a modular wall jack.
NOTE: It is not necessary that a telephone be connected to the
messaging system in order for it to record messages.
HOUR
1. Press and hold the STOP/SET button for two seconds, then
release. The unit announces, "Time (the current time and day
setting) . To set hour, press NEXT. Press SET to continue."
2. To set the hour, press and release the NEXT or
GREETING/PREVIOUS button, and the unit announces an
hour, such as "12am, 1am, 2am," or "12am, 11pm, 10pm:'
3. After choosing the hour, press and release the STOP/SET
button to store the hour. The unit enters the Minute menu.
2. Connect a telephone to the jack on the back of the
messaging system.
3. Plug the power supply into and electrical outlet.
Wait for the beep. The unit is ready for setup or to answer
calls with the default greeting and settings.
MOVING THE MESSAGING SYSTEM
To move the messaging system to a different location in the
house, follow these instructions:
1. Disconnect the telephone line or any phones you may
have connected to the unit.
2. Unplug the power supply from the electrical outlet.
3. Move the messaging system and phone line to the
desired location.
4. Plug the power supply into the new electrical outlet.
5. Connect the telephone line.
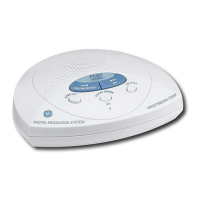
MESSAGING SYSTEM SET UP
MINUTES
1. The unit announces, "(the current minutes setting) To set
minutes, press NEXT. Press SET to continue."
2. To change the minutes, press and release the NEXT or
GREETING/PREVIOUS button and the unit announces a
minute such as "1, 2, 3."
3. After choosing the minute, press and release the STOP/
SET button to store the minute. The unit enters the Day
menu.
RECORDING THE GREETING
Before using your new messaging system, you should record a
greeting (the announcement callers hear when your messaging
system answers a call). If you don't record a greeting, callers
hear a default greeting which says,
"We
are unavailable to tahe your
mil. Please leave a message. Thanh you for calling. "
DAY
1. The unit announces, "(the current day setting) To set day,
press NEXT. Press SET to continue:'
2. To change the day, press and release the NEXT or
GREETING/PREVIOUS button and the unit announces a
day, such as "Sunday, Monday" or "Sunday, Saturday:
3. After choosing a day, press and release the STOP/SET
button to store the day. The unit enters the Rings to
Answer menu.
When recording the greeting you should be about six to eight
inches from the unit. Eliminate as much background noise as
possible.
1. Prepare your greeting.
Sample Greeting:
Hi, this is (use your name here). I can't answer the
phone right now, so jJlease leave your name, number, and a brief message
alter the tone, and I'll get bach to you. Thanks.
2. Press and hold the GREETING/PREVIOUS button. The unit
announces
"Record greeting a/ier tone."
After the tone you have
30 seconds to record your greeting.
3. Release the GREETING/PREVIOUS button when finished.
The unit beeps, and the greeting plays back
automatically.
REVIEWING OR ERASING THE GREETING
1. To review the default or recorded greeting, press and quickly
release the GREETING/PREVIOUS button. The unit plays
the current greeting.
2. To erase your greeting, press and hold the ON/OFF
ERASE button while your recorded greeting is playing.
Hold it until the voice prompt states "Greeting erased." The
default greeting is restored.
NOTE: Your recording time should not be less than two seconds.
Otherwise the unit will return to the default greeting.
RINGS TO ANSWER
This setting allows you to select the number of rings before the
unit answers a call.
1. The unit announces, "Rings to Answer (the current rings to
answer setting )To set rings to answer, press NEXT. Press
SET to continue."
2. To change the rings to answer, press and release the NEXT
or GREETING/PREVIOUS button and the unit announces a
number, such as "2,3,4;' or "2, toll saver,S:'
3. After choosing a number, press and release the STOP/ SET
button to store the rings to answer. The unit confirms the
setting and enters Message Length menu.
TOLL SAVER
Toll Saver saves you the cost of making a call when you
access your messages from another location:
• If you have new messages, the unit answers after the 2nd
ring.
• If you have no new messages, the unit answers after the 5th
ring.
You can hang up after the 3rd ring and save the pay
telephone or long distance charge.
Hour 12
a.m. -
11 p.m.
Minute 0- 59
Day Sunday - Monday
Rings 2,3,4,5 toll saycr
to Answer
Mcssage
time
1,2,,4, rninntcs
Secnrity 0-9.0-9.0-9
Code
Rings to Answcr 4
Jvlessage tirne 2
Security Code 123
SETTING THE INCOMING MESSAGE TIME
This setting allows you to select the length of recording time
of the incoming message.
1. The unit announces" Message Time (current message
length) minutes. To set message time, press NEXT. Press
SET to continue."
2. To change the message length, press and release the
NEXT or GREETING/PREVIOUS button and the unit
announces a number, such as "1, 2, 3, 4."
3. After choosing a number, press and release the STOP/ SET
button to store the message time. The unit enters the Security
Code Menu.
SETTING THE SECURITY CODE
This setting allows to change the factory-set security code,
ich you use to access your digital answering system
remotely. The default code is 123.
1. The unit announces, "Security code (the current 3
number Security Code setting). To set security code,
press NEXT. Press SET to stop."
NOTE: If you press and release the STOP/SET button, the unit
announces all the new settings and exits the set up menu.
CHANGING THE SETTINGS
This function allows you to change the Time/Day, Rings to
Answer, message time and Security Code settings. To
change the settings, follow the message system's voice
instructions.
TIME/DAY
This setting allows you to set the current time and day for the
Time/Day stamp attached to each message.
 Loading...