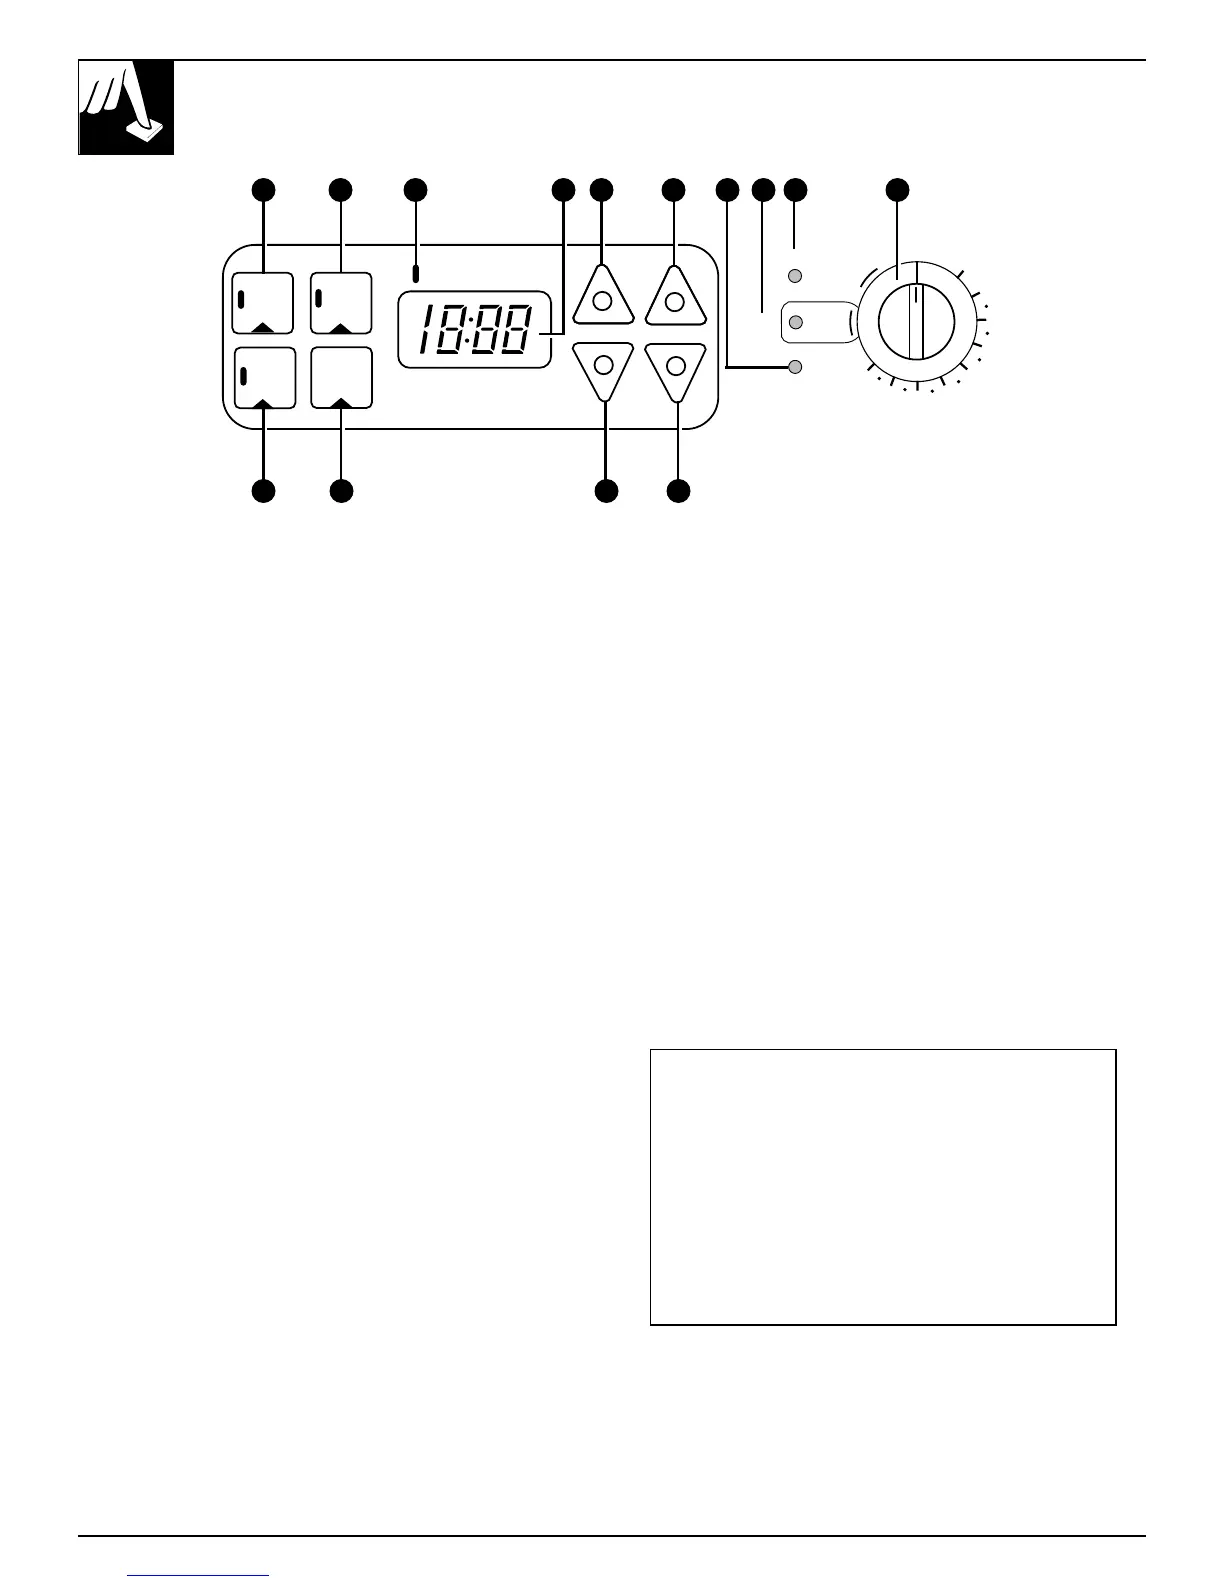
FEATURES OF YOUR OVEN CONTROL
Not all features are on all models. Appearance may vary.
CLOCK
+
–
HOUR
TIMER
ON/OFF
+
–
MIN.
HR MIN
COOK
TIME
ON/OFF
START
TIME
ON/OFF
AUTOMATIC OVEN
OFF
PREHEATED
OVEN ON
BROIL
AUTO
SELF
CLEAN
LATCH
DOOR
WM
200
250
300
350
400
500
550
450
1
11
2
3 554 8 976
10
1. COOK TIME ON/OFF. Press this pad and then
press the HOUR and MIN. pads to set the amount
of time you want your food to cook. Turn the Oven
Temperature knob to the desired temperature. The
oven will shut off after the Cook Time has run out.
2. TIMER ON/OFF. Press this pad to select the timer
feature. The timer does not control oven operations.
The timer can time up to 11 hours and 59 minutes.
To set the timer, first press the TIMER ON/OFF
pad. Press the HOUR and MIN. pads to change
the time.
To cancel the timer, press the TIMER ON/OFF pad
until the display clears.
3. AUTOMATIC OVEN Light. This lights anytime
the oven has been programmed.
4. TIME DISPLAY. Shows the time of day and the
times set for the timer on automatic oven operations.
5. HOUR and MIN. pads. These pads allow you to
set times up to 11 hours and 59 minutes.
6. PREHEATED Indicator Light. Glows when
the oven reaches your selected temperature.
7. LATCH DOOR Light. Glows when the oven is
in the Self-Clean cycle. After the Self-Clean
Cycle, the light will flash. Unlatch the door and
turn the Oven Temperature knob to OFF.
8. OVEN ON Light. Glows anytime the oven is
heating. The light will flash when the oven
automatically turns off to remind you to turn the
Oven Temperature knob to OFF.
9. Oven Temperature Knob. Turn this knob to the
temperature or function you want. See the Baking,
Roasting, Broiling and Self-Cleaning sections.
10. START TIME ON/OFF. Press this pad and the
HOUR and MIN. pads to delay the starting of
your oven up to 11 hours and 59 minutes.
11. CLOCK. Press this pad before setting the
clock. To set the clock, first press the CLOCK
pad. Then press the HOUR and MIN. pads to
change the time of day.
If “F—and a number” flash in the display and
the oven control signals, this indicates a
function error code. If the function error code
appears during the self-cleaning function, check
the oven door latch—the latch handle may have
been moved, even if only slightly, from the
latched position. Make sure the handle is to the
right as far as it will go. Turn the Oven Temperature
knob to off. Allow the oven to cool for one hour.
If the function error code repeats, disconnect
power to the range and call for service.
10
5 5
 Loading...