Do you have a question about the GE UVC9360 and is the answer not in the manual?
| Brand | GE |
|---|---|
| Model | UVC9360 |
| Category | Ventilation Hood |
| Language | English |
General safety guidelines for operation, electrical safety, and proper ventilation.
Specific procedures for handling range top grease fires, including immediate actions and extinguisher use.
Preventive measures for grease fires, including unattended cooking and oil heating on the range.
Safety measures for installation, electrical wiring, and protecting utilities during setup.
Mandatory use of metal ductwork for fire safety compliance.
Guide to safely removing protective film from the appliance surface before use.
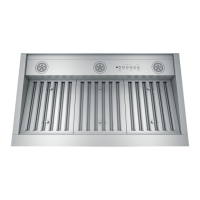
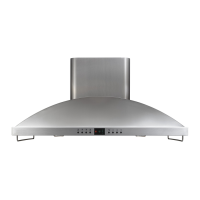
Explanation of the control panel layout and functions for fan and light operation.
Description of the heat sensor that automatically adjusts blower speed based on cooking surface heat.
Instructions for pairing the hood with other compatible Chef Connect enabled products.
Steps to connect your GE Appliances hood to your smart device via Wi-Fi for remote control.
Instructions for removing, cleaning, and installing the grease drip tray.
Procedure for removing, cleaning, and correctly reinstalling the baffle metal grease filters.
Information on charcoal filter maintenance, replacement frequency, and ordering.
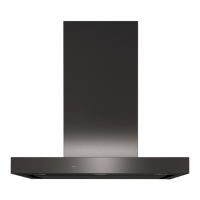
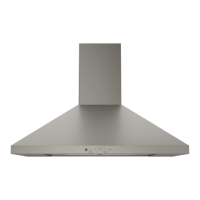
Guidance on cleaning stainless steel surfaces using appropriate cleaners and techniques.
Procedure for safely replacing the hood's light bulbs, including compatibility information.
Essential preparations, safety warnings, skill level, and tool requirements for installation.
Safety instructions for electrical supply, grounding, and disconnecting power before installation.
Details about the optional power cord kit (JXHC1) for installation via a standard wall outlet.
Specifications for hood dimensions and required clearances above the cooking surface.
Guidelines for preparing the cabinet opening and mounting the hood, including custom cabinet planning.
List of tools and materials needed for installation that are not supplied with the hood.
Identification of parts included with the hood, including hardware and mounting screws.
Instructions for safely removing packaging materials and handling sharp edges.
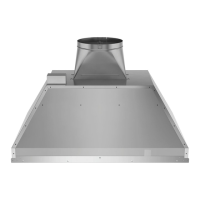
Planning considerations for vertical and horizontal duct venting, including materials and airflow.
Requirements for custom cabinet openings to accommodate the hood insert, including dimensions.
Information for installing the hood in recirculation mode using charcoal filters.
Details on the electrical supply needed, including voltage, frequency, and circuit protection.
Steps for preparing house wiring to connect to the junction box for installation.
Steps for preparing the cabinet, including damper attachment, centering, and panel removal for access.
Procedure for inserting and fastening the hood into the cabinet opening and sealing the duct.
Instructions for connecting the hood's wiring to the house electrical supply.
Steps for installing the optional recirculation kit, including cutting holes and sealing ducts.
Final steps including inserting filters, checking lights and blower operation, and finishing cabinetry.
Instructions for modifying wiring to limit CFM levels (390CFM or 290CFM) for local codes.
Solutions for problems with the fan or light not operating or cycling unexpectedly.
Troubleshooting steps for loud or abnormal airflow noise and inadequate air circulation.
Solutions for issues with grease not captured in drip trays and problems with remote hood operation.
Details on what is covered by the limited warranty and common exclusions.
Information on implied warranties and consumer legal rights varying by state or province.
List of optional parts like power cord, make-up air kit, and cleaning supplies.
Recommended cleaning products for maintaining the appliance's surfaces and finish.
Information on accessing the GE Appliances website for support and registering your appliance.
How to schedule repair service and information on purchasing extended warranties.
Guidance on ordering parts, accessories, and how to contact GE Appliances for support.