Other Top Console Parts replacement
Vivid E80/E90/E95 – Service Manual 8-57
GC091052 Rev. 3
2. Disconnect the Mains Power Cable from the wall outlet.
3. Disconnect all probes and external I/O cabling.
4. Remove the Rotary buttons below the Touch screen and the
Volume button.
5. Remove the Operating Panel, Upper.
6. Remove the Operating Panel, Lower. Place it on a clean
surface with the front down.
Remove the Handle, Left Top / Handle Right Top
Hatches are used to attach the Handle Left Top and Handle
Right Top to the Lower UI.
NOTE: Be careful when doing this procedure. It is easy to break the
plastic hatches.
NOTE: The screwdriver positions in Figure 8-10 on page 8-57 indicates
where the hatches are located.
Follow this procedure to remove the Handle, Left Top / Handle
Right Top:
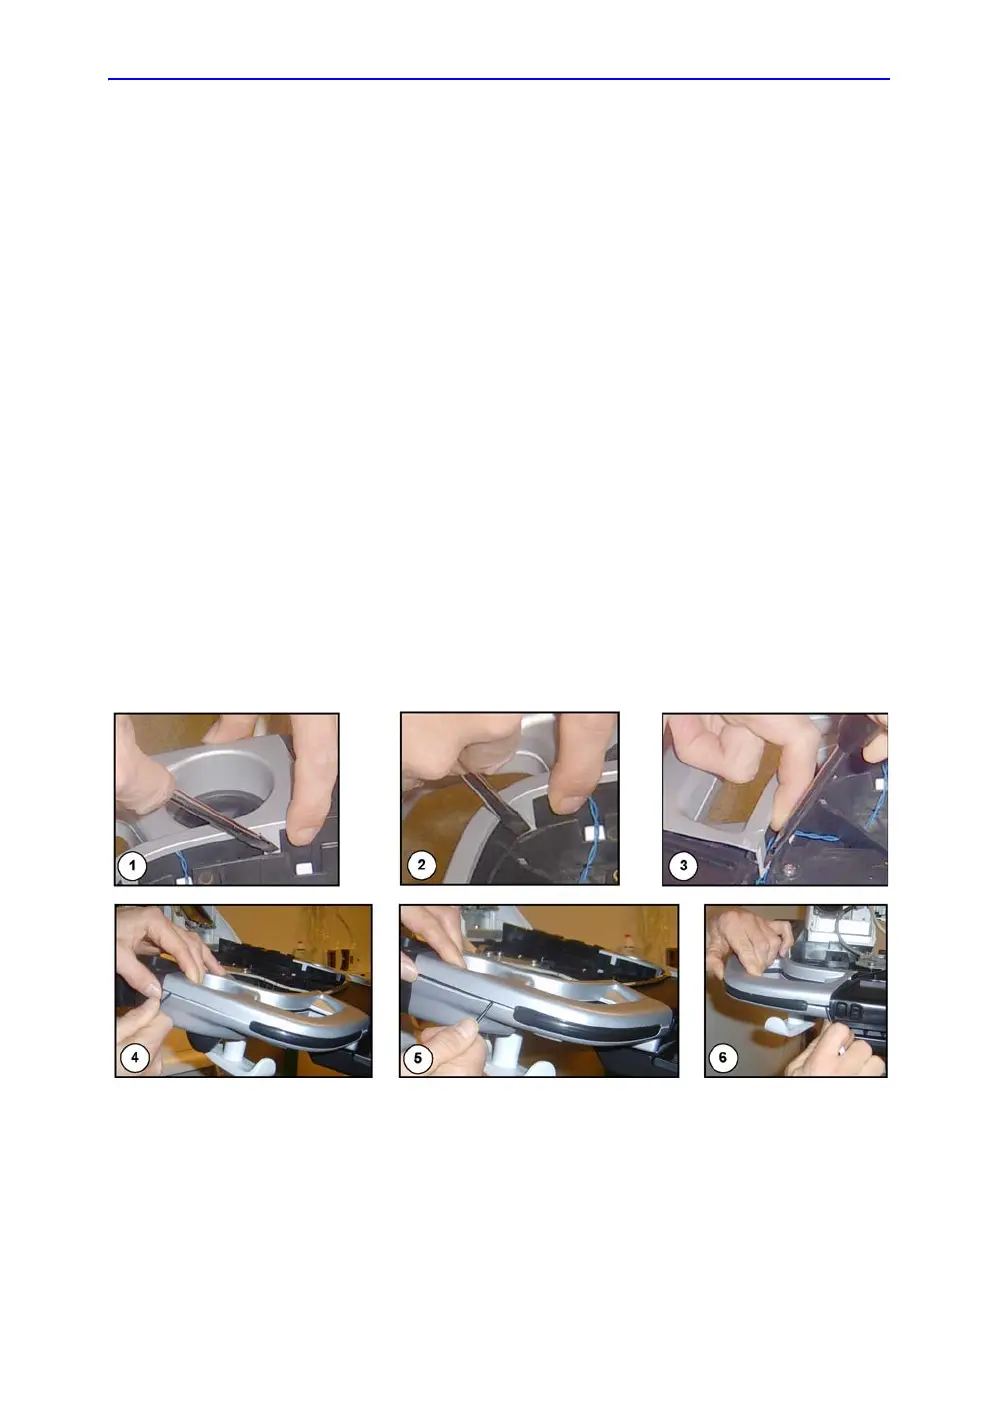
1. Use a thin screwdriver to release the hatches, one by one
as illustrated in Figure 8-10 on page 8-57, until you can
remove the Handle Left Top or Handle Right Top.
Figure 8-10. Release Hatches
2. Remove the Handle Left Top or Handle Right Top.
3. If needed, repeat the previous steps for the other handle.

 Loading...


