Rev 2.0 Page 2
Getting Started
After all the cables are connected, the mount and the telescope optical tube is properly set at
counterweight down (CWD) position, you can power ON the Gemini 2.
As the Gemini 2 boots up a blue screen will come on for a second. Use this ONLY if you need to
recalibrate the touch screen. Calibration is set at the factory and most likely will be fine so you can let
this screen pass by not touching the screen.
NOTE: there is a dedicated video to setting up your Gemini for the very first time here:
https://www.youtube.com/watch?v=hoba3nVv0AM )
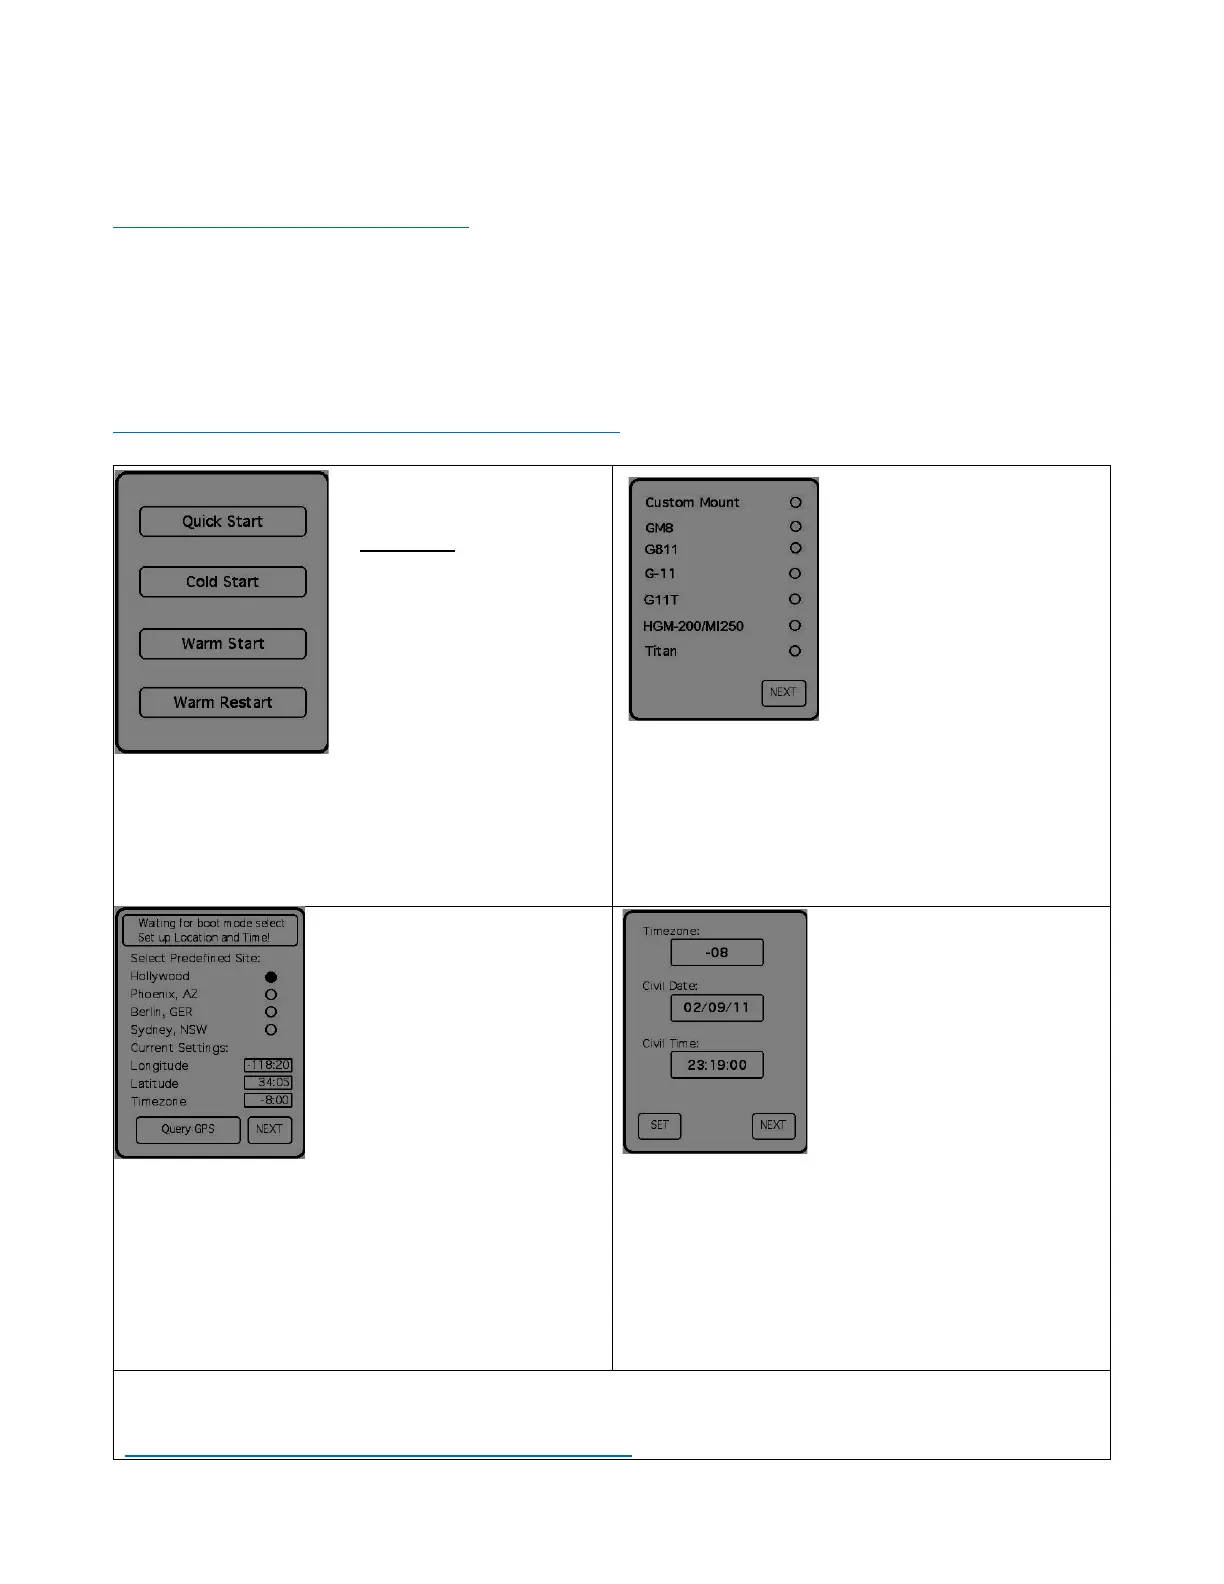
screen press Quick Start.
(Cold Start will be used
when you are starting up
using the mount again
but already have the
location and time
entered. For example you
move the mount in doors
and the next night you
move it back outside. Alignment will need to be
done again. Power ON Gemini 2 when the
telescope is pointing at Polaris and CWD.
2. Select your appropriate
Mount Type (G11, GM811,
etc.)
Press NEXT
Longitude and Latitude.
Longitude will be negative
in the Western Hemisphere.
Long and Lat is in HH:MM
format, not Decimal. Enter
Time Zone of your location
taking into account any
daylight savings time. If you
have a Losmandy GPS, it should be plugged in to
serial/GPS port. Wait until the GPS is blinking
(showing GPS lock), then press QUERY GPS: the
location will be automatically filled in. With GPS
you still need to enter your timezone
Press NEXT
4. Enter Date & Time – Date
in format MM/DD/YY and
Time in Military (24 hour)
format. When Date and
Time is correct -
Press SET then
Press NEXT
PLEASE NOTE: there is an excellent online tool that gives you accurate and correctly formatted
location, date, and time information for programming your Gemini, it can be found here:
https://gemini-2.com/lat_long_from_address.html
 Loading...