2
PRODUCT OVERVIEW
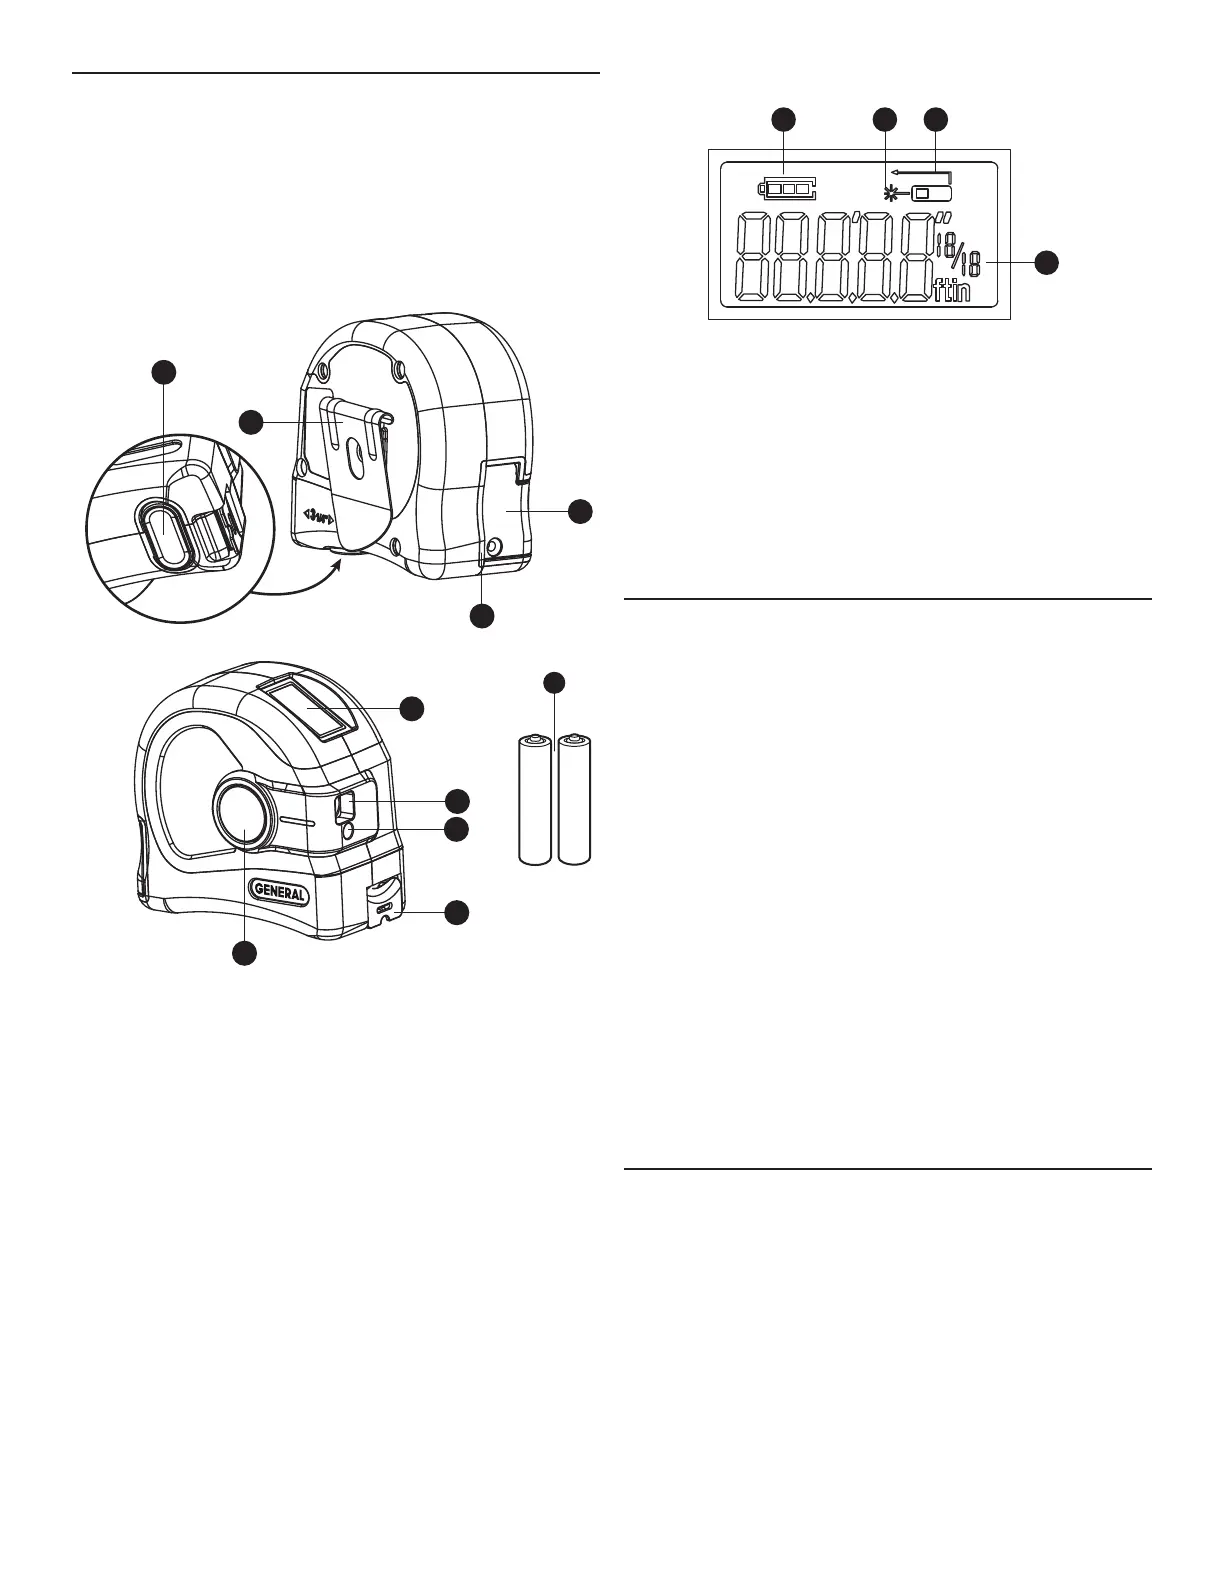
Fig. 1 shows the key components of the LTM1. Fig. 2
shows all possible display icons and indications. Use Fig. 1
to familiarize yourself with the position and function of all
components—especially the red measurement button
(Callout 1)—before moving on to the safety, setup and
operating instructions.
Fig. 1. The LTM1’s key components
1. Red measurement button. Press to activate laser
pointer.
2. Conventional 16 ft. tape measure
3. Laser measurement reference point
4. Metal belt clip
5. Gray tape retraction button
6. Laser measurement display (see Fig. 2)
7. Hinged battery compartment cover
8. Two “AAA” Alkaline batteries (included)
9. Red laser pointer exit
10. Infrared transmitter/receiver port
Fig. 2. The LTM1’s laser measurement display
A. Battery charge indicator
B. Laser measurement enabled icon. When flashing,
indicates that the laser pointer is activated and ready to
be aimed at a target.
C. Indicates that laser measurements are referenced to
the edge of the housing opposite the laser pointer exit
(Fig. 1, Callout 3).
D. Distance readout
SAFETY INSTRUCTIONS
CAUTION!
• The LTM1’s Class II laser pointer emits less than 1mW of
radiation at 620 to 690 nm (nanometers). However, avoid
looking directly at the laser, and never point it at people
or animals. Eye protection is normally afforded by the
blink reflex. U.S. law prohibits pointing a laser beam at
aircraft; doing so is punishable by a fine of up to $10,000
and imprisonment.
• Do not operate the LTM1 in explosive environments
containing flammable liquids, gases or dust. Sparks may
be created in the tool which may ignite the dust or
fumes.
• Keep the LTM1 away from cardiac pacemakers. A
magnet inside the tool generates a field that can impair
their function. Likewise keep the tool away from
magnetic data storage media, whose contents may be
erased by the magnetic field.
SETUP INSTRUCTIONS
INSTALL BATTERIES
The LTM1 is ready to use after you install the two supplied
“AAA” batteries. To open the battery compartment (Fig. 1,
Callout 7), use the included Phillips-head screwdriver to
turn the screw securing the compartment cover
counterclockwise until it swings up on its hinge at the top.
Install the batteries in series by following the polarity
marks on the inside of the cover. Then swing the cover
down and tighten the screw to secure it.

 Loading...