2
PRODUCT OVERVIEW
F
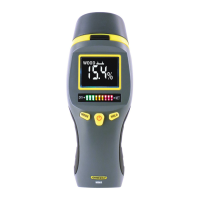
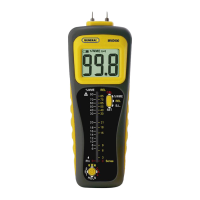
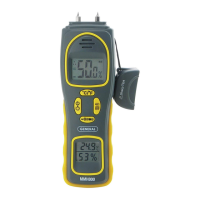
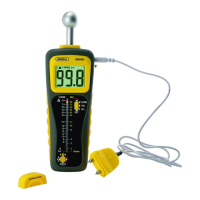
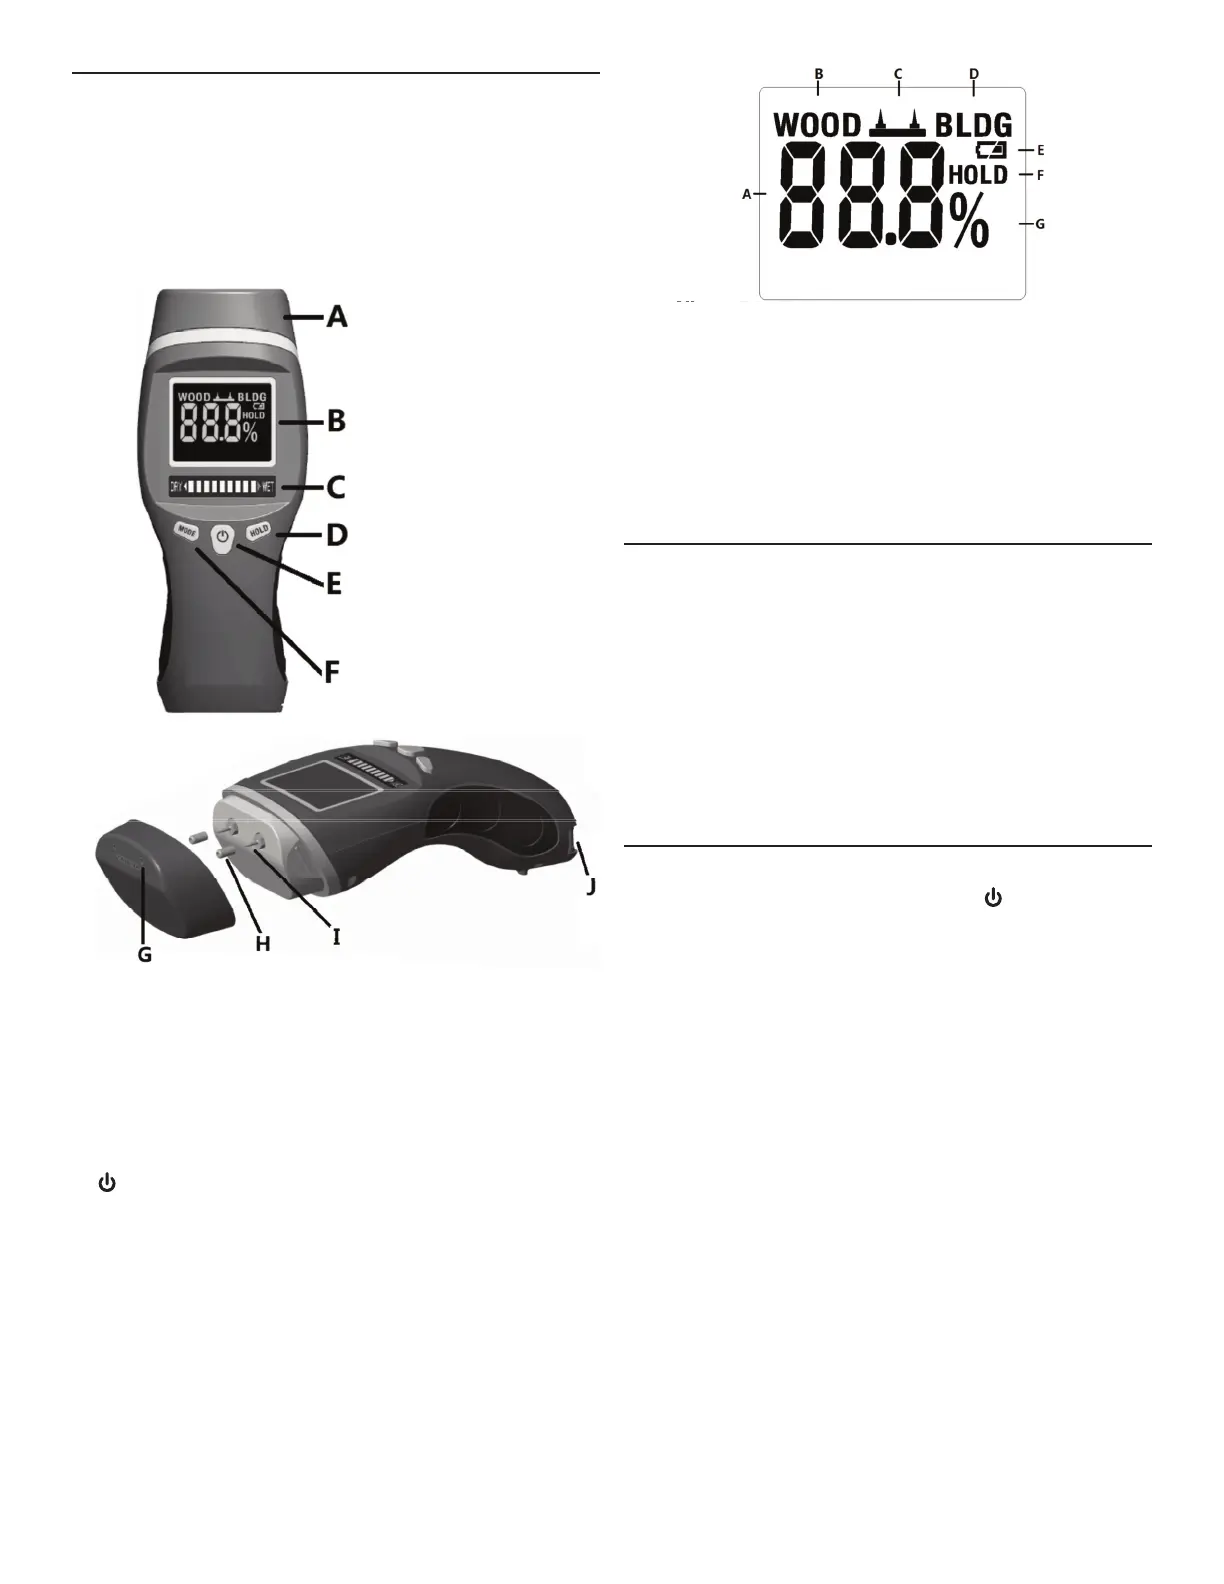
ig. 1 shows all of the controls, indicators and physical features
of the MM7. Fig. 2 shows all possible display indications.
Familiarize yourself with the position and function of all
components before moving on to the Setup Instructions
and Operating Instructions.
Fig. 1.
The controls, indicators and physical features of the MM7
A. Removable pin cover with fixed calibration-checking resistor
on its underside
B. High-contrast, white-on-black LCD (see Fig. 2)
C. LED bar graph; mirrors reading on LCD
D.
HOLD
button. “Freezes” and releases LCD and LED readouts.
Also used to enable and silence out-of-range alarms.
E. button.
Pressed briefly
, powers the meter on.
Pressed
and held
for at least 3 seconds, powers the meter off.
F.
MODE
button.
Pressed briefly, selects WME% moisture
measurement of wood or building material.
G. Calibration holes sized for the MM7's measurement pins
H. Measurement pin covers
I. Measurement pins
J. Battery compartment
Fig 2. All possible display indications
A. Moisture level readout
B. Indicates operation in wood measurement mode
C. Indicates operation in pin mode
D. Indicates operation in building material measurement mode
E. Low battery charge indication; replace the “9V” battery when
it appears
F. Indicates a held measurement
G. Moisture measurement unit (%WME)
SETUP INSTRUCTIONS
INSTALL BATTERY
Open the battery compartment at the bottom of the meter
(Fig. 1, Callout J) by placing a fingernail in the slot on the right
side of the housing where it meets the compartment door. Push
the tab on the door gently to the left until it pops open. Remove
the “9V” battery from the packaging and slide it into the
compartment “terminals-first”, with the anode (+ terminal) on
the right, as indicated by the markings inside the compartment.
Swing the door back toward its closed position until it snaps
shut.
OPERATING INSTRUCTIONS
To power on the meter, press and hold the
button (Fig. 1,
Callout E)
for at least three seconds. (To power off the meter,
follow the same instruction.)
To measure the moisture level of wood or a building material,
power on the meter and remove the pin cover (Fig. 1, Callout A)
by squeezing it gently to pop it off. The LCD will display the word
WOOD
(Fig. 2, Callout B) and the pin-mode icon (Callout C) at its
right. Remove the black rubber insulating sleeves from the pins.
To measure wood
, carefully press the test pins into the sample.
Its absolute moisture level will be displayed as a percentage,
with the unit %WME (Fig. 2, Callouts A and G). Simultaneously,
the bar graph LEDs will illuminate to mirror the digital reading.
To measure a building material, press the MODE button to
change the indication on the top line of the LCD from
WOOD
to
BLDG
(Fig. 2, Callout D). As with wood, carefully press the test
pins into the sample. Its absolute moisture level will be displayed
as a percentage, with the unit %WME. Again, one or more bar
graph LEDs will illuminate to mirror the digital reading.
In wood measurement mode, the available moisture level range
is 5% to 50%. When the level is below 5%, the LCD will show
__ __ __. When it is above 50%, the LCD will show  ̄ ̄ ̄.
In building material measurement mode, the available moisture
level range is 1.5% to 33%. When the level is below 1.5%, the
LCD will show __ __ __. When it is above 33%, the LCD will
show
 ̄ ̄ ̄
.
 Loading...