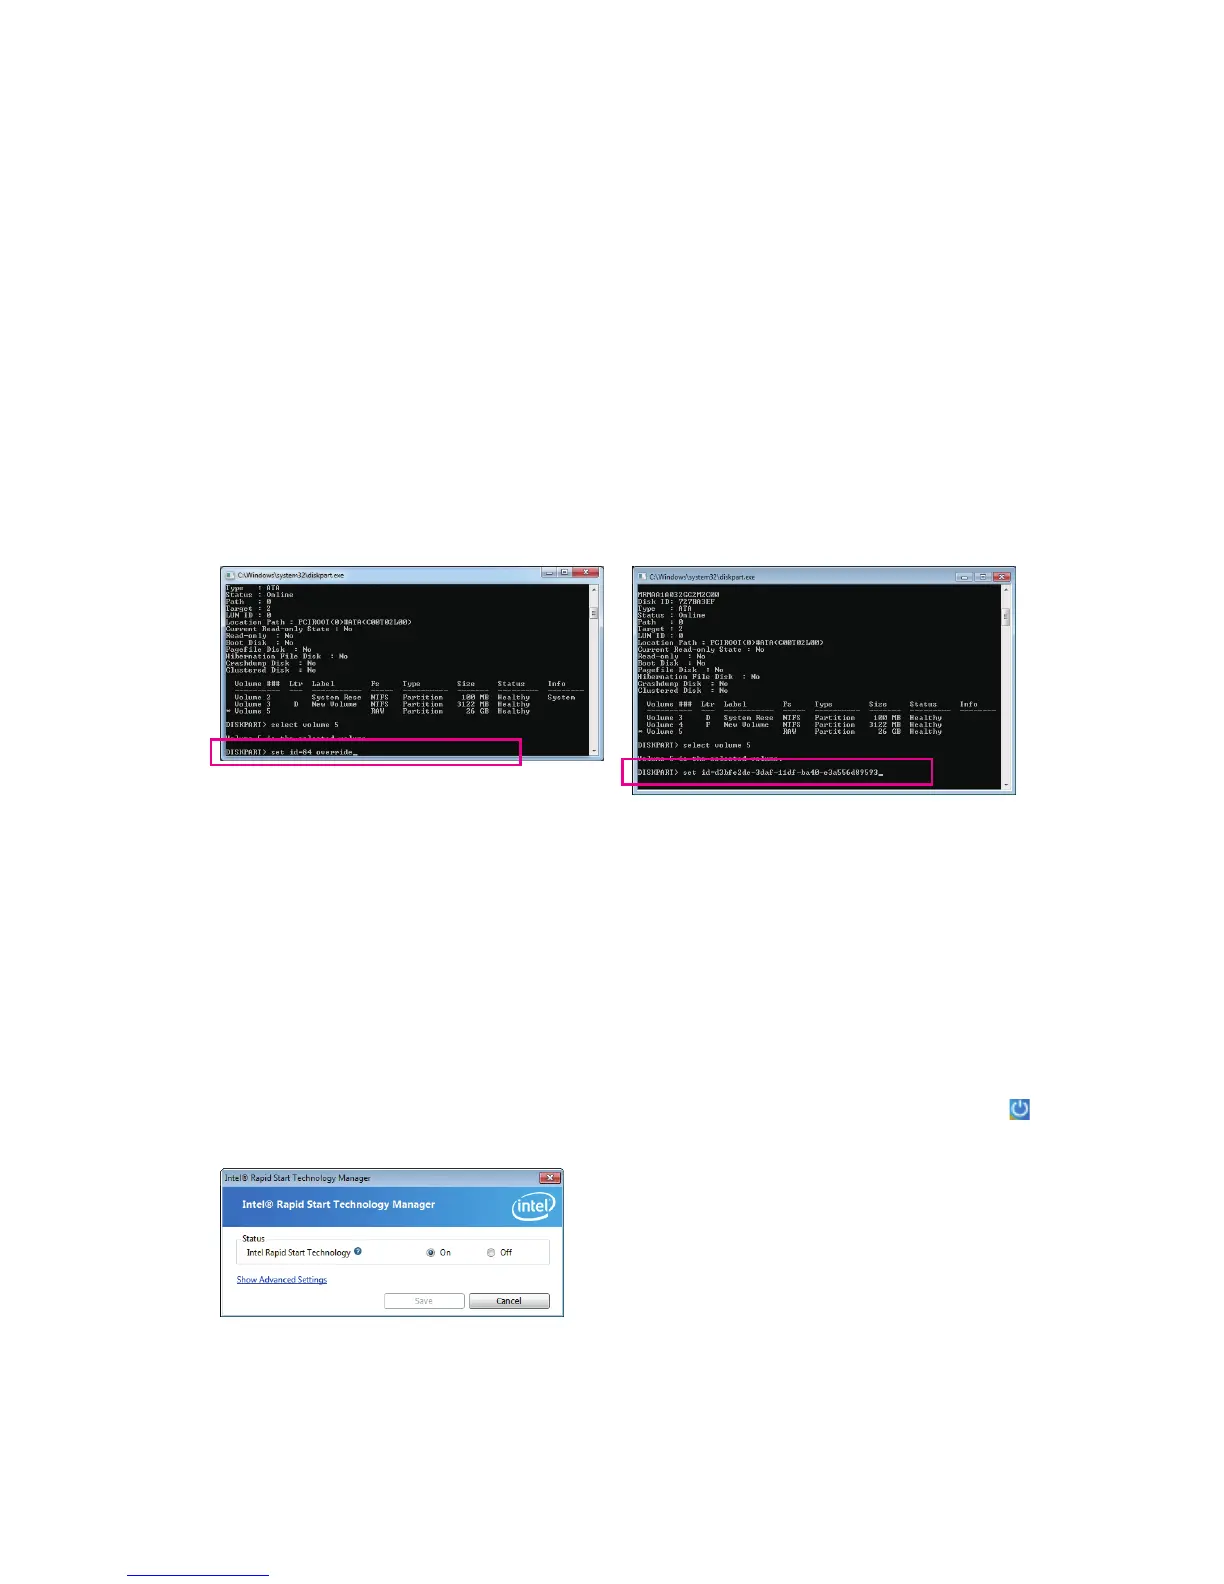
DISKPART>detail disk
(Displays the properties of the selected disk and the
volumes on that disk)
DISKPART>select volume X
(Selects the specied volume. "X" is volume of your
store partition. Refer to the results from "detail
disk" for exact volume number)
DISKPART>set id=84 override
(Change the partition type) (Figure 3)
GPT format:
Follow the commands for MBR format. When you execute the last command where you change the partition
type (set id="XXX"), enter the following command instead (Figure 4):
DISKPART>set id=D3BFE2DE-3DAF-11DF-BA40-E3A556D89593
You have created the Intel Rapid Start Technology store partition after completing the commands above.
Restart your computer.
Figure 3
Figure 4
D. Enabling the Intel Rapid Start Technology in BIOS Setup
When the system restarts, press <Delete> to enter the BIOS Setup program. Go to the 1. Peripherals menu
and set Intel Rapid Start Technology to Enabled.
Save the settings and exit BIOS Setup. 2.
E. Installing and Conguring the Intel Rapid Start Application
While in the operating system, insert the motherboard driver disk, go to Application Software\Install Application 1.
Software, and select Intel Rapid Start Technology to install. After the installation is complete, we recommend
that you restart the system.
Launch the 2.
Intel Rapid Start Technology Manager application
from
Start\All Programs\Intel or click the
icon in the notication area.
Instructions:
The Intel Rapid Start application allows you to enable or
disable the Intel Rapid Start Technology. The Timer slider
in Advanced Settings allows you to set when to copy and
move the data from the memory to the SSD after entering
S3 mode.
 Loading...