~3~ ~4~
HARDWARE INSTALLATION
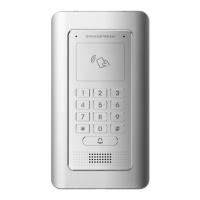
GSC3510 PORTS
Port Description
Reset Factory reset button. Press for 10 seconds to reset factory
default settings.
NET/PoE Ethernet RJ45 port (10/100Mbps) supporting PoE/PoE+.
2-Pin port 2-pin multi-purpose input port.(switch action)
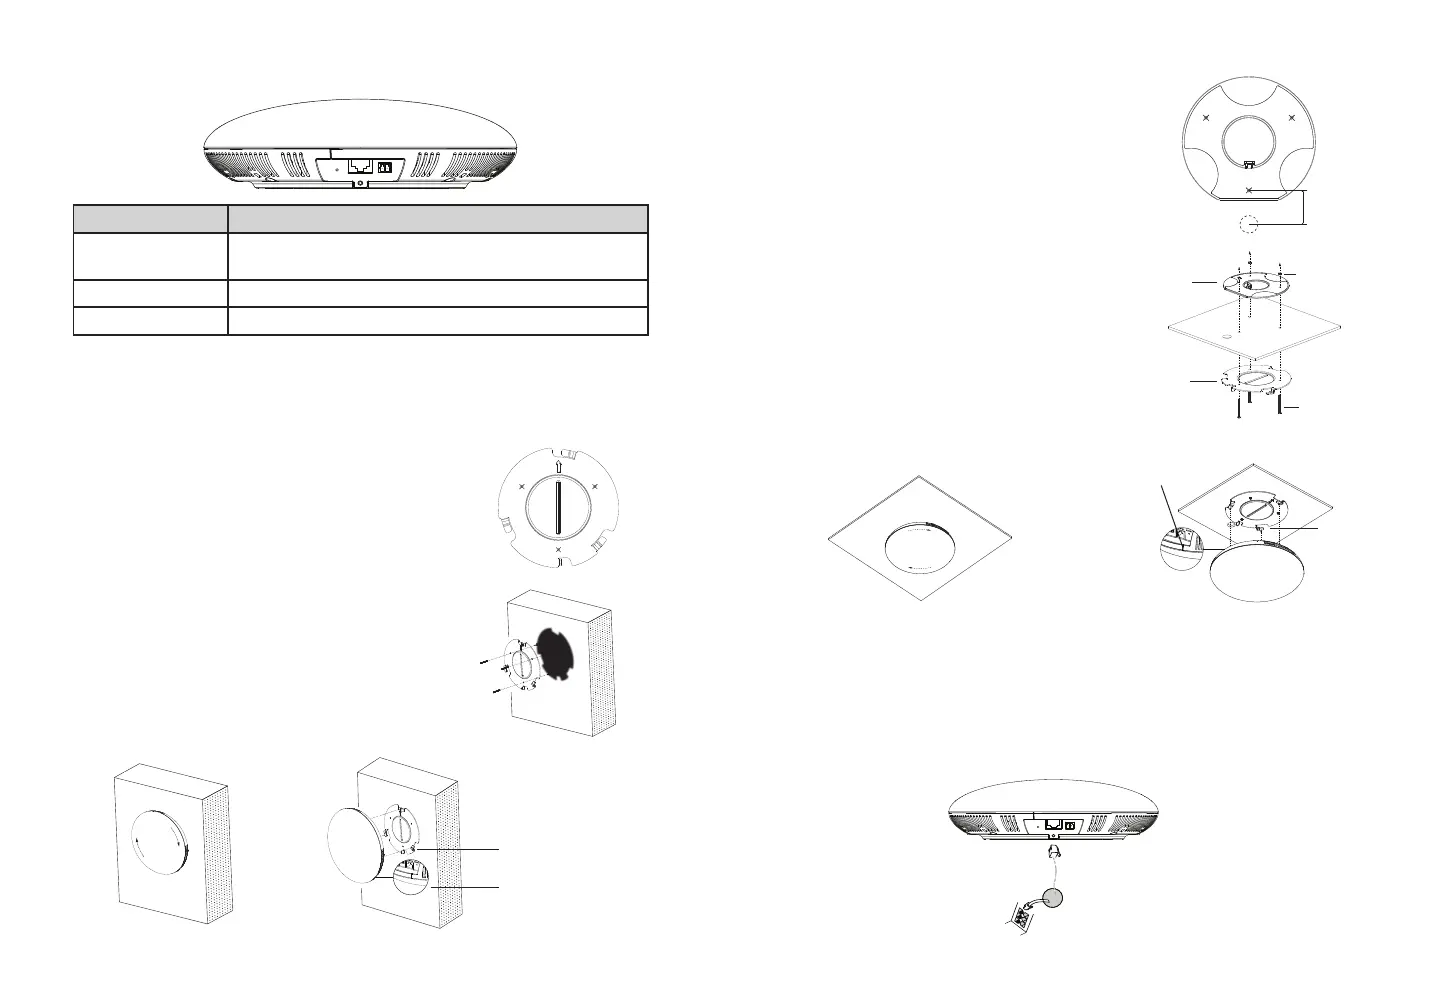
Lock
Positionining slot
1. Locate the equipment holder on the desired po-
sition with arrow up. Drill three holes on the wall
referring to the positions of holes on the metal
bracket.
2. Fix the metal bracket on the wall by expansion
screws.
3. Align the position line on device’s back cover
with the positioning slot.
4. Rotate the device clockwise untill it is locked on
the right postion.
Wall Mount
GSC3510 can be mounted on the wall or ceiling. Please refer to the following
steps for the appropriate installation.
Ceiling Mount
1. Put the ceiling mounting (metal bracket)
in the ceiling’s center and mark the posi-
tion of the three screw holes.
2. Drill a round hole with a diameter of
18mm for Ethernet cable. The distance
between its center and the highlighted
hole on the plastic bracket should be
35mm.
3. Fix the plastic and metal brackets on the
ceiling with at-head screws and lock-
nuts.Then place an Ethernet cable pass
through the 18mm-round hole.
4. Align the position line on device’s back
cover with the positioning slot.
5. Rotate the device clockwise untill it is
locked on the right postion.
35mm
M3.0x50
screw
M3 nut
Metal
bracket
Plastic
bracket
Lock
Positionining
slot
GSC3510 can be powered on using PoE/PoE+ switch or PoE injector using
following steps:
- Step 1: Plug a RJ45 Ethernet cable into the network port of the GSC3510.
- Step 2: Plug the other end into the power over Ethernet (PoE) switch or PoE
injector.
POWERING AND CONNECTING THE GSC3510
Network Port
RJ45 Ethernet Cable to Power over Eth-
ernet (PoE) Switch or PoE injector.
1
2
34
1, 2
3
45
 Loading...