20
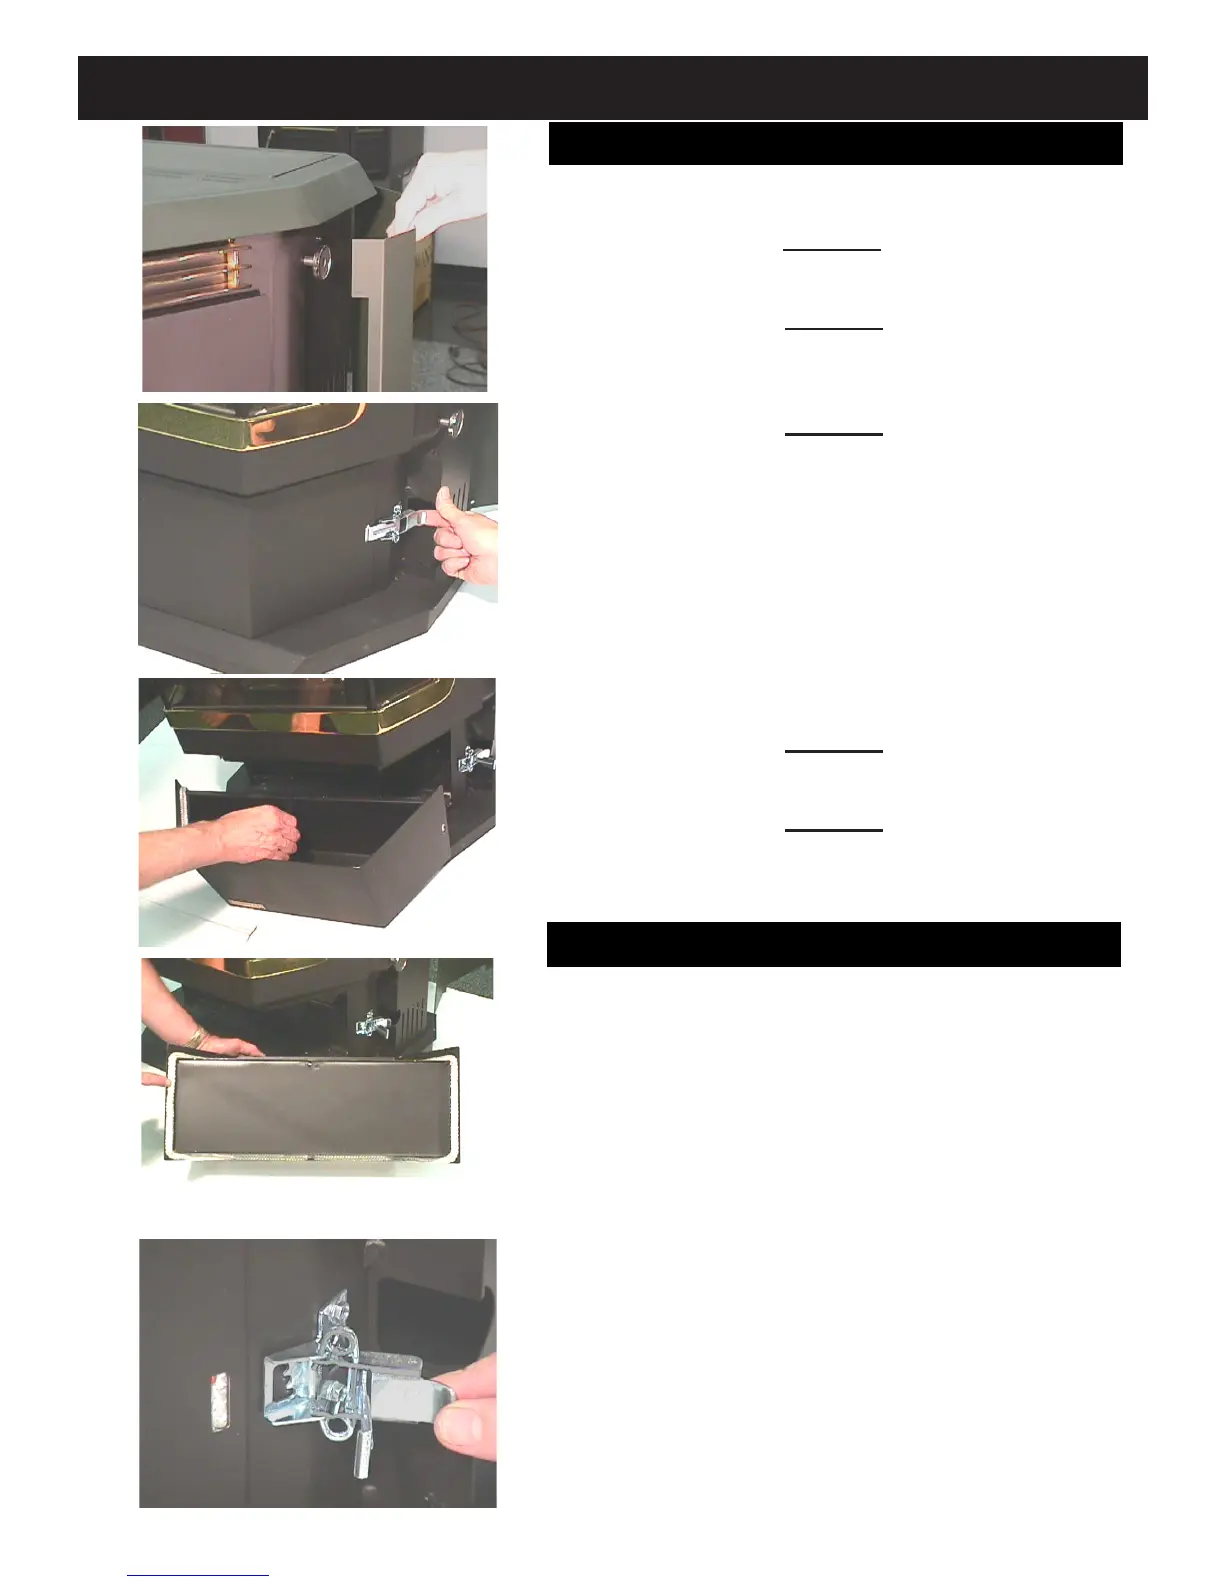
Ash Pan Removal and Reattachment
CAUTION: Surfaces are hot while in operation, Wear
gloves to protect from burns.
Figure 29
Open side doors.
Figure 30
Release spring latches on the right and left side of the ash
pan.
Figure 31
Slide ash pan forward enough to lift with center handle.
Empty ashes and reinstall ash pan.
Ashes should be placed in a metal container with
atightttinglid.Theclosedcontainerofashesshould
beplacedonanoncombustibleoororontheground,
wellawayfromallcombustiblematerials,pendingnal
disposal. If ashes are disposed of by burial in soil or
otherwise locally dispersed, they should be retained in
the closed container until all cinders have thoroughly
cooled.
Figure 32
Inspect the gasket rope for damage. Replace if necessary.
Figure 33
Insert spring latch front hooks into the ash pan side slots.
Push both latches to the rear at the same time to latch.
When removing the ash pan to empty ashes, you will
note a build up of ash nes behind the ash pan. This space
behind the ash pan was designed to allow the nes to fall
out of the vertical heat exchangers and collect where they
are easily cleaned out, rather than going into the ue pipe
where it would be difcult to clean. These nes should not
be allowed to build up. They may not allow the ash pan to
be seated into its gasket properly. NOTE: If an extreme
amount of force is required to snap the latch on one or
both sides of the ash pan, the area behind the ash pan
should be checked for ash build up.
Fig. 29
Fig. 30
Fig. 31
Fig. 32
Fig. 33
Maintenance - Emptying Ashes
Soot and Fly Ash
The products of combustion will contain small particles
of y ash. The y ash will collect in the exhaust venting
system and restrict the ow of the ue gases. Incomplete
combustion, such as occurs during startup, shutdown, or
incorrect operation of the room heater, will lead to some
soot formation which will collect in the exhaust venting sys-
tem. The ENTIRE venting system should be professionally
cleaned at least once each year.
 Loading...