EasyManuals Logo
Home>HIKVISION>Security Camera>DS-2CE12KF0T-FS

HIKVISION DS-2CE12KF0T-FS User Manual

HIKVISION DS-2CE12KF0T-FS
15 pages
To Next Page IconTo Next Page
To Previous Page IconTo Previous Page
Page #10 background imageLoading...
Page #10 background image
PM4 × 10
Junction Box Cover
Installation Plate
Figure 2-10 Fix the Camera to the Junction Box
For Type IV and Type V camera:
Junction Box Cover
Installation Plate/Base
PM3 × 13
M4 × 10
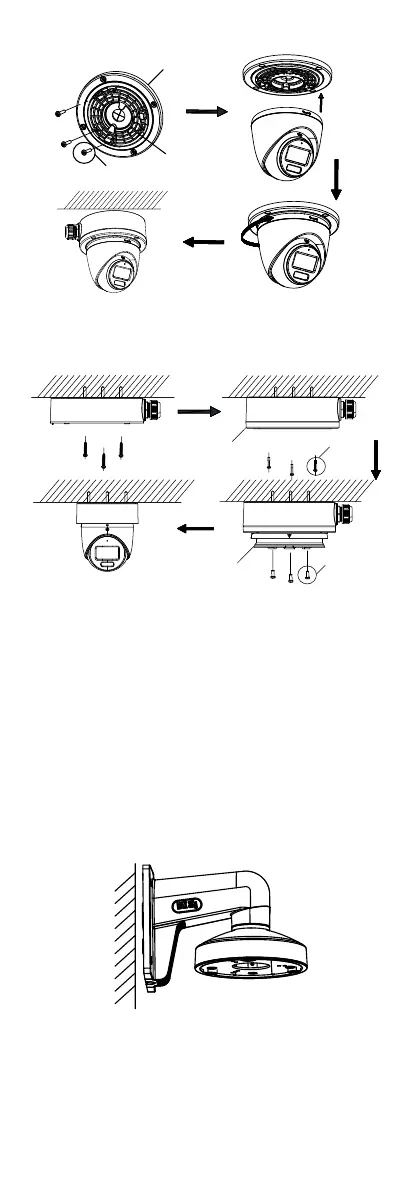
Figure 2-11 Fix the Camera to the Junction Box
7. Route the cables through the bottom cable hole or
the side cable hole of the junction box.
8. Refer to Step 5 of Section 2.2.1 to adjust the angle
and finish the installation.
2.2.3 Wall Mounting
Before you start:
You need to purchase a wall mount in advance.
Steps:
1. Drill Φ 10 mm screw holes in the wall where you
want to install the wall mount.
2. Use four M6 expansion bolts to fix the wall mount
onto the wall.
Figure 2-12 Fix the Wall Mount
3. Fix the base/installation plate to the wall mount.
For Type III and Type V camera:
i. Use three PM4 screws to fix the installation plate
onto the wall mount.

Questions and Answers:

Question and Answer IconNeed help?

Do you have a question about the HIKVISION DS-2CE12KF0T-FS and is the answer not in the manual?

HIKVISION DS-2CE12KF0T-FS Specifications

General IconGeneral
BrandHIKVISION
ModelDS-2CE12KF0T-FS
CategorySecurity Camera
LanguageEnglish

Related product manuals