Hangzhou Hikvision Digital Technology CO.,Ltd. No.555 Qianmo Road, Binjiang District, Hangzhou 310052, China
DS-KB8113-IME1
Vandal-Resistant Doorbell
UD18946B
1
2
1
1 2
3
4 5
2
3
5
4
3.1 3.2
-+
DC 12V
IN
1 2
A1 A2 B1 B3
OUT
ALARMPOWER
LAN
AI G COM NO NC
44
82
Unit:mm
Expansion Screws
Wall Mounng Plate
Alarm Interface
Power Interface
Network Interface
Network Cable
Terminal Blocks
Protecve Shield
Doorbell
Main Body
Hooks
Set Screw
Rubber Plug
ENGLISH
Diagram References
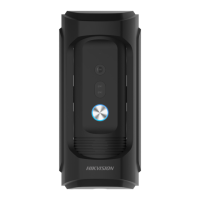
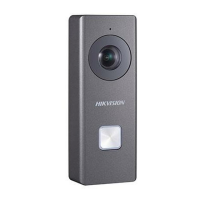
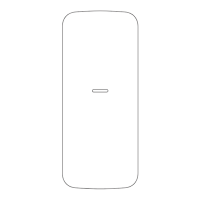
Appearance
Installaon
Before you begin:
Wall Mounng
1
3
Terminal
2
Microphone Built-in Camera Low Illuminaon Supplement Light
1
12 VDC: 12 VDC Power Supply Input
1
LAN: Network Interface (PoE Supported)
2
AI: Alarm Input
A1
COM: Common Interface
B1
NO: Door Lock Relay Output (Connect Electric Strike)
B2
NC: Door Lock Relay Output (Connect Electric Bolt or Magnec Lock)
B3
GND: Grounding
A2
2 3
4
Make sure the device in the package is in good condion and all the assembly parts are
included.
The device supports two ways of power supply: 12 VDC, or PoE power supply. Please
make sure your power supply matches your doorbell.
Make sure all the related equipment is power-off during the installaon.
Make sure the wall is strong enough to withstand 4 mes the weight of the doorbell.
Check the product specificaon for the installaon environment.
To install the doorbell onto the wall, you are required to use a matched mounng plate.
1. Fix the wall mounng plate to the wall with 4 expansion screws.
2. Insert terminal blocks into interfaces of the doorbell body, and connect the network
cable.
3. Fix the doorbell body to the protecve shield ghtly.
4. Hook the doorbell to the wall mounng plate ghtly.
5. Use the set screw to secure the doorbell with the mounng plate.
Mounng Accessories
Call Buon
5 Loudspeaker
Note: The appearance of the device vary according to different model. Refers to the actual device.
Note: Wiring descripon refers to the User Manual.
Refer to Video Intercom Vandal-Resistant Doorbell User Manual (scan the QR code) for details.
Before you begin:
Make sure your mobile device has been connected to Wi-Fi.
Set Up Mobile Client
Configuraon
4
1. Install Hik-Connect client and register a user account for iOS and Android.
1) Search Hik-Connect in App Store or Hikvision website to download and install the
client.
2) Launch the App and follow the on-screen instrucons to register a user account.
2. Start the client, and login the client.
1
1. On the home page of the client, tap Add Device.
- Scan QR Code of the doorbell to add.
Note: The QR Code is printed on the label, which is on the rear panel of doorbell. If you
have already installed the device, you can scan the QR code in the user manual.
- Tap Image icon to select QR code picture to add.
- Tap Edit icon to enter Serial No. of the doorbell to add.
2. Tap Next. Connect the device to a router with a network cable, and tap Connected.
Note: Make sure your mobile device is connected to the same router.
3. The account is connected to the device.
To operate the doorbell normally, you should add the doorbell to the client.
Set Up Doorbell via Client
2
Set Up Doorbell via Indoor Staon
3
Remote Operaon
Live View via Mobile Client
4
a
Two-Way Audio
b
Unlock Remotely via Mobile Client
c
Tap the doorbell in the list to open the floang windows. And then tap the floang
window to enter the Live View page.
Tap the video on the screen, you can tap to capture the screen.
Tap to record.
On the main page or on the live view page, tap to unlock the door.
Call from client soware: On the Live View page, tap to create a call between the
client and the device.
Receive call from the device:
You can receive or decline the call from device.
- Tap to receive the call.
- Tap to decline the call.
- Tap to unlock the door remotely.
- Tap to adjust the volume.
- When you communcaon with the device, you can tap to mute.
Call indoor staon: Press call buon to create a call between the indoor staon and the
doorbell.
1. Choose Language and tap Next.
2. Set network parameters and tap Next.
- Edit Local IP, Subnet Mask and Gateway parameters.
- Enable DHCP, the device will get network parameters automacally.
3. Configure the indoor staon and tap Next.
a. Select Indoor Staon Type.
b. Edit Floor and Room No.
4. Linked related devices and tap Next. If the device and the indoor staon are in the
same LAN, the device will be displayed in the list. Tap the device or enter the serial No.
to link.
a. Tap the doorbell in the list to link.
b. Tap the sengs icon to pop up the Network Sengs page.
c. Edit the network parameters of the doorbell manually or enable DHCP to get the
network parameters automacally.
d. Oponal: Enable Synchronize Language to synchronize the Language of doorbell
with indoor staon.
e. Tap OK to save the sengs.
5. Tap Finish to save the sengs.