7
Before you begin the third-party
manufacturer instructions, be sure to
do the following things:
1. Place the TV face down on a flat,
clean, safe and cushioned surface.
2. Remove the TV stand if you already
attached it.
3. Place the spacers (not included) in
the corresponding bracket holes.
CAUTION:
• Whenyouattachthemount,besuretousethespacers(providedbythethird-
party manufacturer) between the TV and the bracket.
• TopreventinternaldamagetotheTVandensureitismountedsecurely,be
suretousefixingscrews (notprovided)thatare 9.5-11.5mm(43"/65")/8.0-
10.0 mm (50"/55"/58") in length when measured from the attaching surface of
the mounting hook.
Wall mount hole pattern(mm)
200 × 200 (43")
200 × 300 (50"/55"/58")
300 × 200 (65")
Wall mount screw size (mm) M6
Follow instructions provided with the Wall mount bracket.
If you have additional questions, please contact the wall-mount manufacturer or the
retailer from which you purchased the TV.
The selected screws are 9.5 -11.5 mm (43"/65")/8.0 - 10.0 mm (50"/55"/58") in length
when measured from the attaching surface of the rear cover.
NOTE: The diameter and length of the screws differ depending on the wall mount
bracket model.
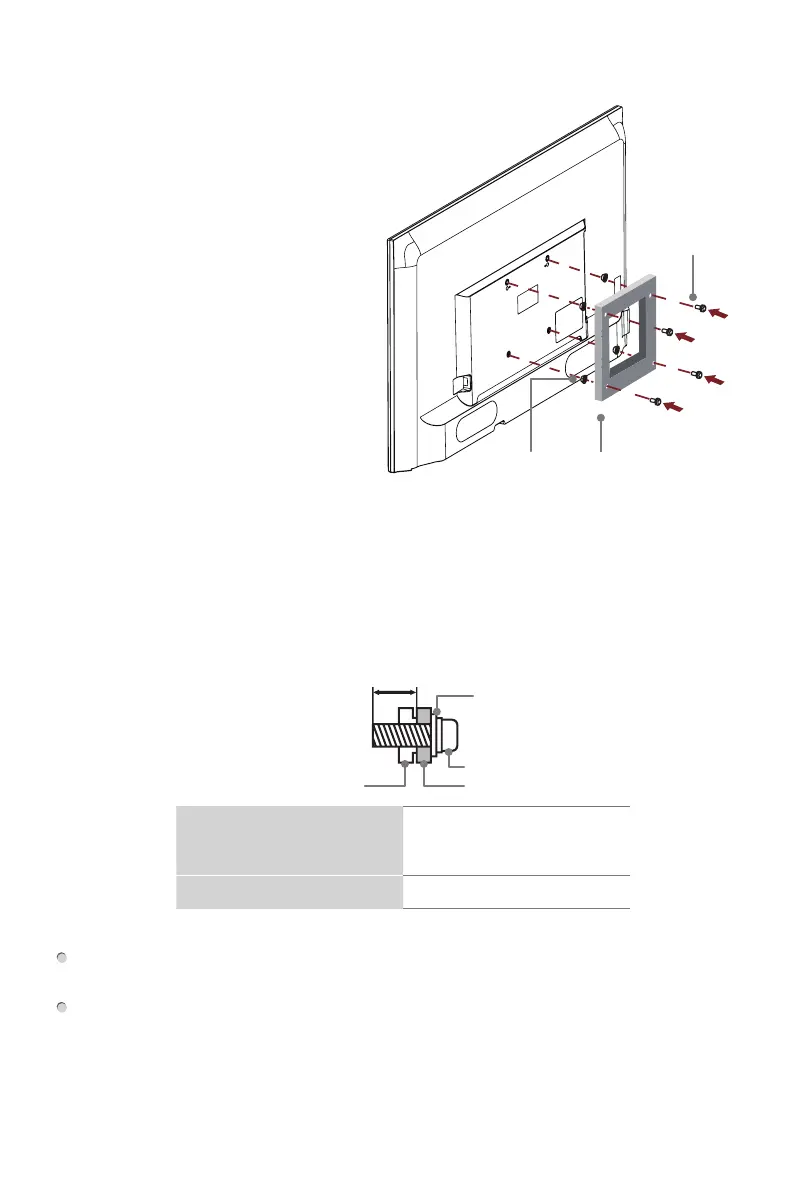
Attach the Wall Mount Bracket (not included)
9.5 - 11.5 mm (43"/65")
8.0 - 10.0 mm (50"55"/58")
Wall mount bracket
Screw
Spacer
Rear cover of the TV
Screw
(not included)
Bracket
(not included)
Spacer
(not included)
 Loading...