Available at www.HoneywellStore.com
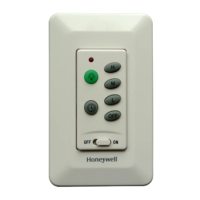
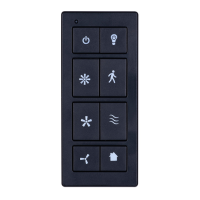
CEILING FAN AND LIGHT REMOTE
WITH WALL CONTROL
Model 40015 / Item # 0374122
User Guide
IMPORTANT SAFETY INSTRUCTIONS S S
1. Readandkeepthisinstructionsheetforfuturereference.
2. Pleasenotethatallfixedwiringappliancesshouldbeinstalledbyaqualified
electrician.
3. Thesupplytothereceivershouldbeconnectedonitsowncircuit.
4. Switchoffthepoweratthecircuitbreakerbeforeworkingon
receiverorceilingfan.
5. Thisunitistobeusedforthecontrolofaceilingfananditselectricalsourcemust
beAC110/120V,60Hz.
6. Donotinstallindamplocationorimmerseintowater.Forindooruseonly.
7. Donotusethisremotewithfansthat
havepre‐installedremotecontrols.
CAUTION: To reduce the risk of fire or injury, do not use this product in
conjunction with any variable (rheostat) wall control.
RECEIVER INSTALLATION INSTRUCTIONS S-
NOTE:Thisremotecanworkwithavarietyofhuggerfantypes,however,thereis
typicallyverylittlespaceinthehangerbracketareatoinstallareceiver.Therefore,
wedonotrecommendusingthisremotewithhuggertypeor5speedceilingfans.
1. Afterswitchingpoweroff@
circuitbreaker,removeceilingfancanopyfromthe
mountingbracket.Disconnectexistingwiringbetweenceilingfanandsupplyat
electricaljunctionbox.
2. SlidethereceiverintothemountingbracketperFIG.1beingcarefulnot
topinchtheantennawire.
3. Thereceiverwillbeinsertedbetweenthedownrod
andthemountingbracket.
4. MakewiringconnectionsperFIG.2.
5. Pushallconnectedwiresbackintothejunctionboxandreinstallthecanopyonto
themountingbracket.
6. ManuallysetfanspeedcontroltoHIGHandsetlighttoONusingthepullchains.
NOTE:Fortheremotetofunctionproperly,thefanmustbeonHIGHspeedand
lightsmustbeONtouse.
CAUTION: Incorrect wire connection can damage this receiver and could
cause injury or fire.
WALL CONTROL INSTALLATION INSTRUCTIONS )
1. Maketheelectricalconnectionstothewallcontrol(transmitter)unitasshowninFig3.
2. Carefullypushallconnectedwiresinsidewalloutletbox.
3. Securewallcontrolunitwith2screws(notincluded)previouslyremovedfromthe
existingwalloutletbox.
4. Afterinstalledwell,slidethePowerOn/Offswit chonwallcontrolto“ON”position.
NOTE:Beforeinstallingwallcontrol,slidetheswitchto“OFF”position.
ACTIVATING THE LEARNING PROCESS (SMART SYNC) S
NOTE:Thisremoteispre‐programmedfromthefactoryandshouldworkrightoutof
theboxoncethebatteryisinstalled.Should,foranyreason,re‐programmingbe
neededpleasefollowthelearningprocessasfollows:
1. Afterinst allationiscompleteandpoweristurnedon,pressandhold
the“FANOFF”
buttonfor3seconds.Fanwillturnonathighspeedandlight(ifinstalled)blinks3
times.ThisconfirmsthattheSMARTSYNCsettingisactive.Younowhave30seconds
topresstheFANOFFkey.TaptheFANOFFbuttonagaintoturnoff
thefan.
2. Ifusercannotfinishthesettingwithinthe30secondstimeframethemainpower
mustbeturnedoffandre‐startedagain.Thiswillresettheunit.Repeatstep1until
theLEARNINGfeatureisactivatedasindicated.
NOTE:Usermustpress“FANOFF”keywithin30secondsafter
mainpoweristurnedon.
FANCANOPY
MOUNTING
BRACKET
FIG1
INSERTING RECEIVER
INTO CANOPY ASSEMBLY
WALL CONTROL LIVE (BLACK)
NEUTRAL (WHITE)
NTENN
LIGHT
(BLUE)
MOTOR
(BLACK)
MOTOR
(WHITE)
FIG2
CONNECTINGTHERECEIVER
TOTHEFAN